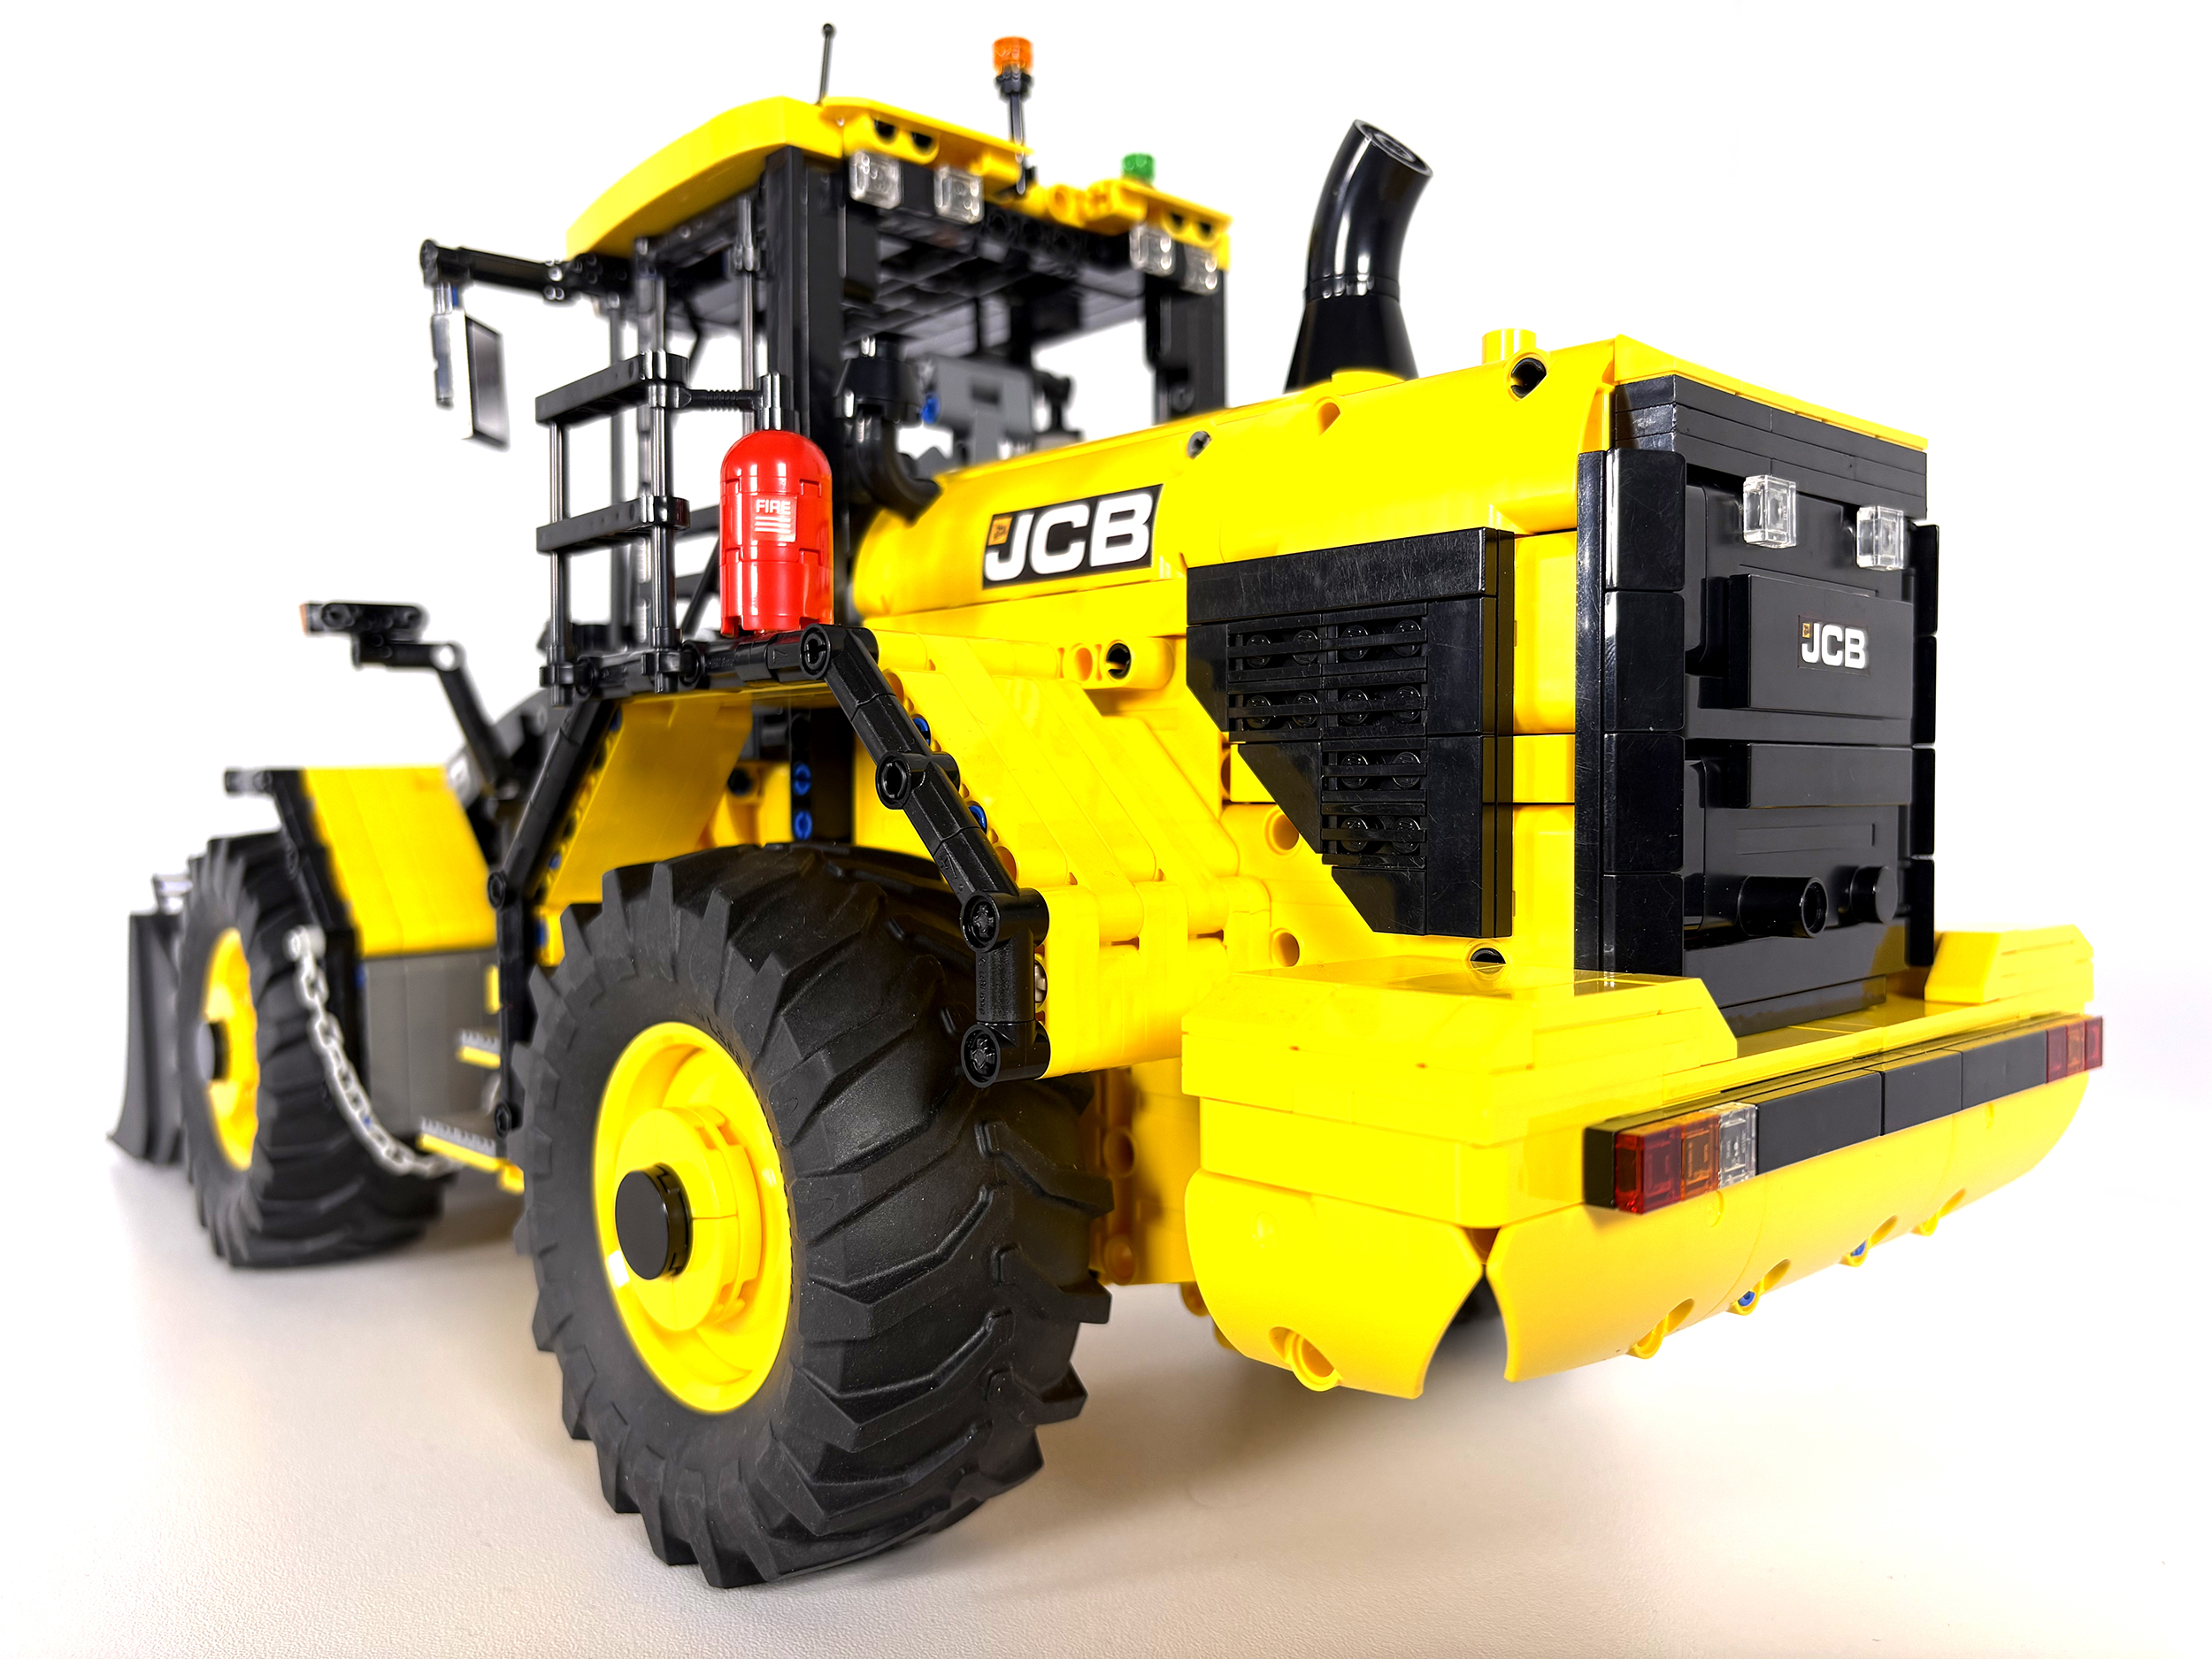
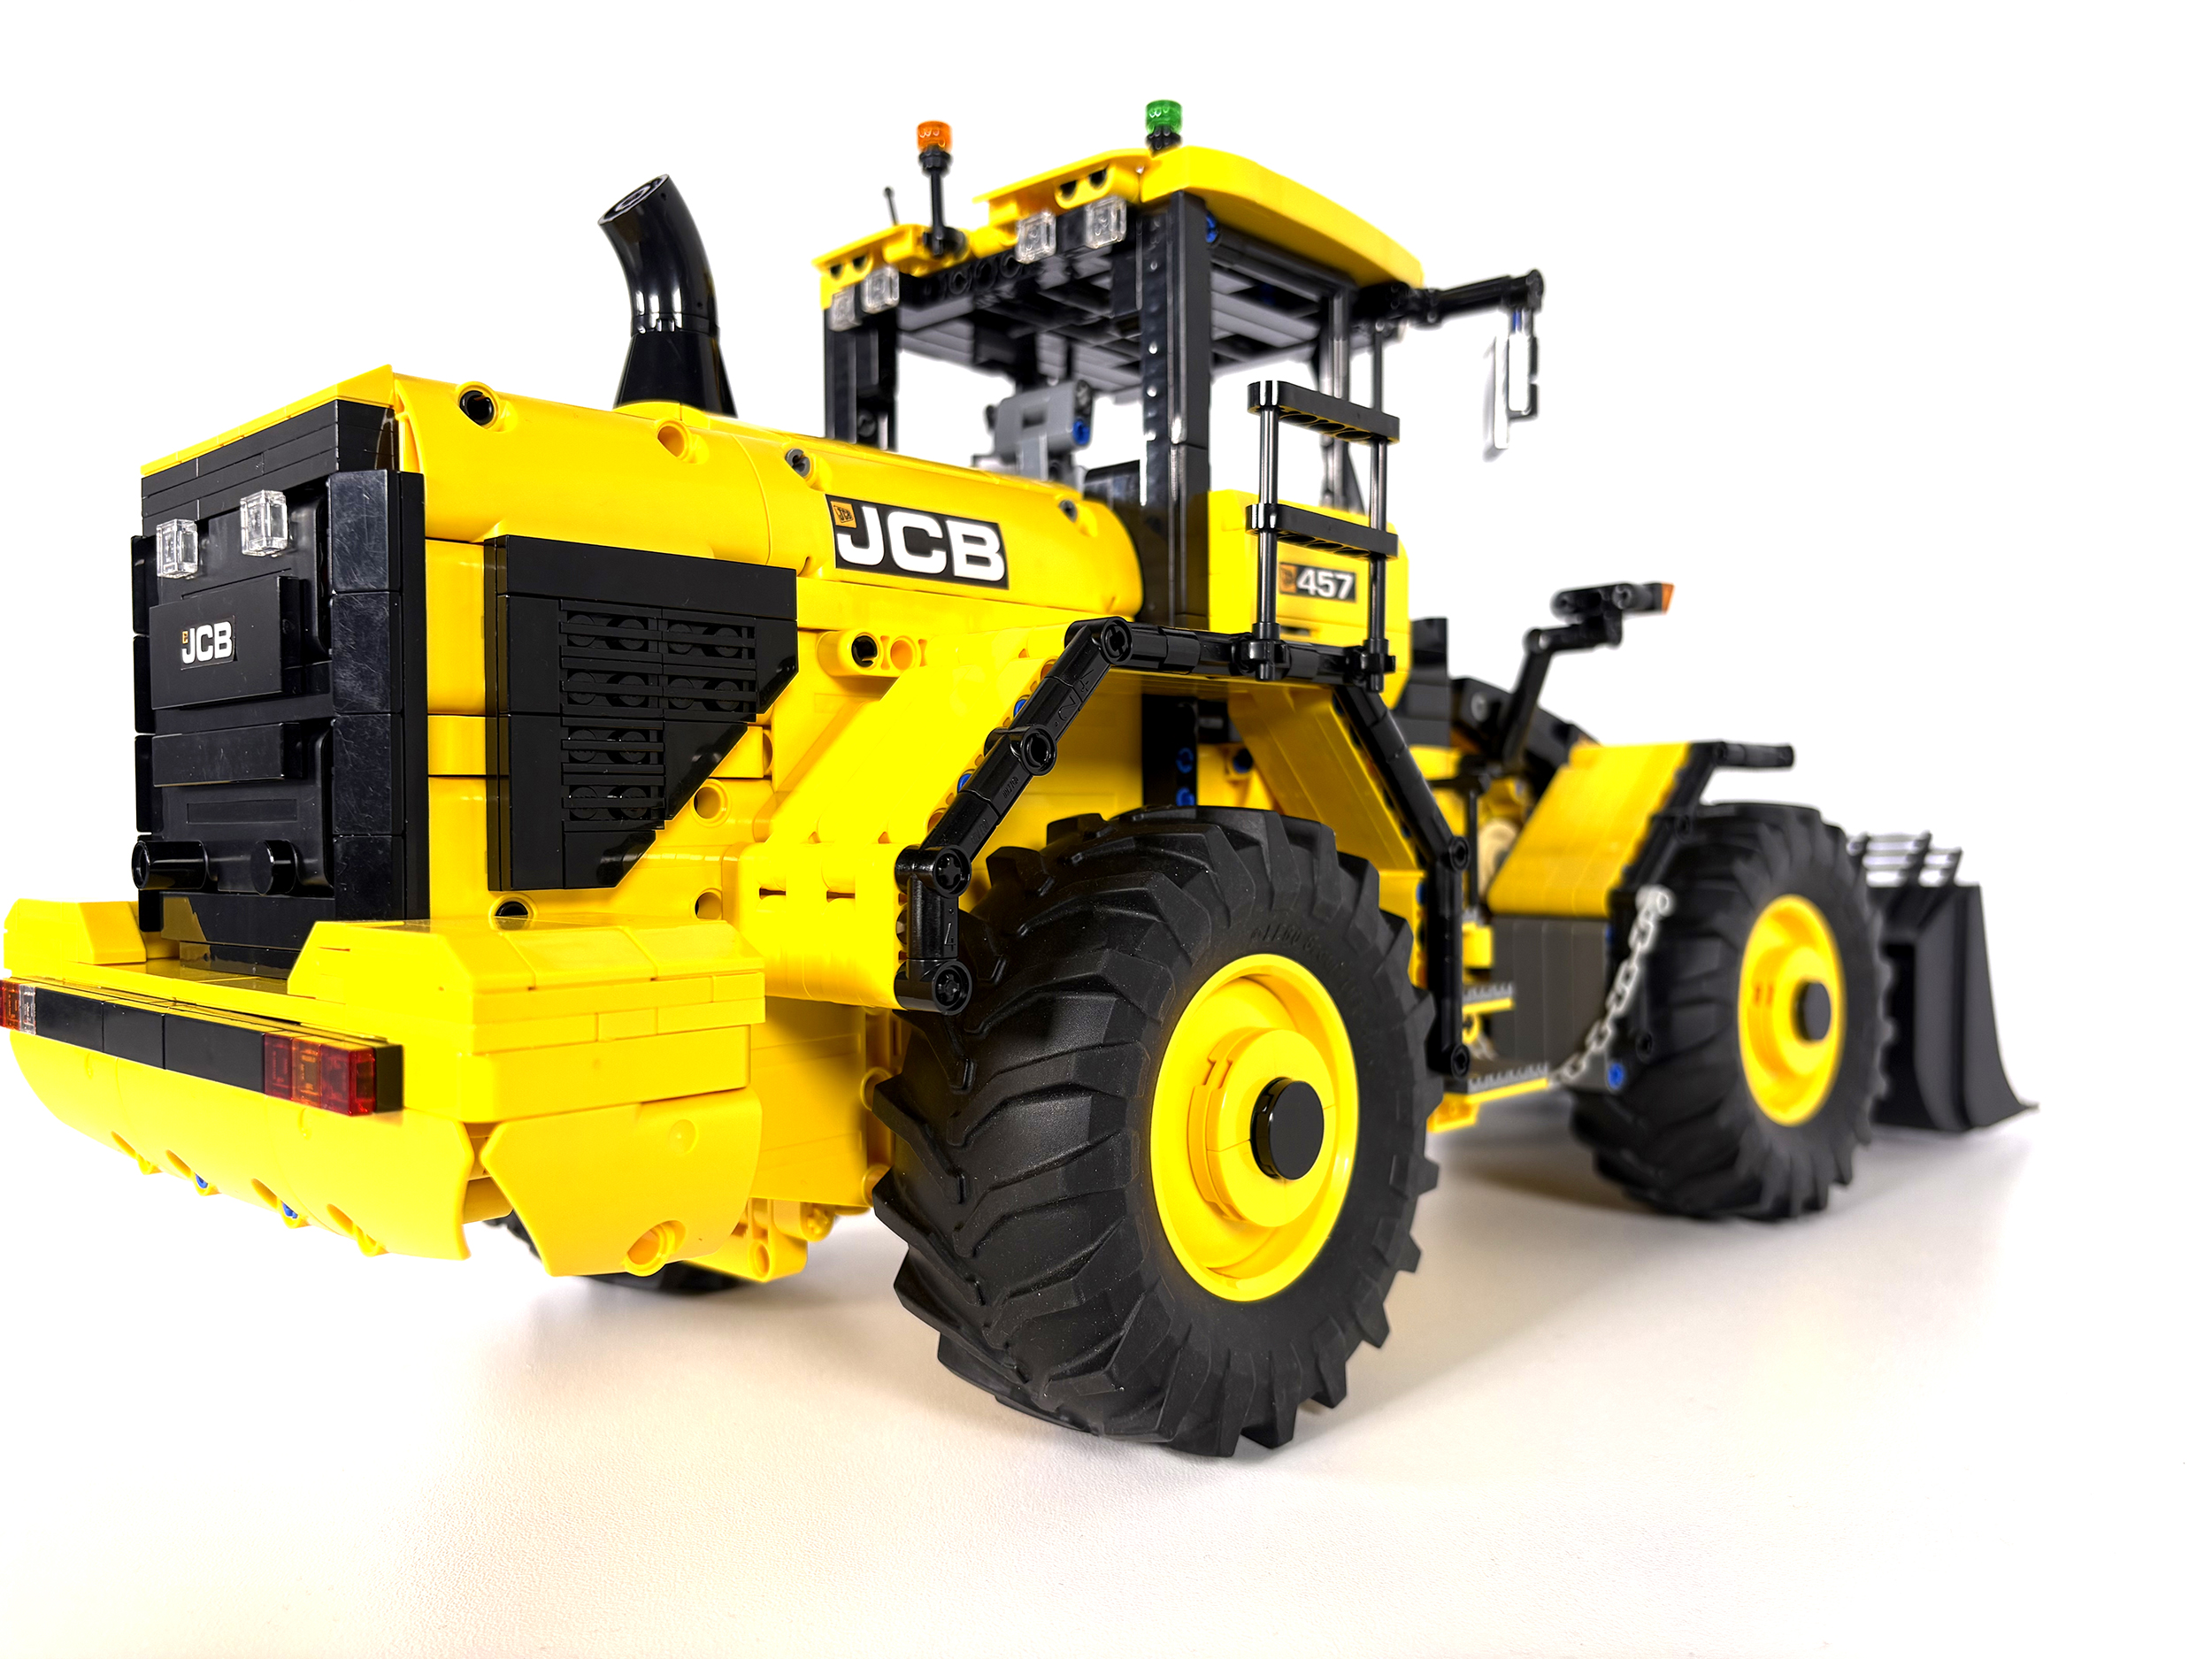
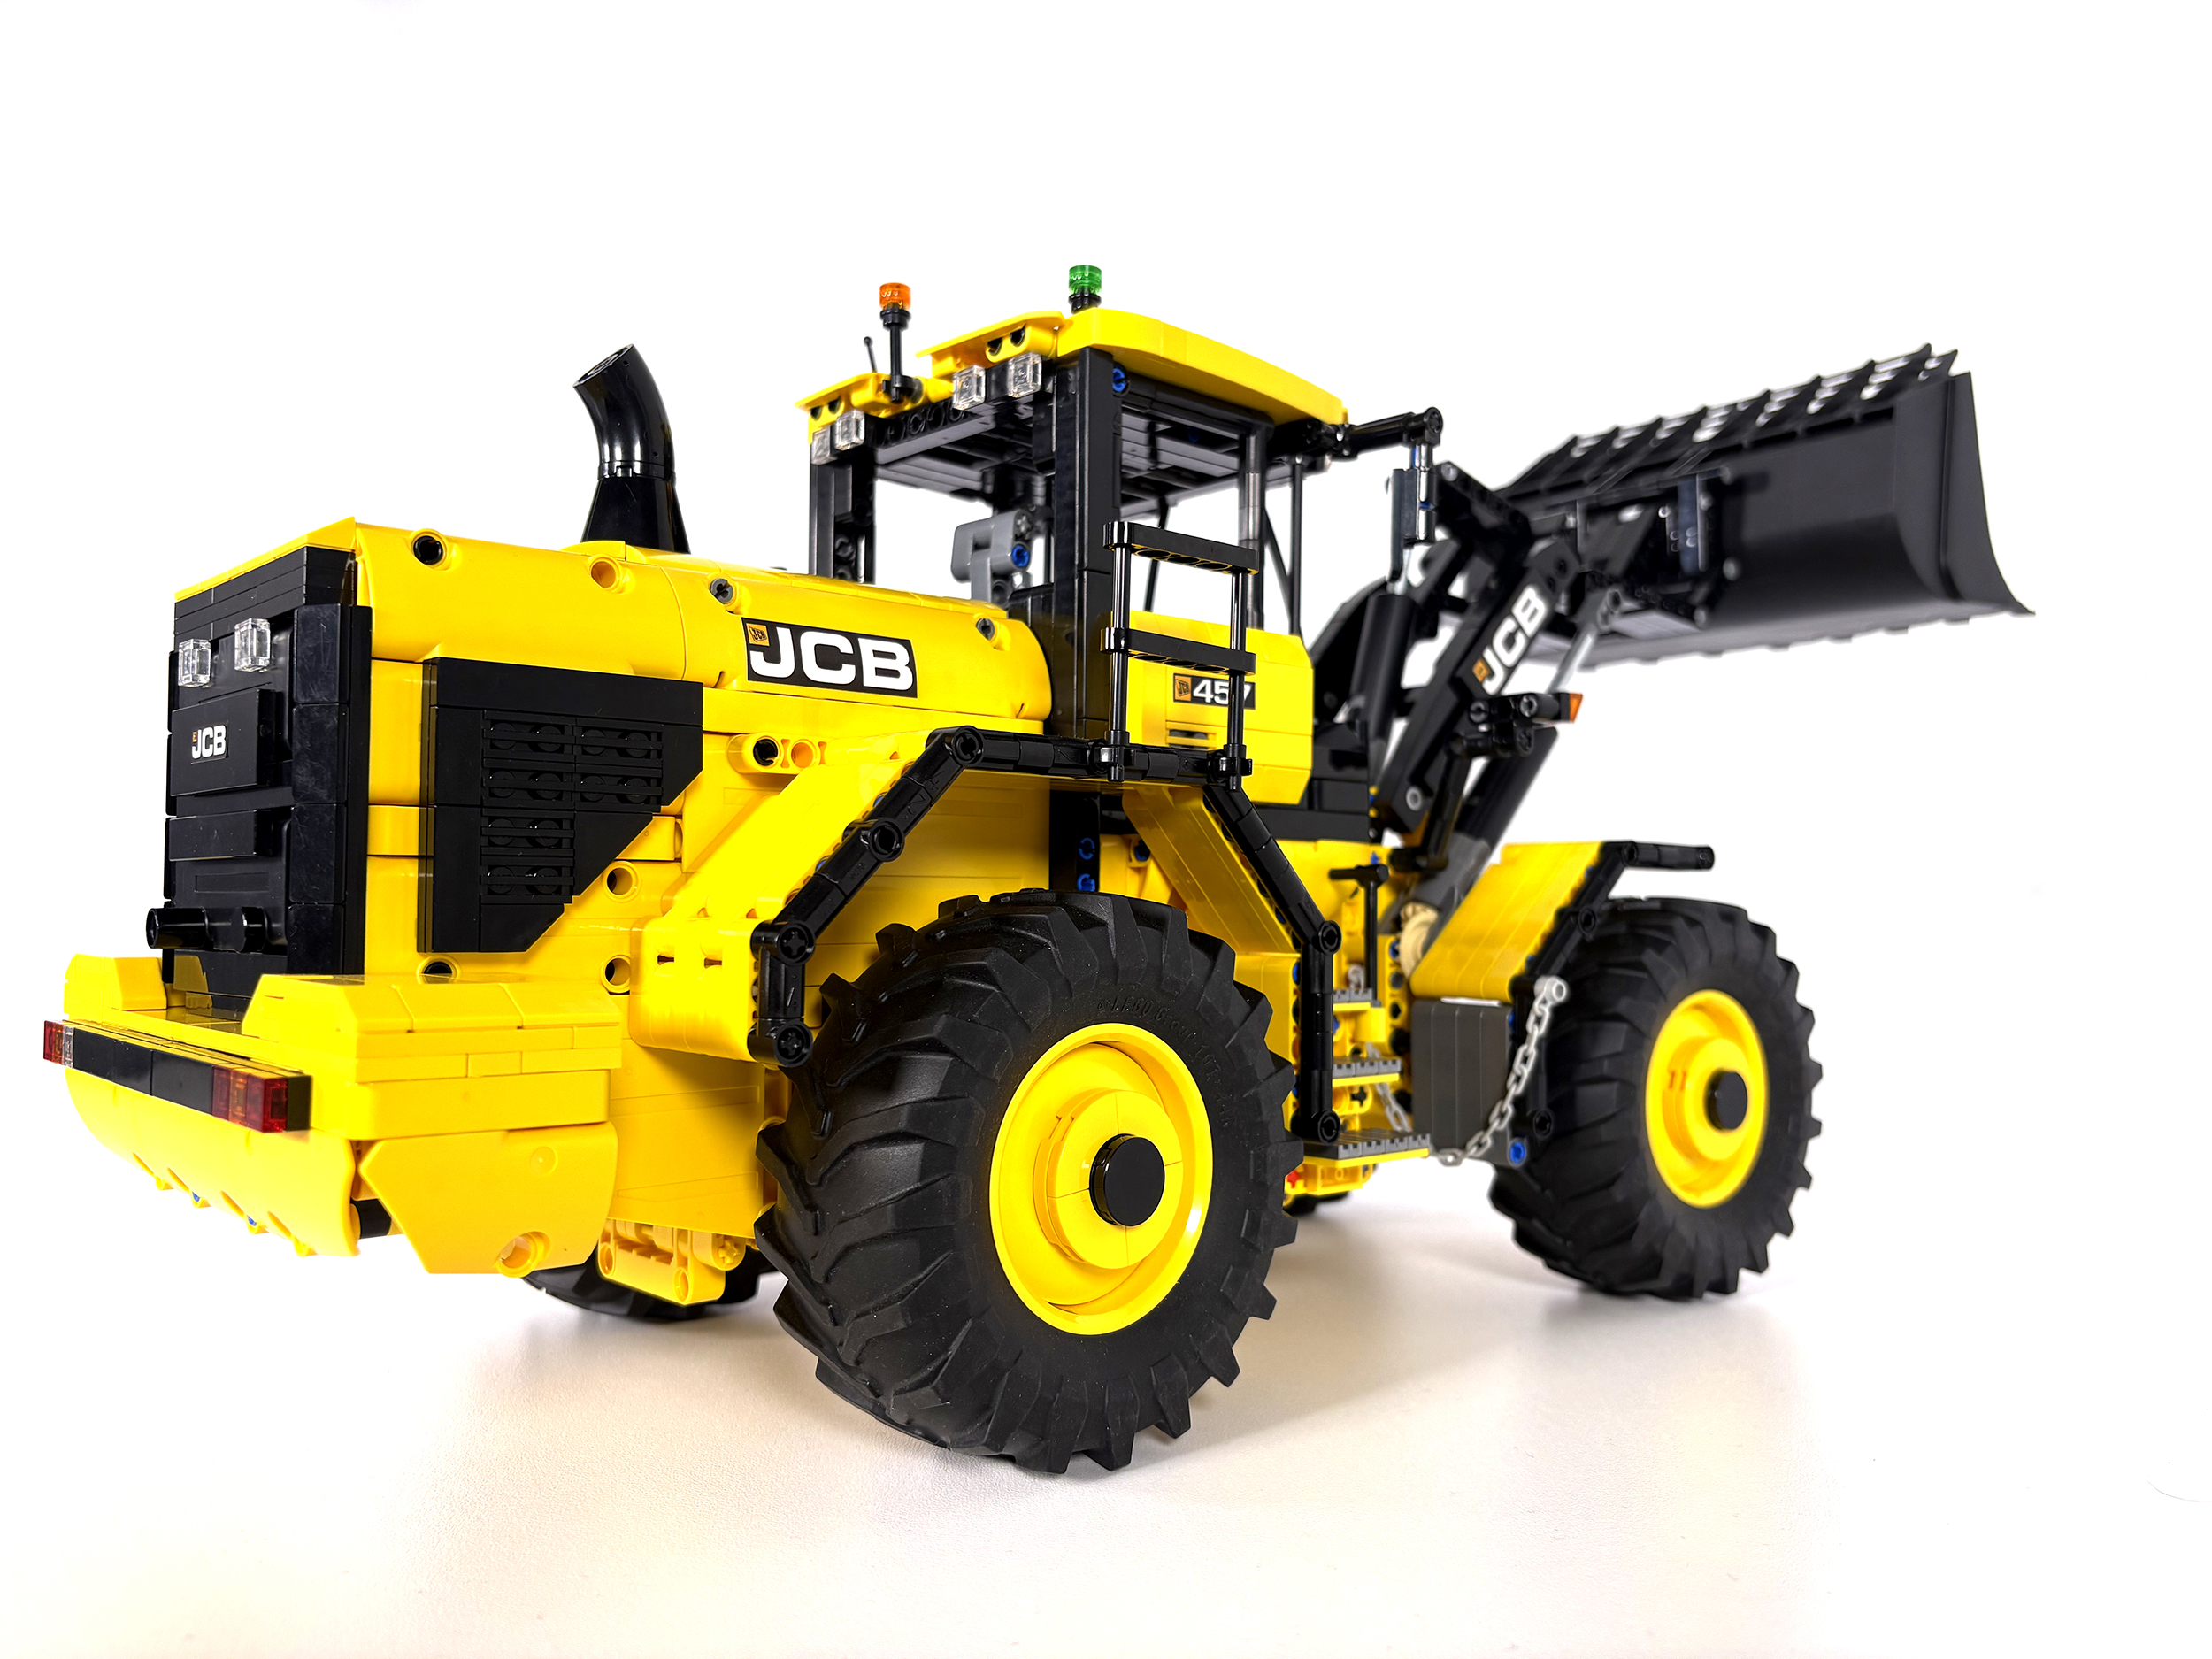
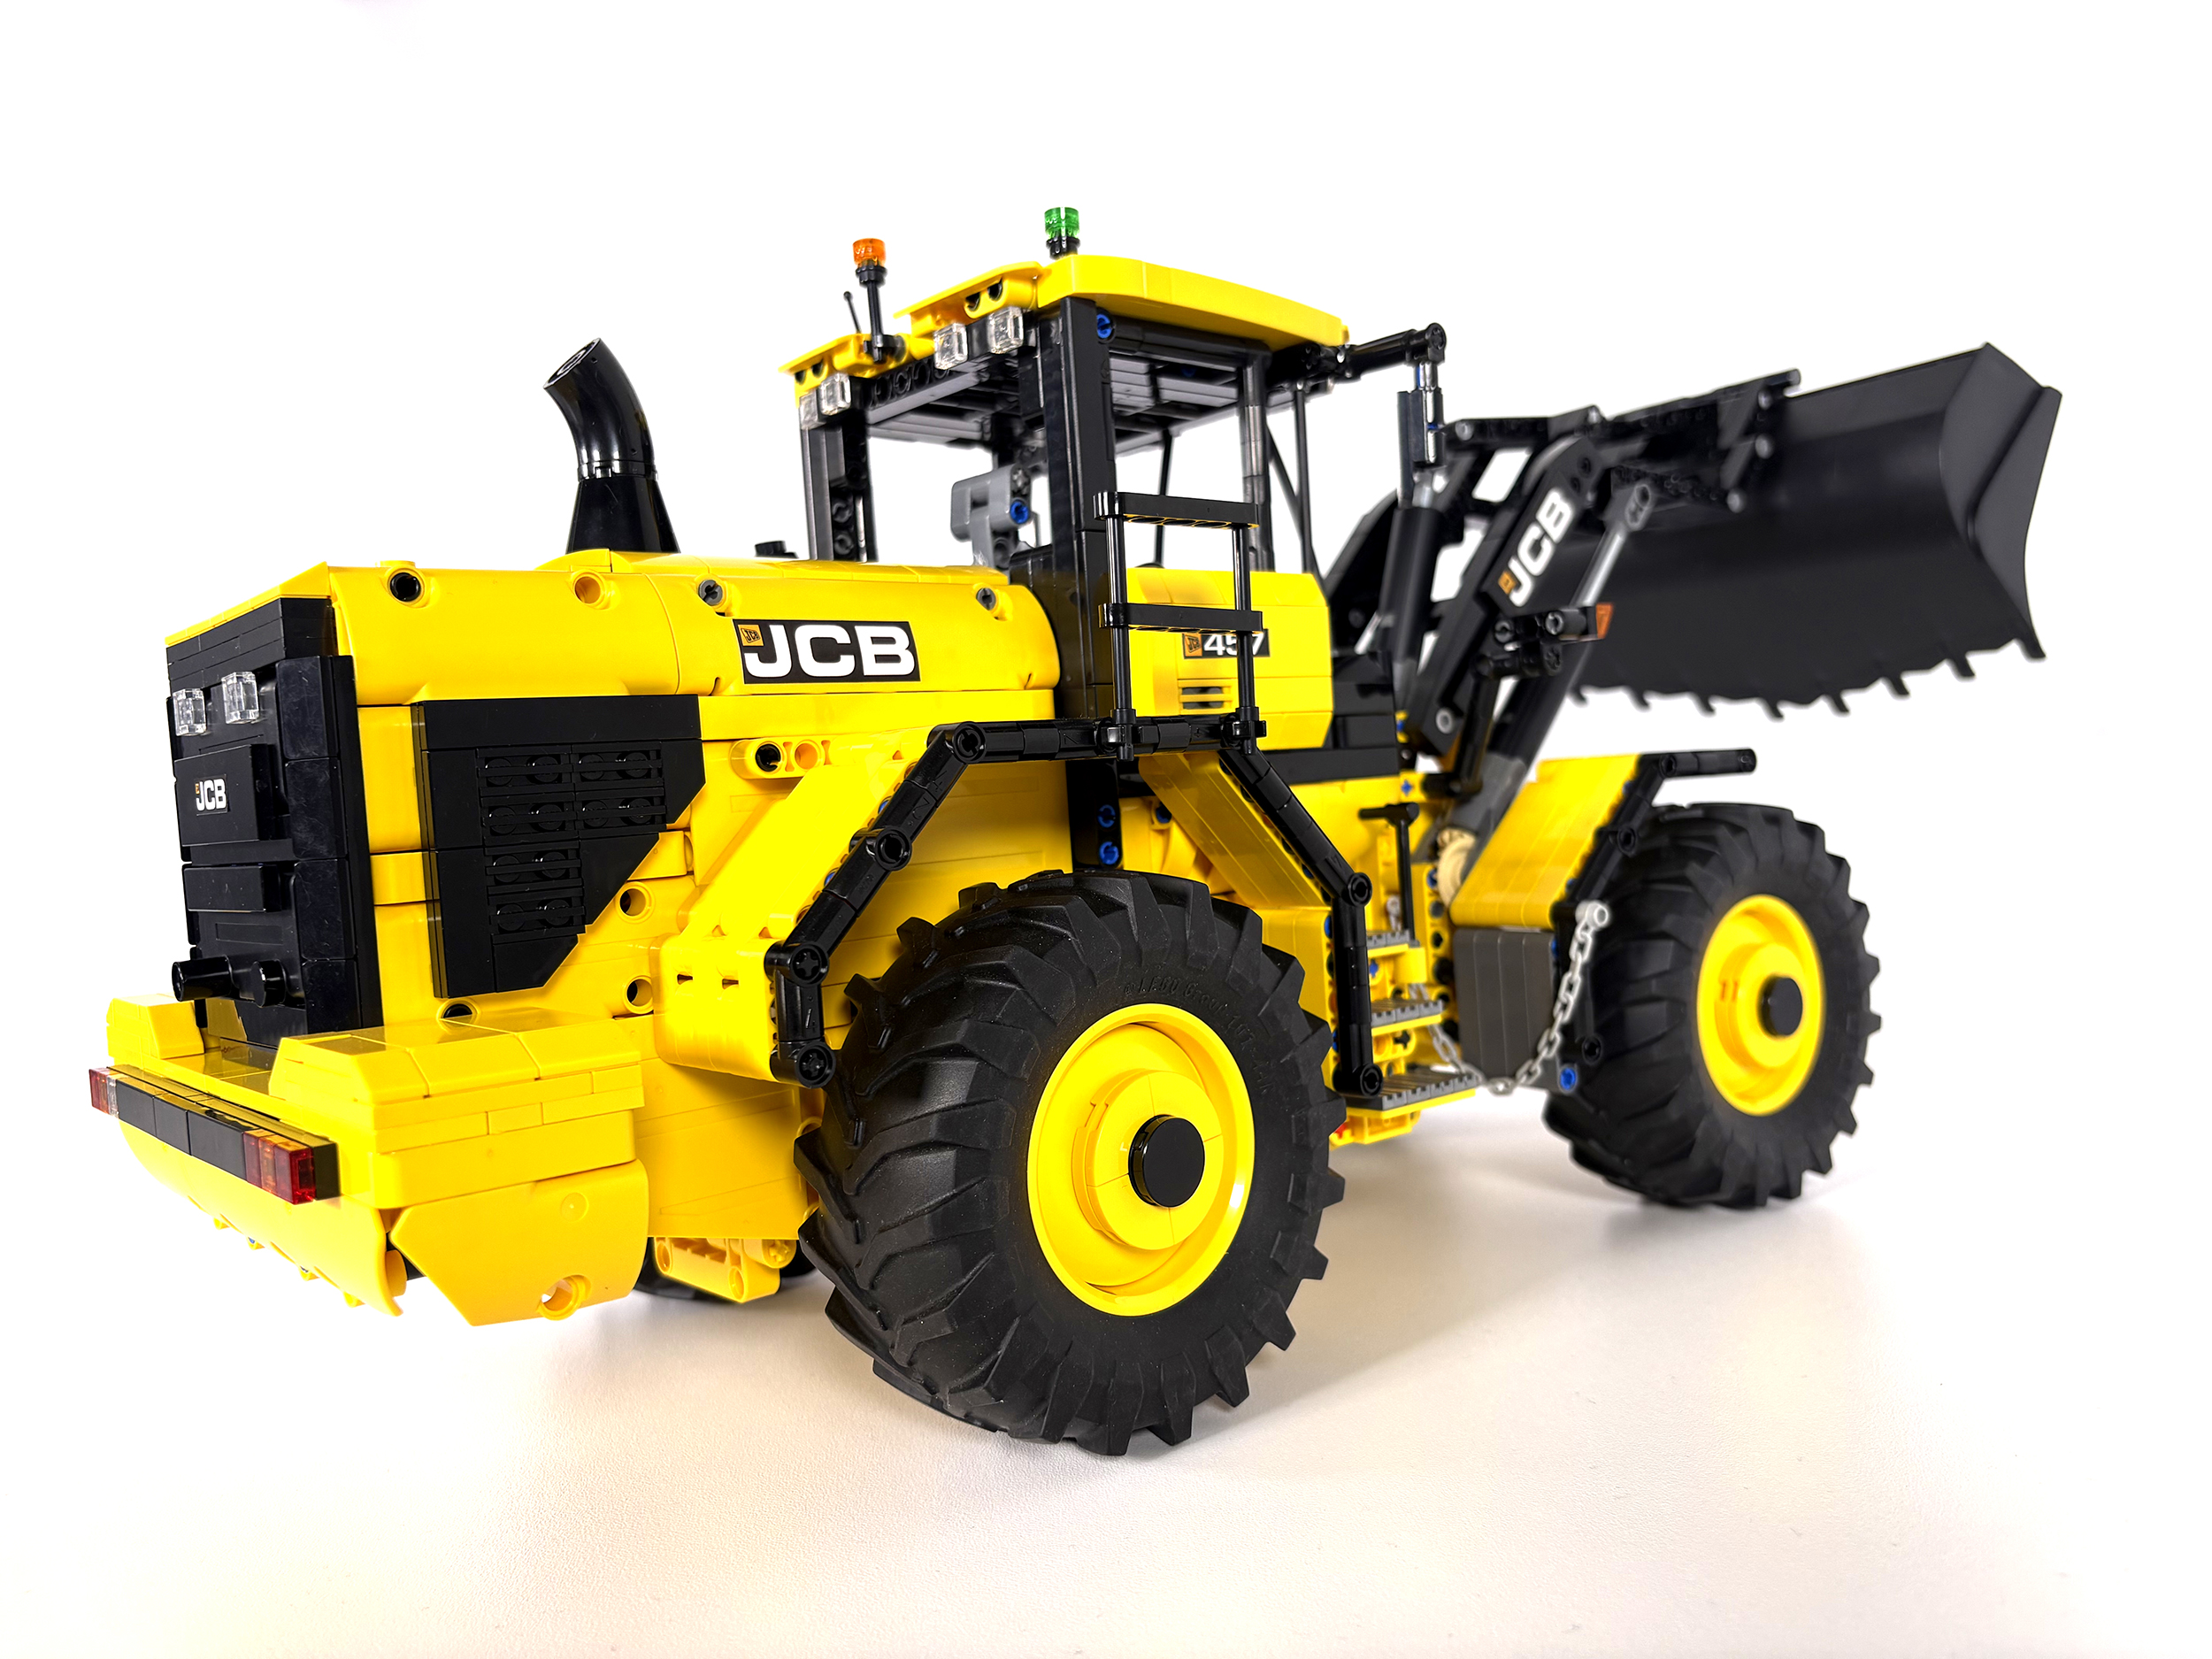
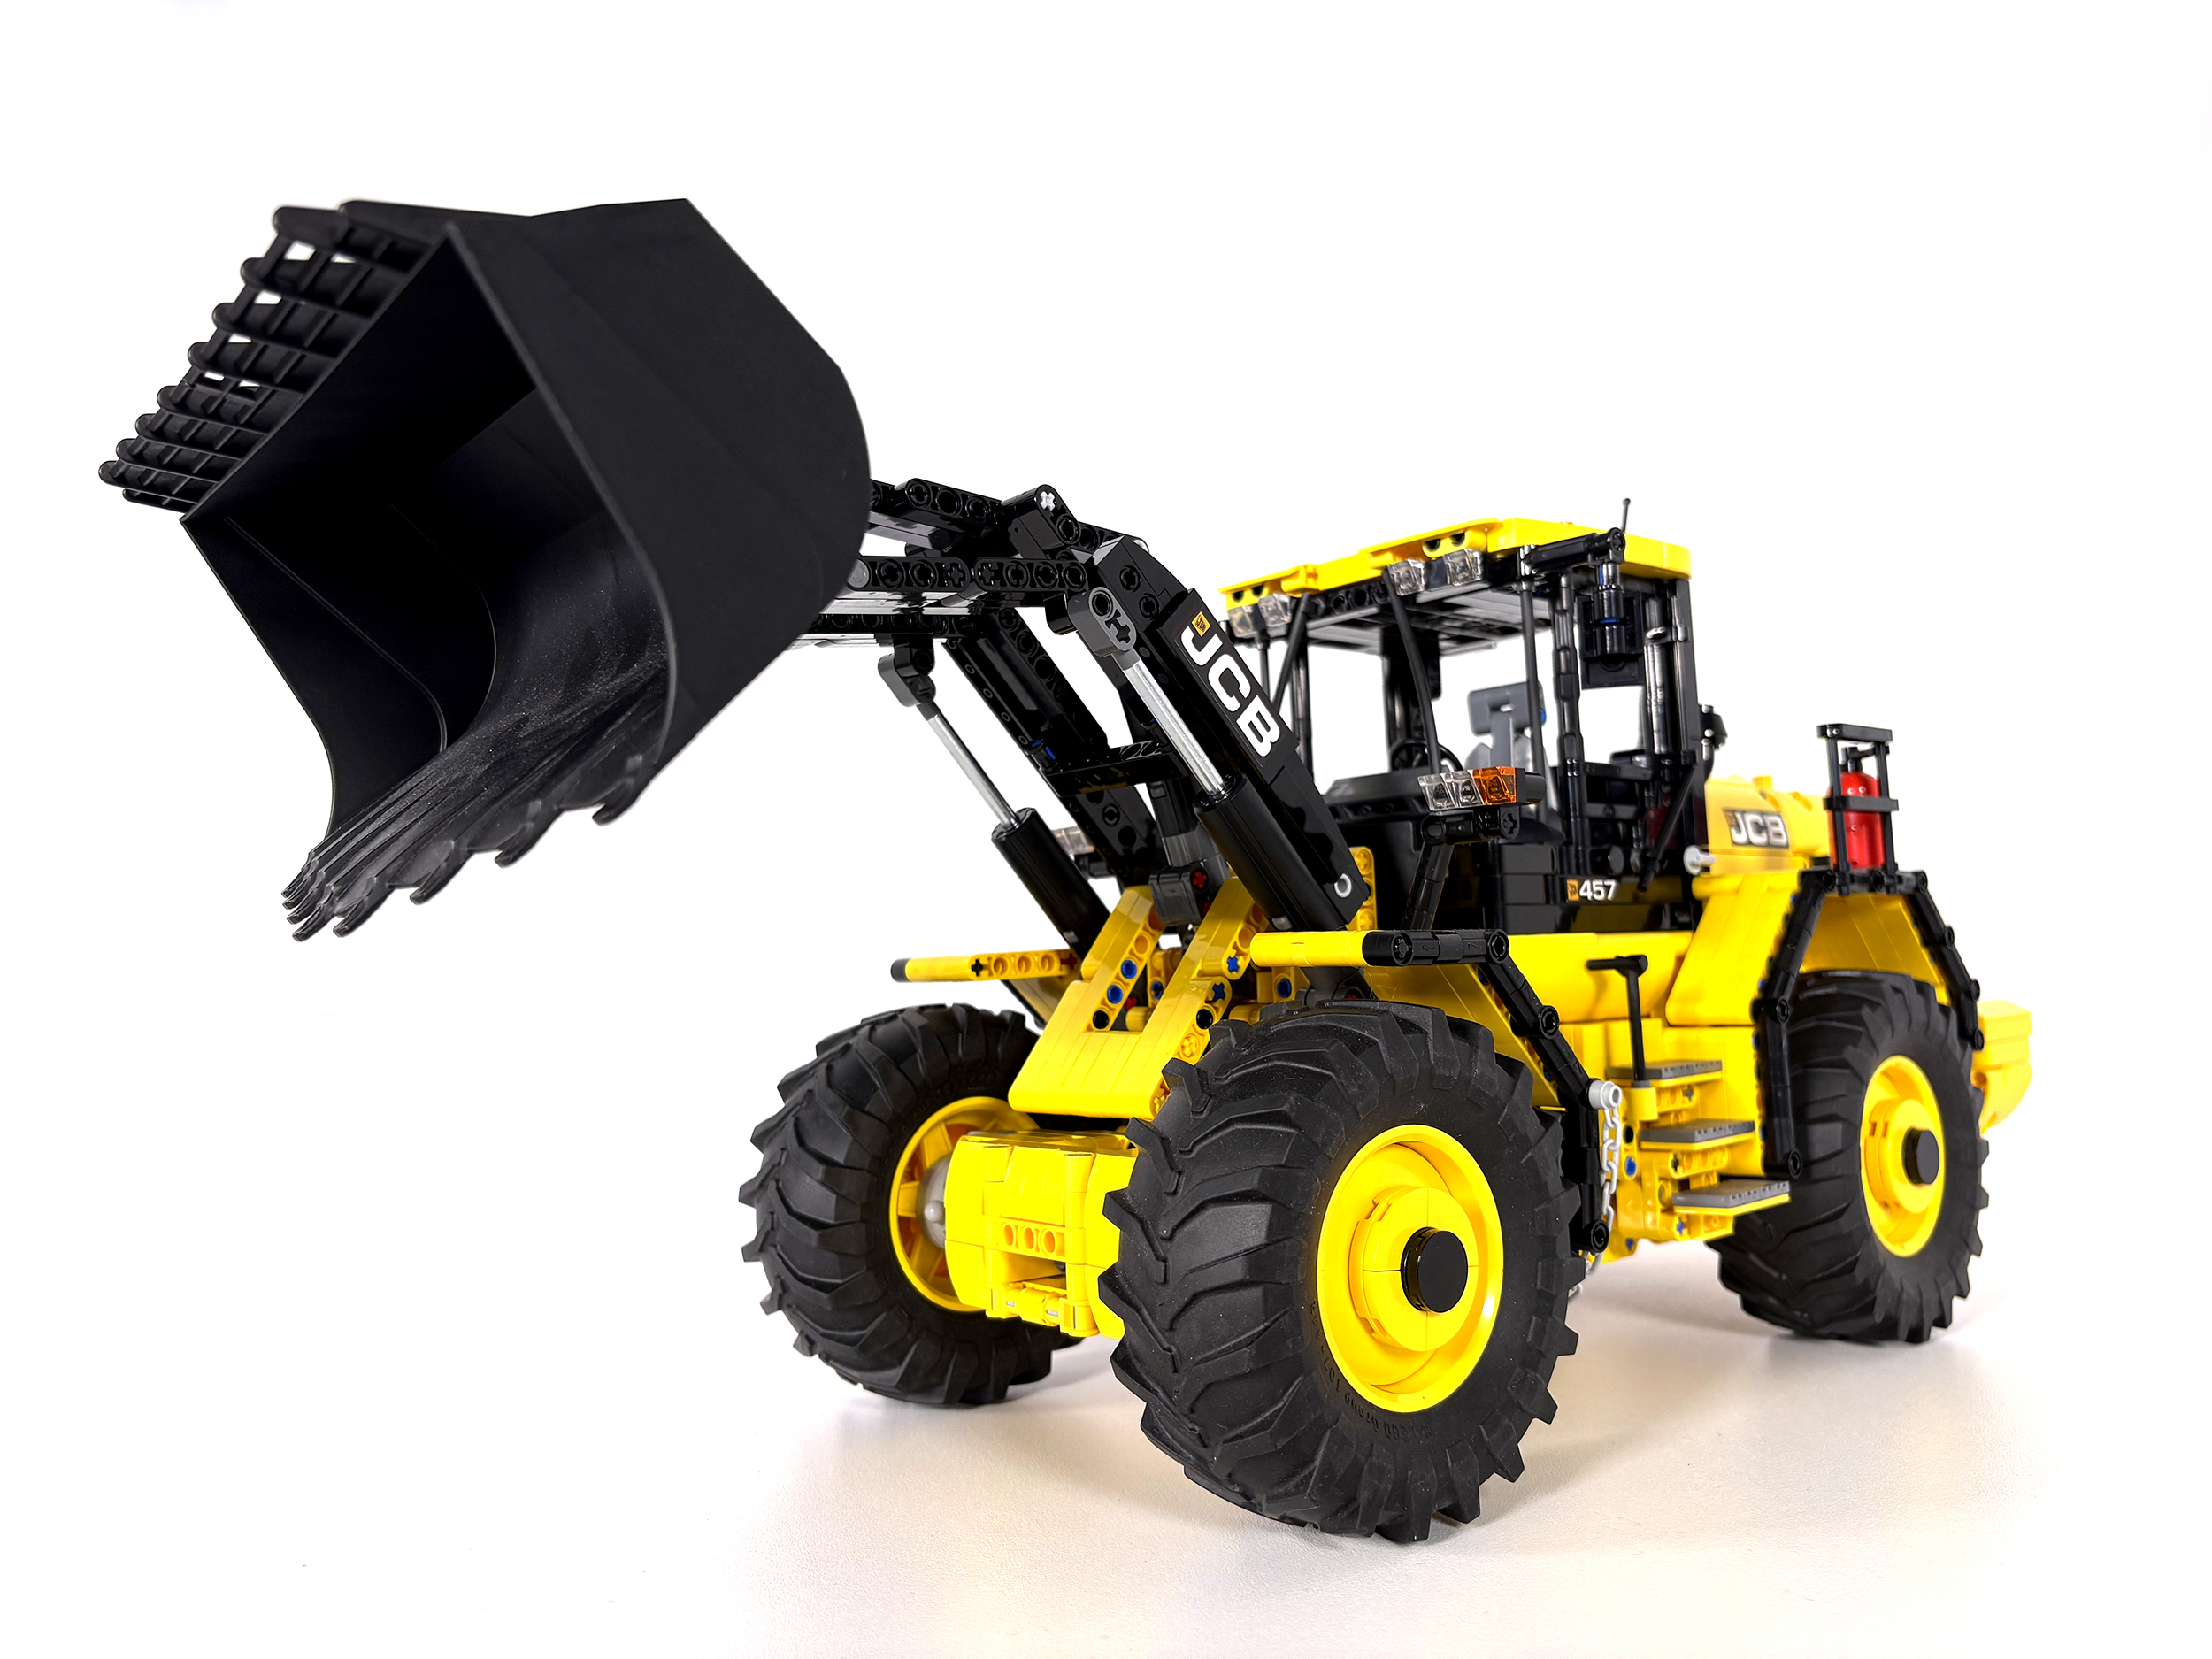
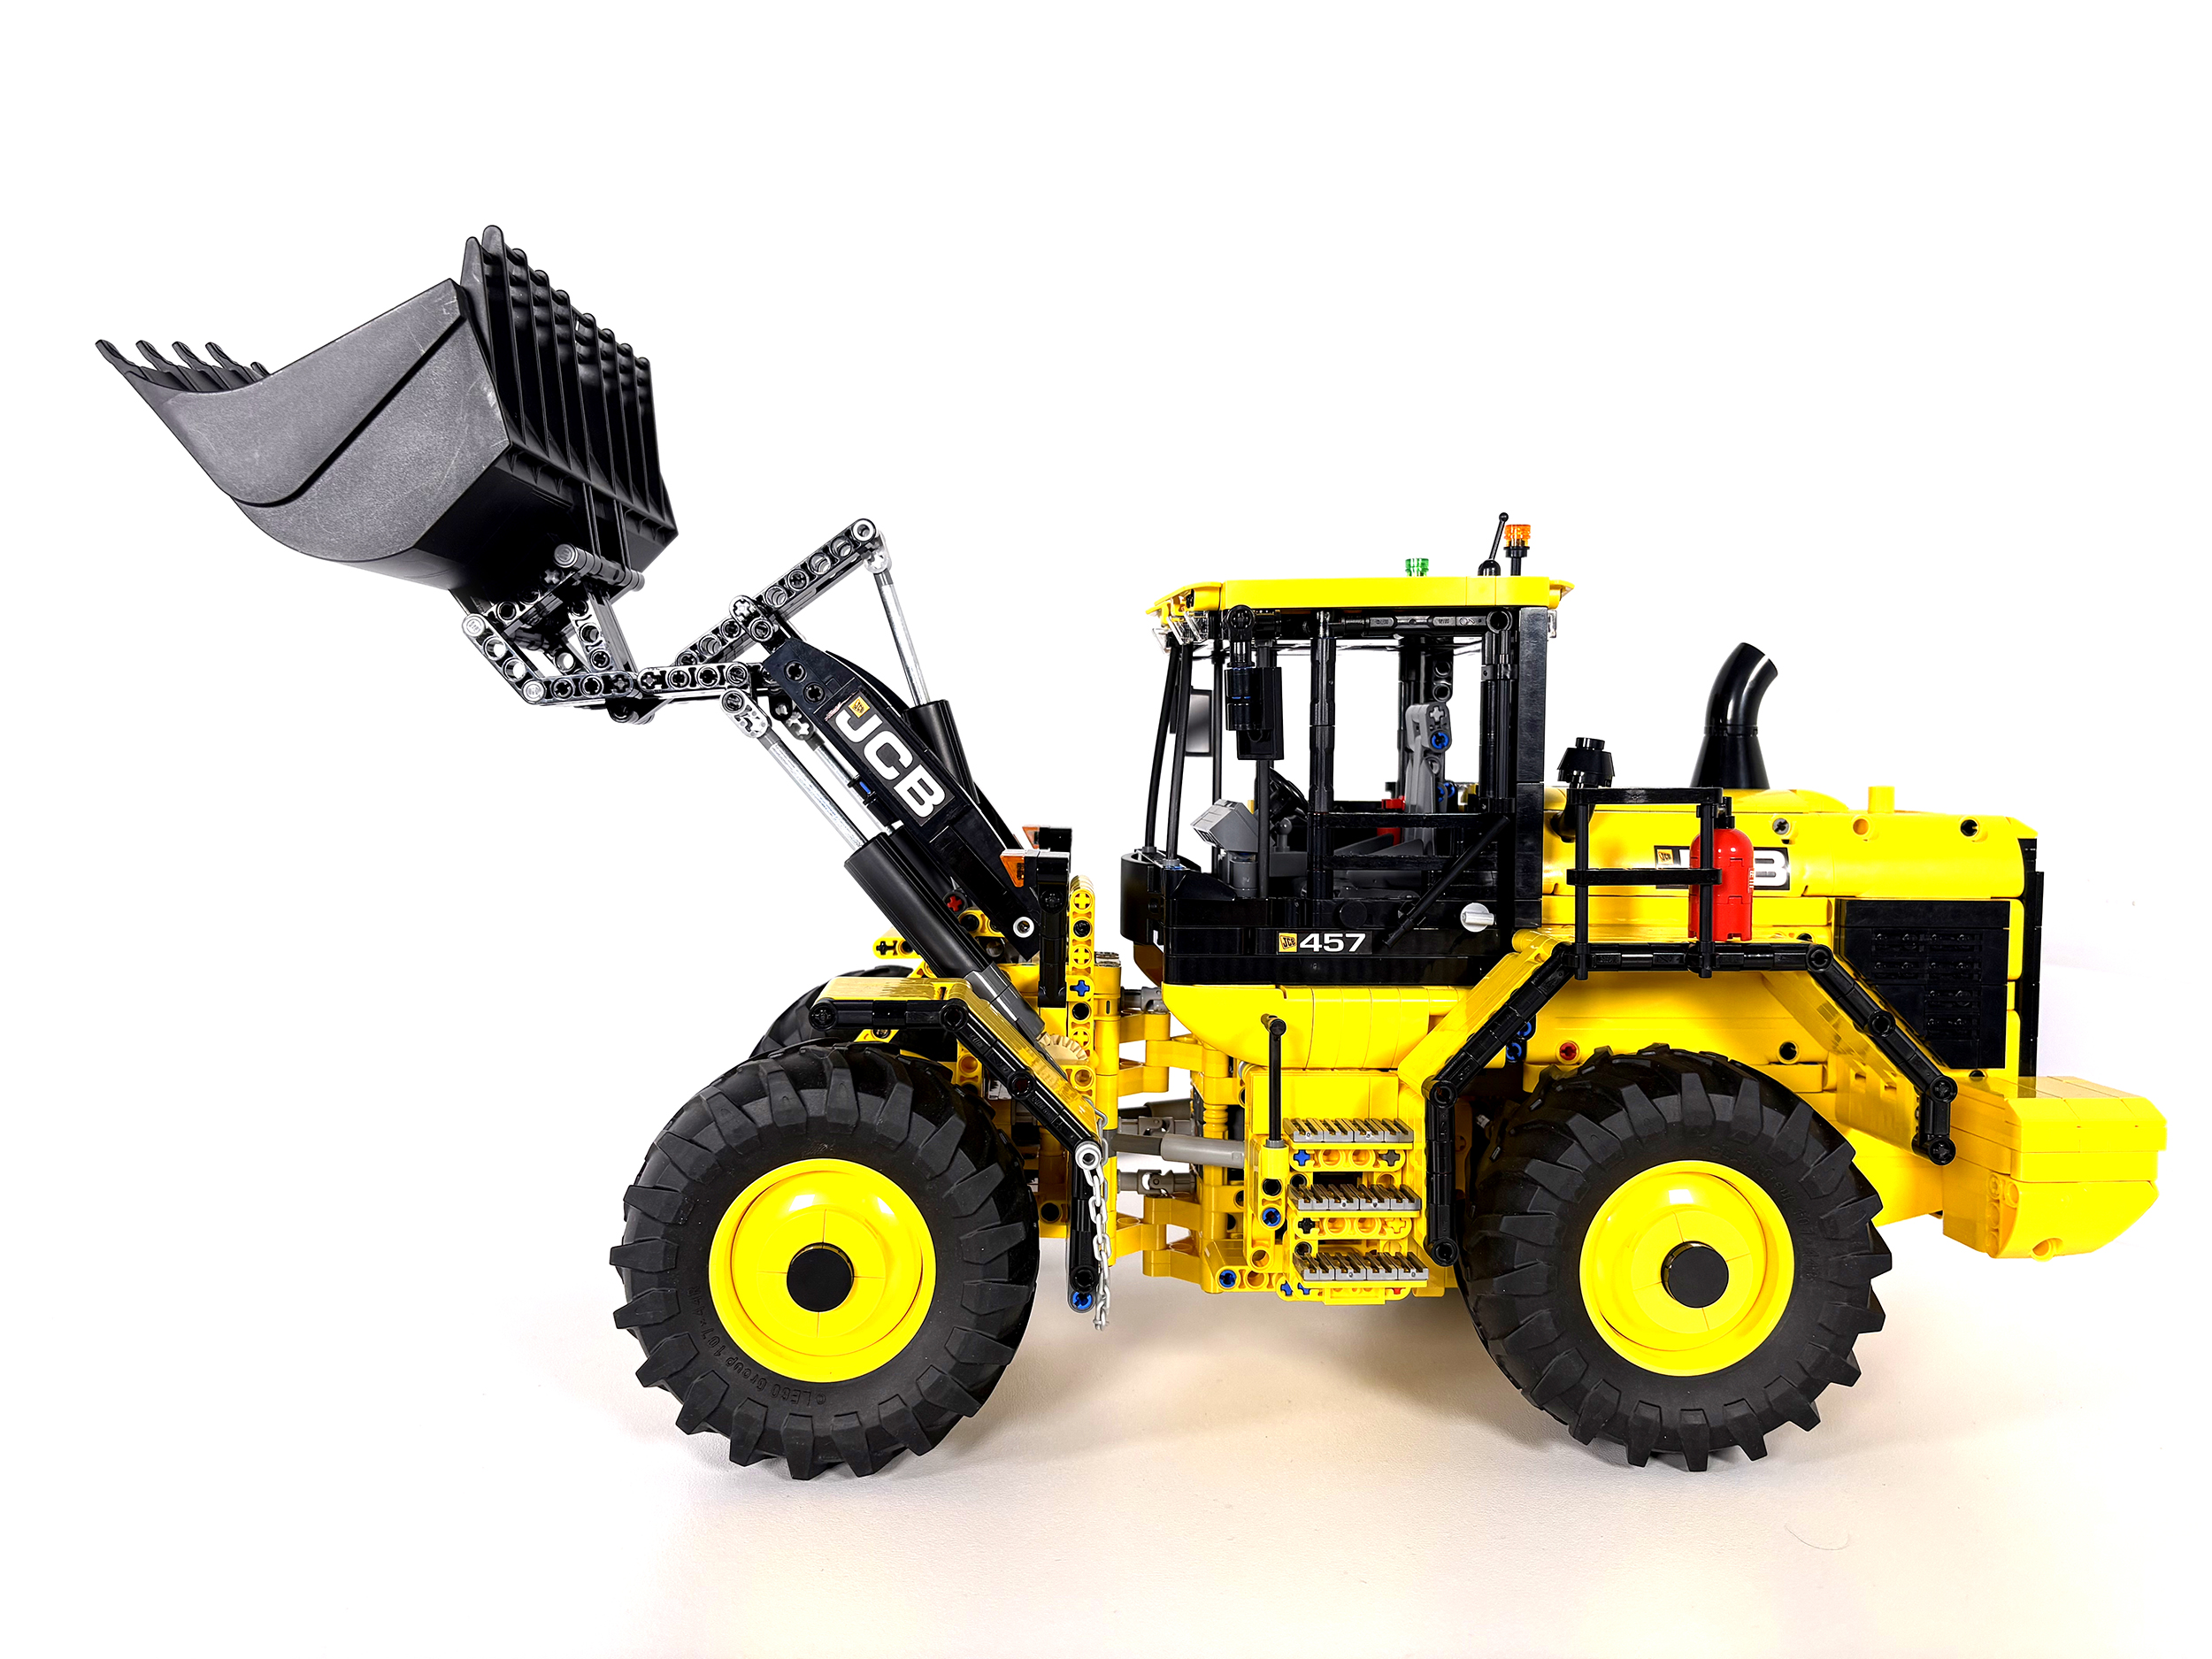
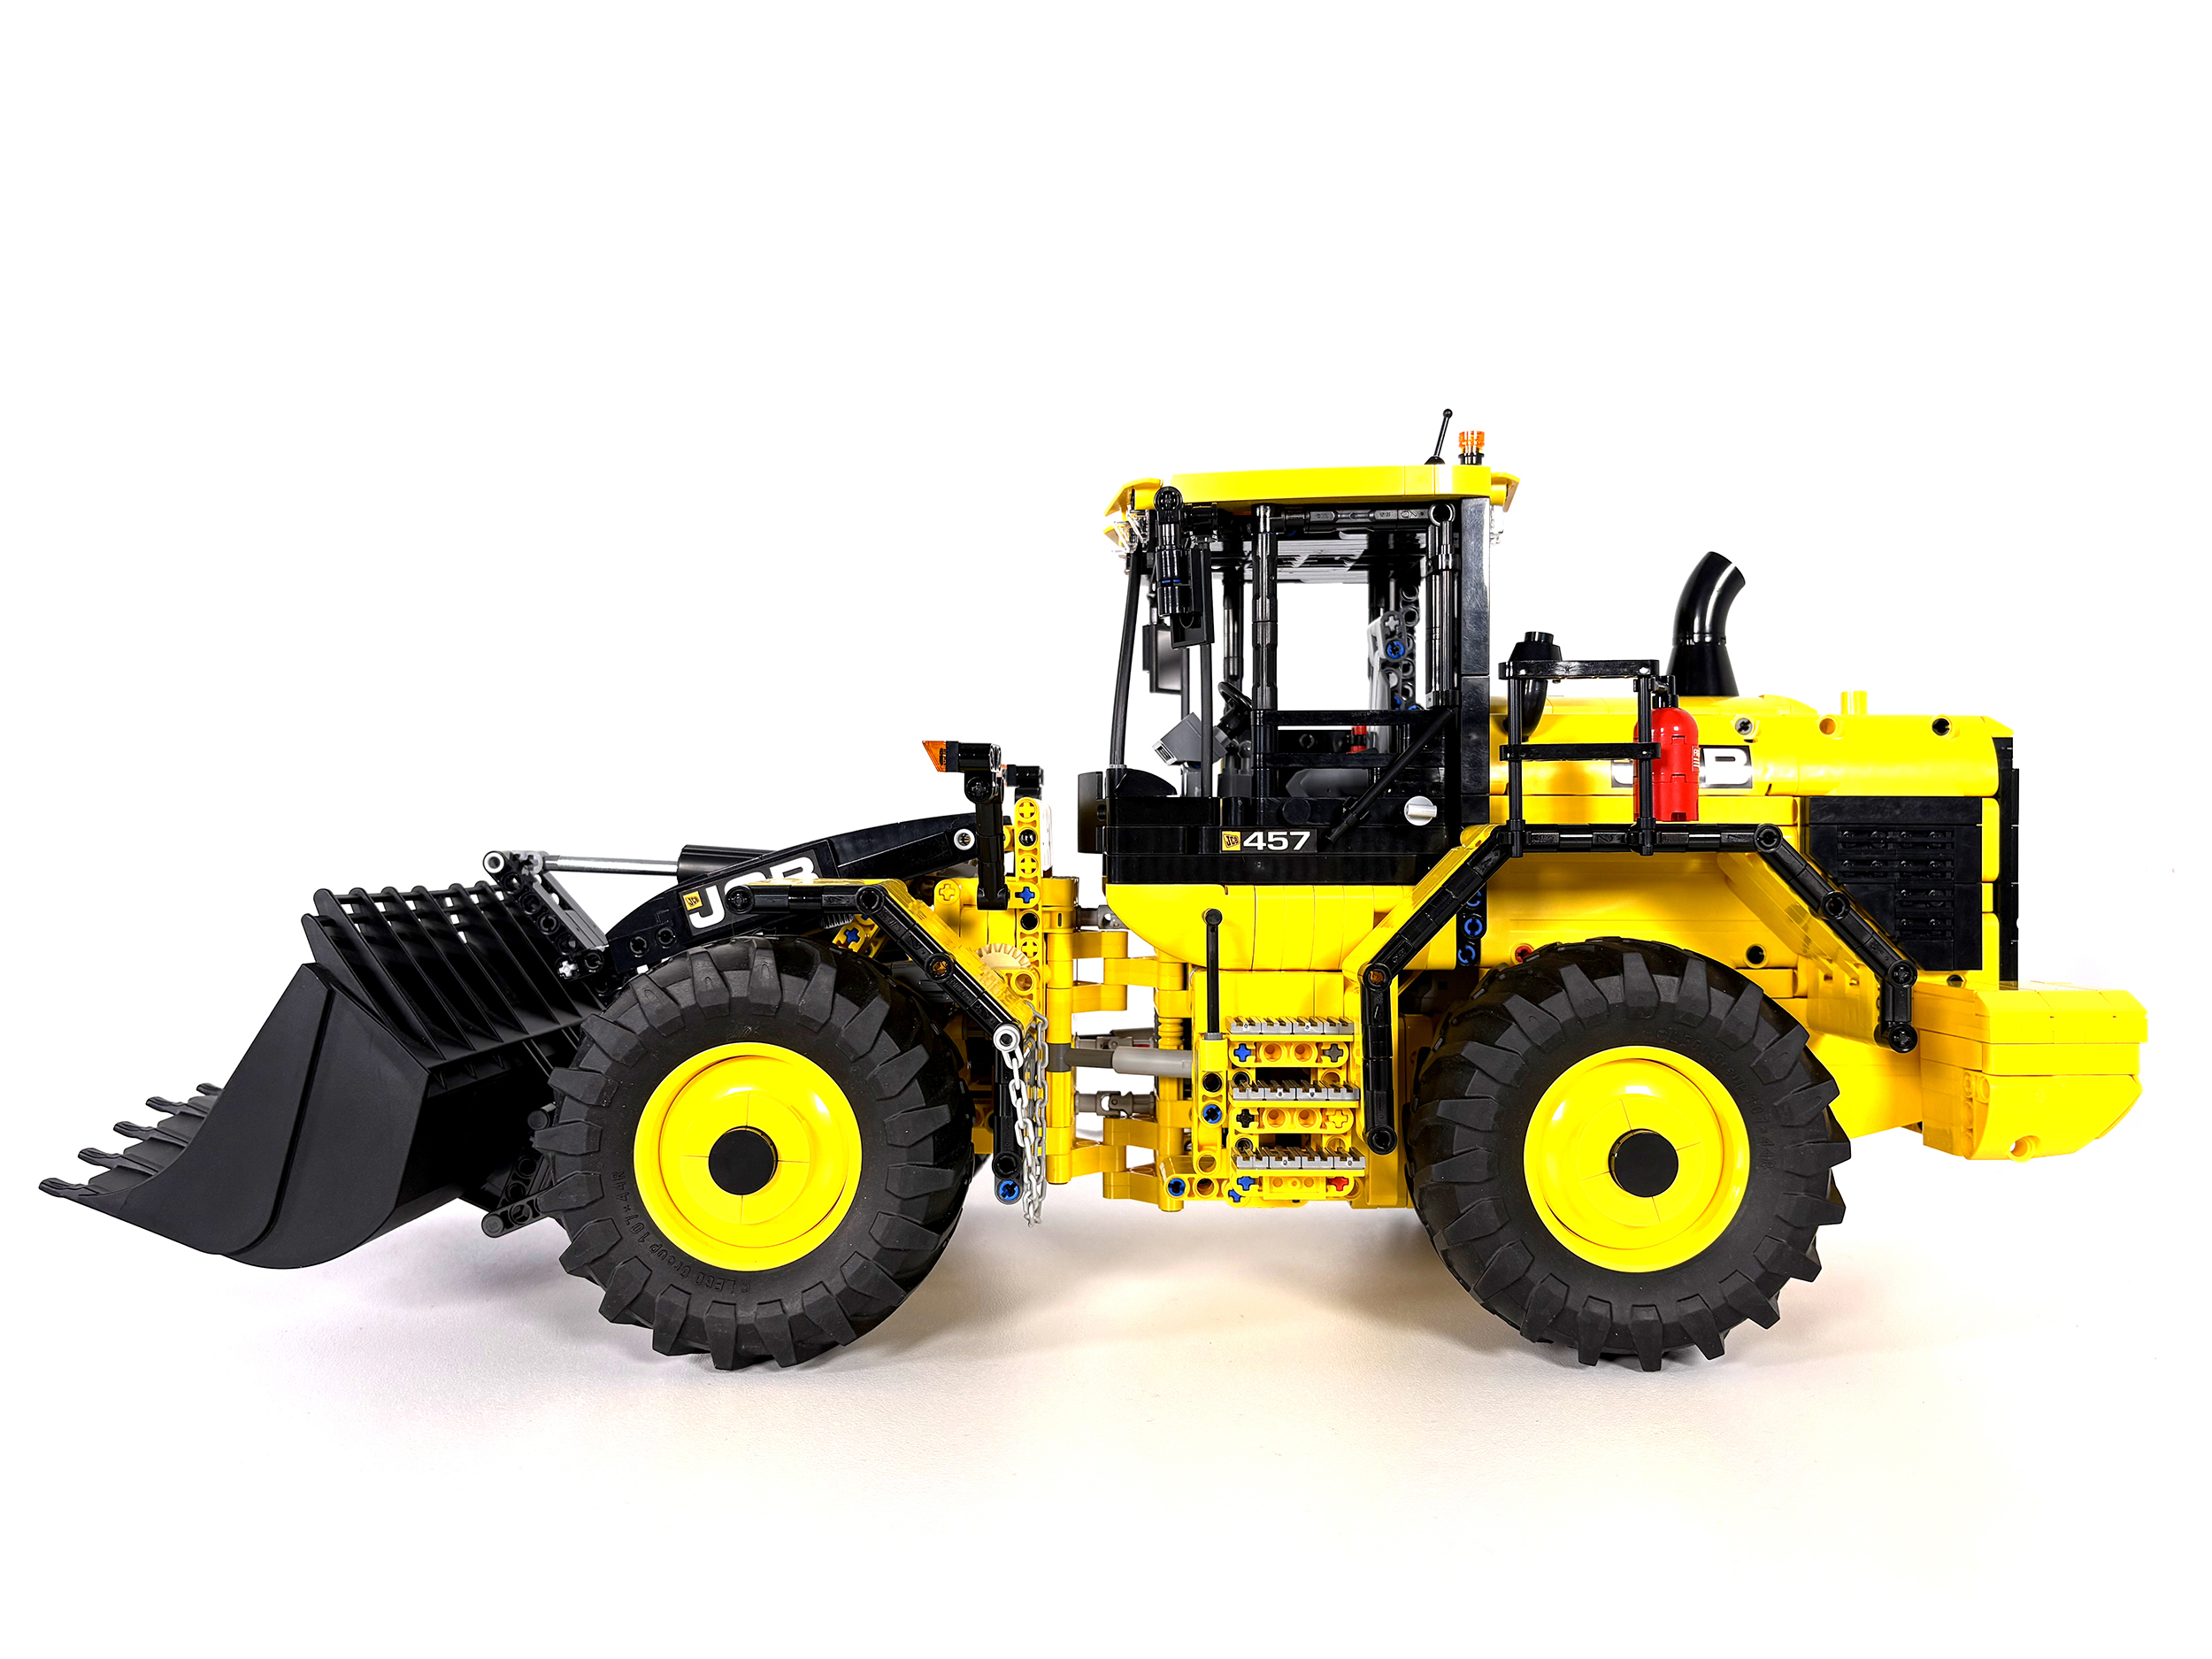
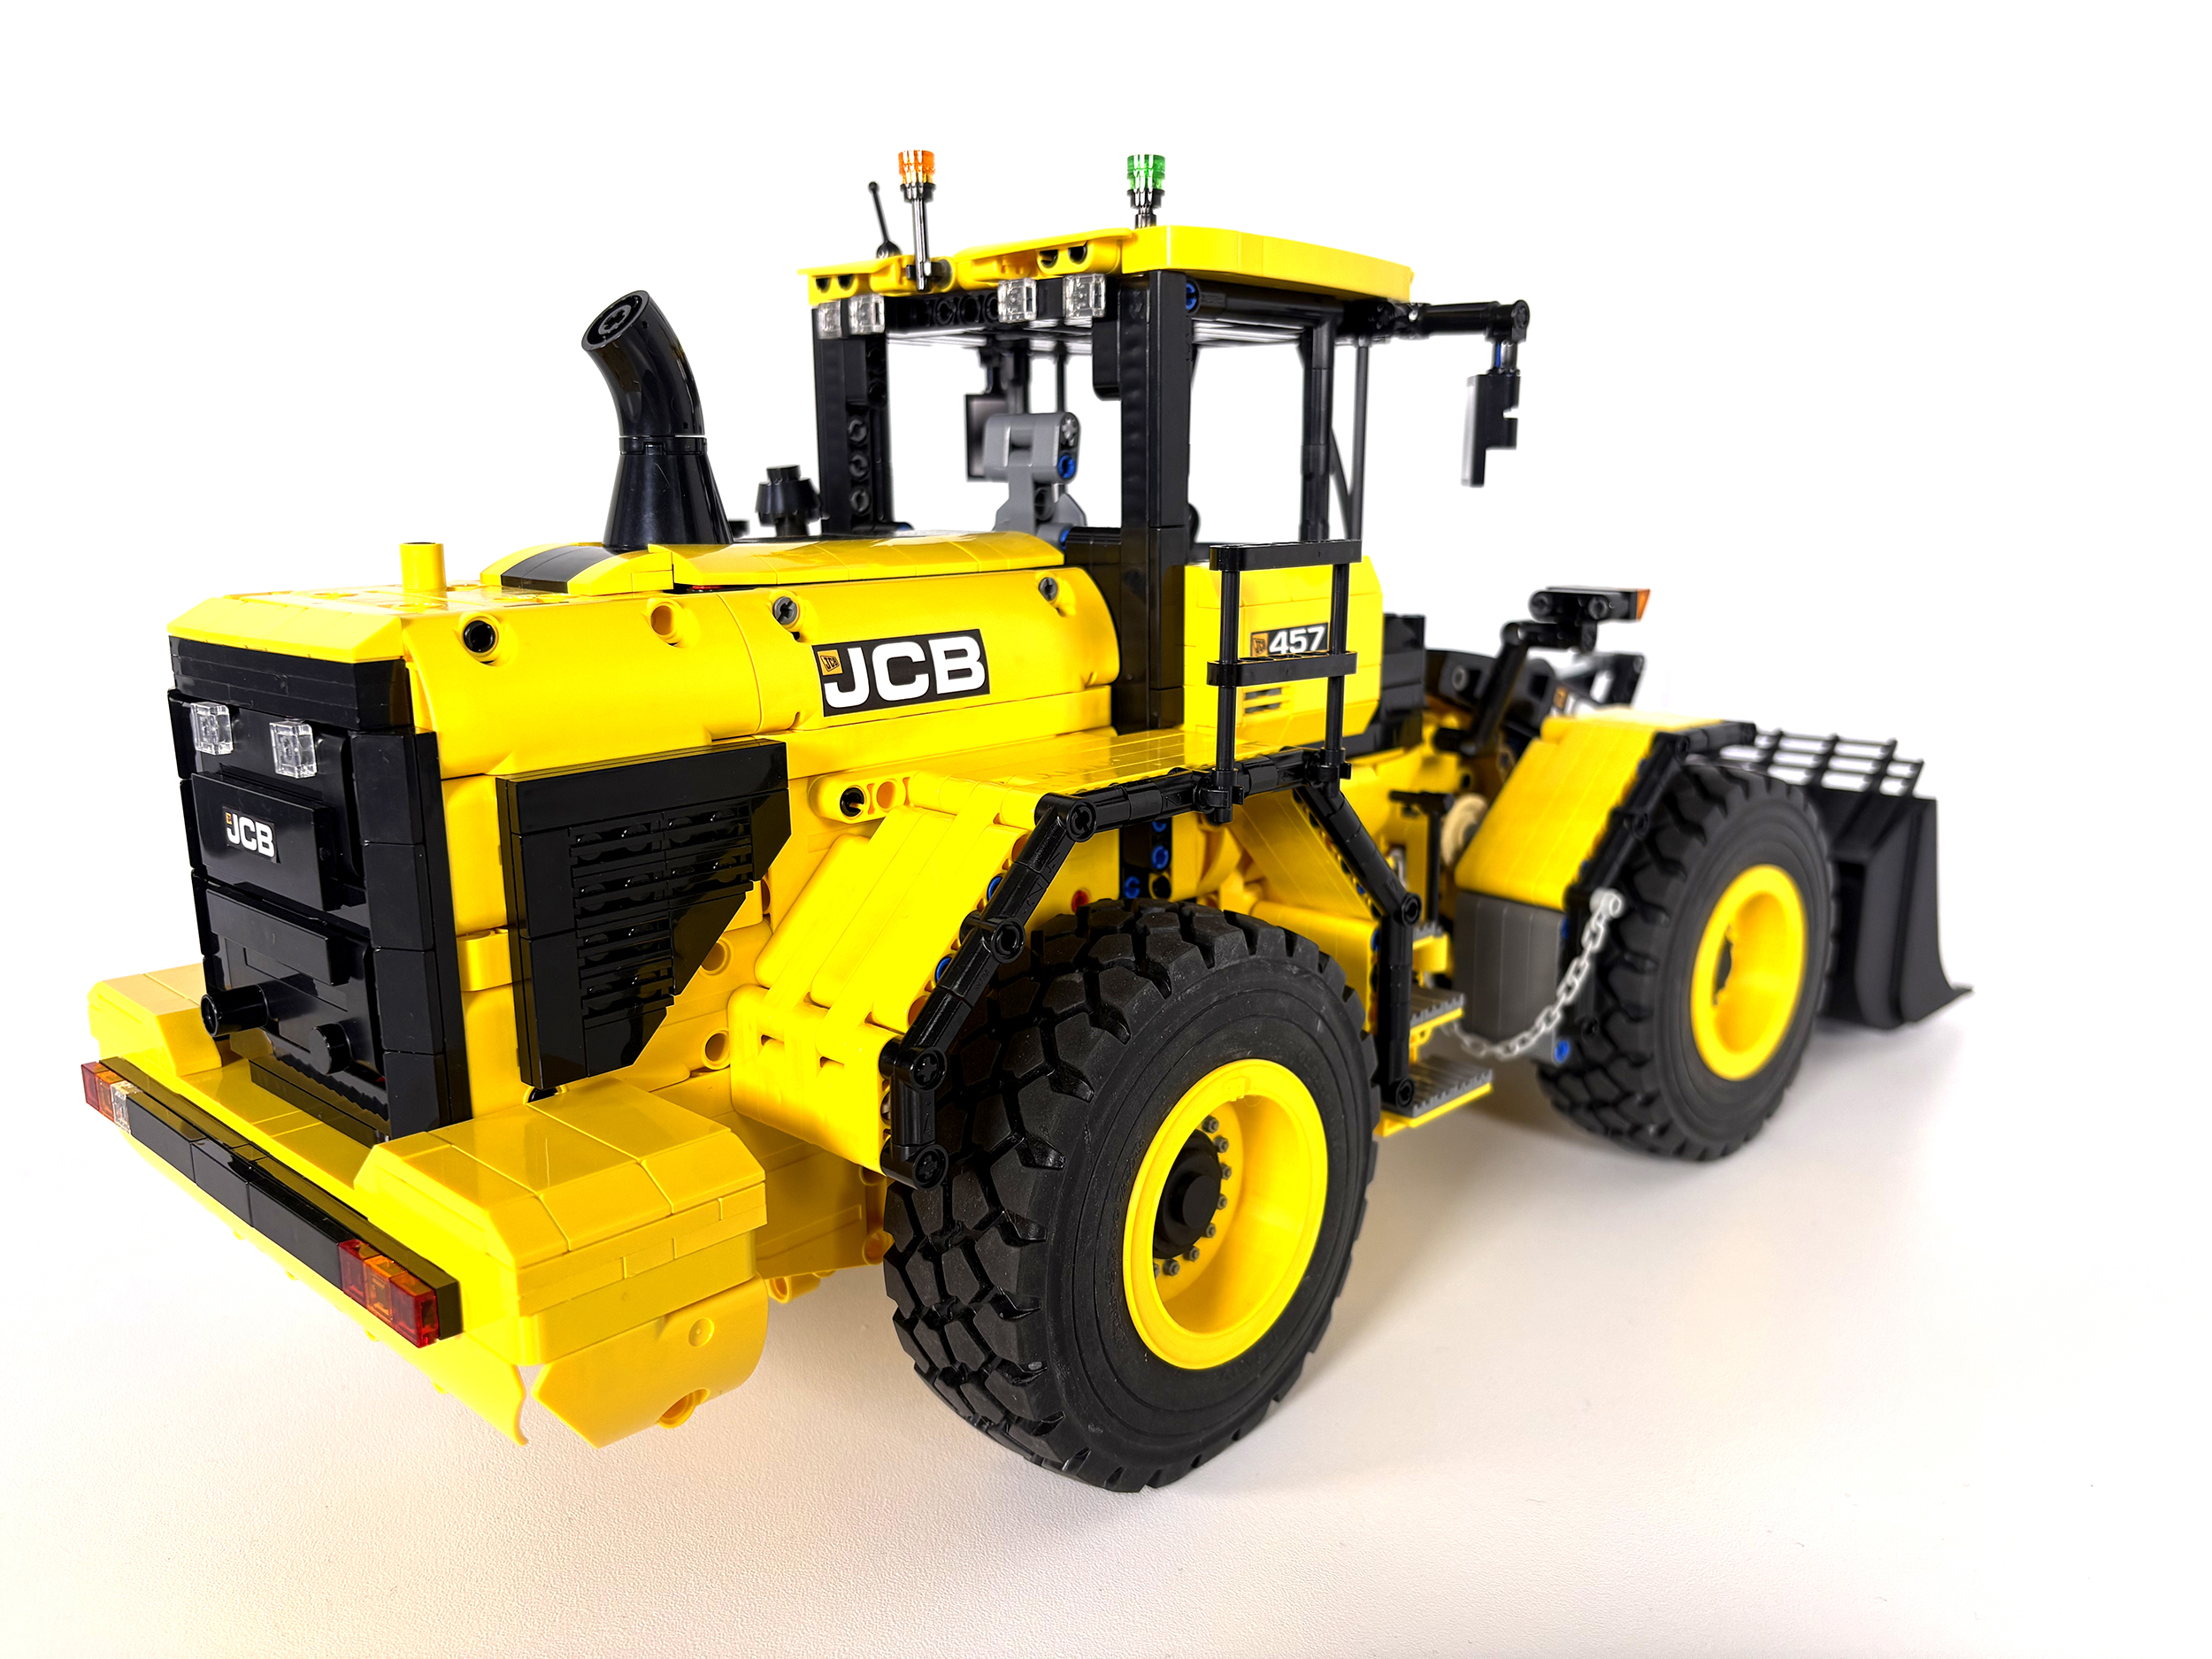
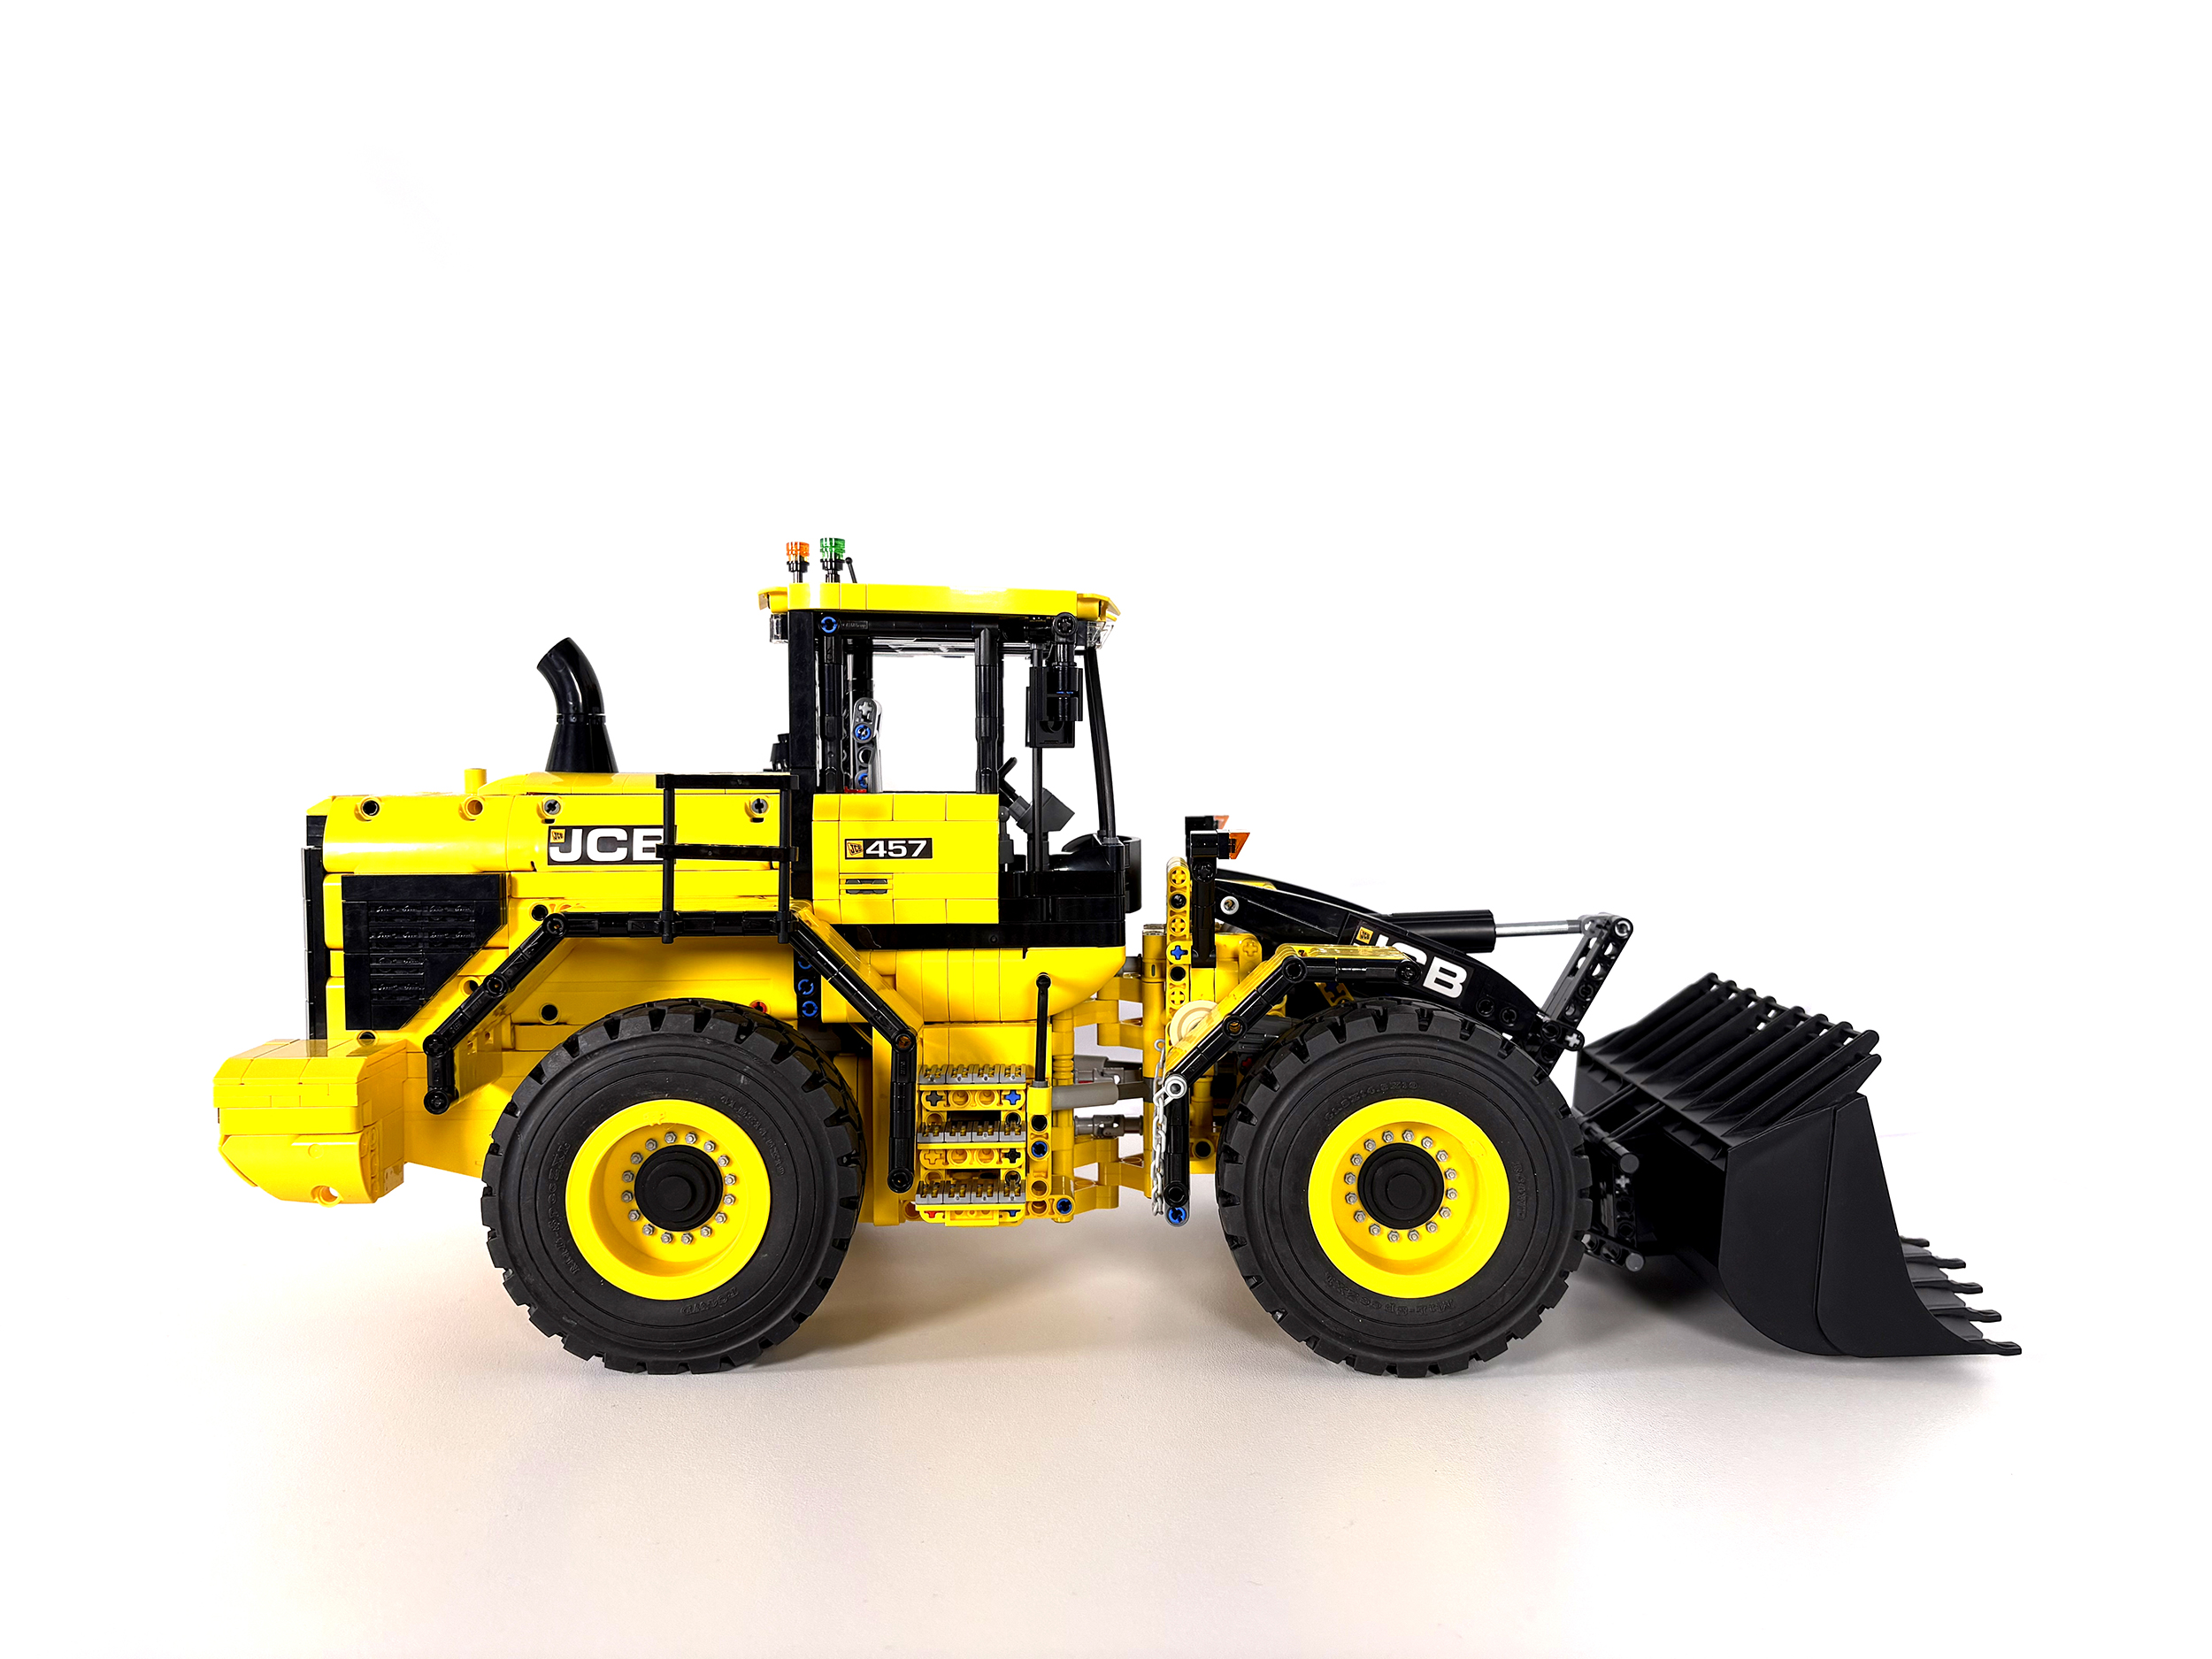
JCB 457 wheel loader
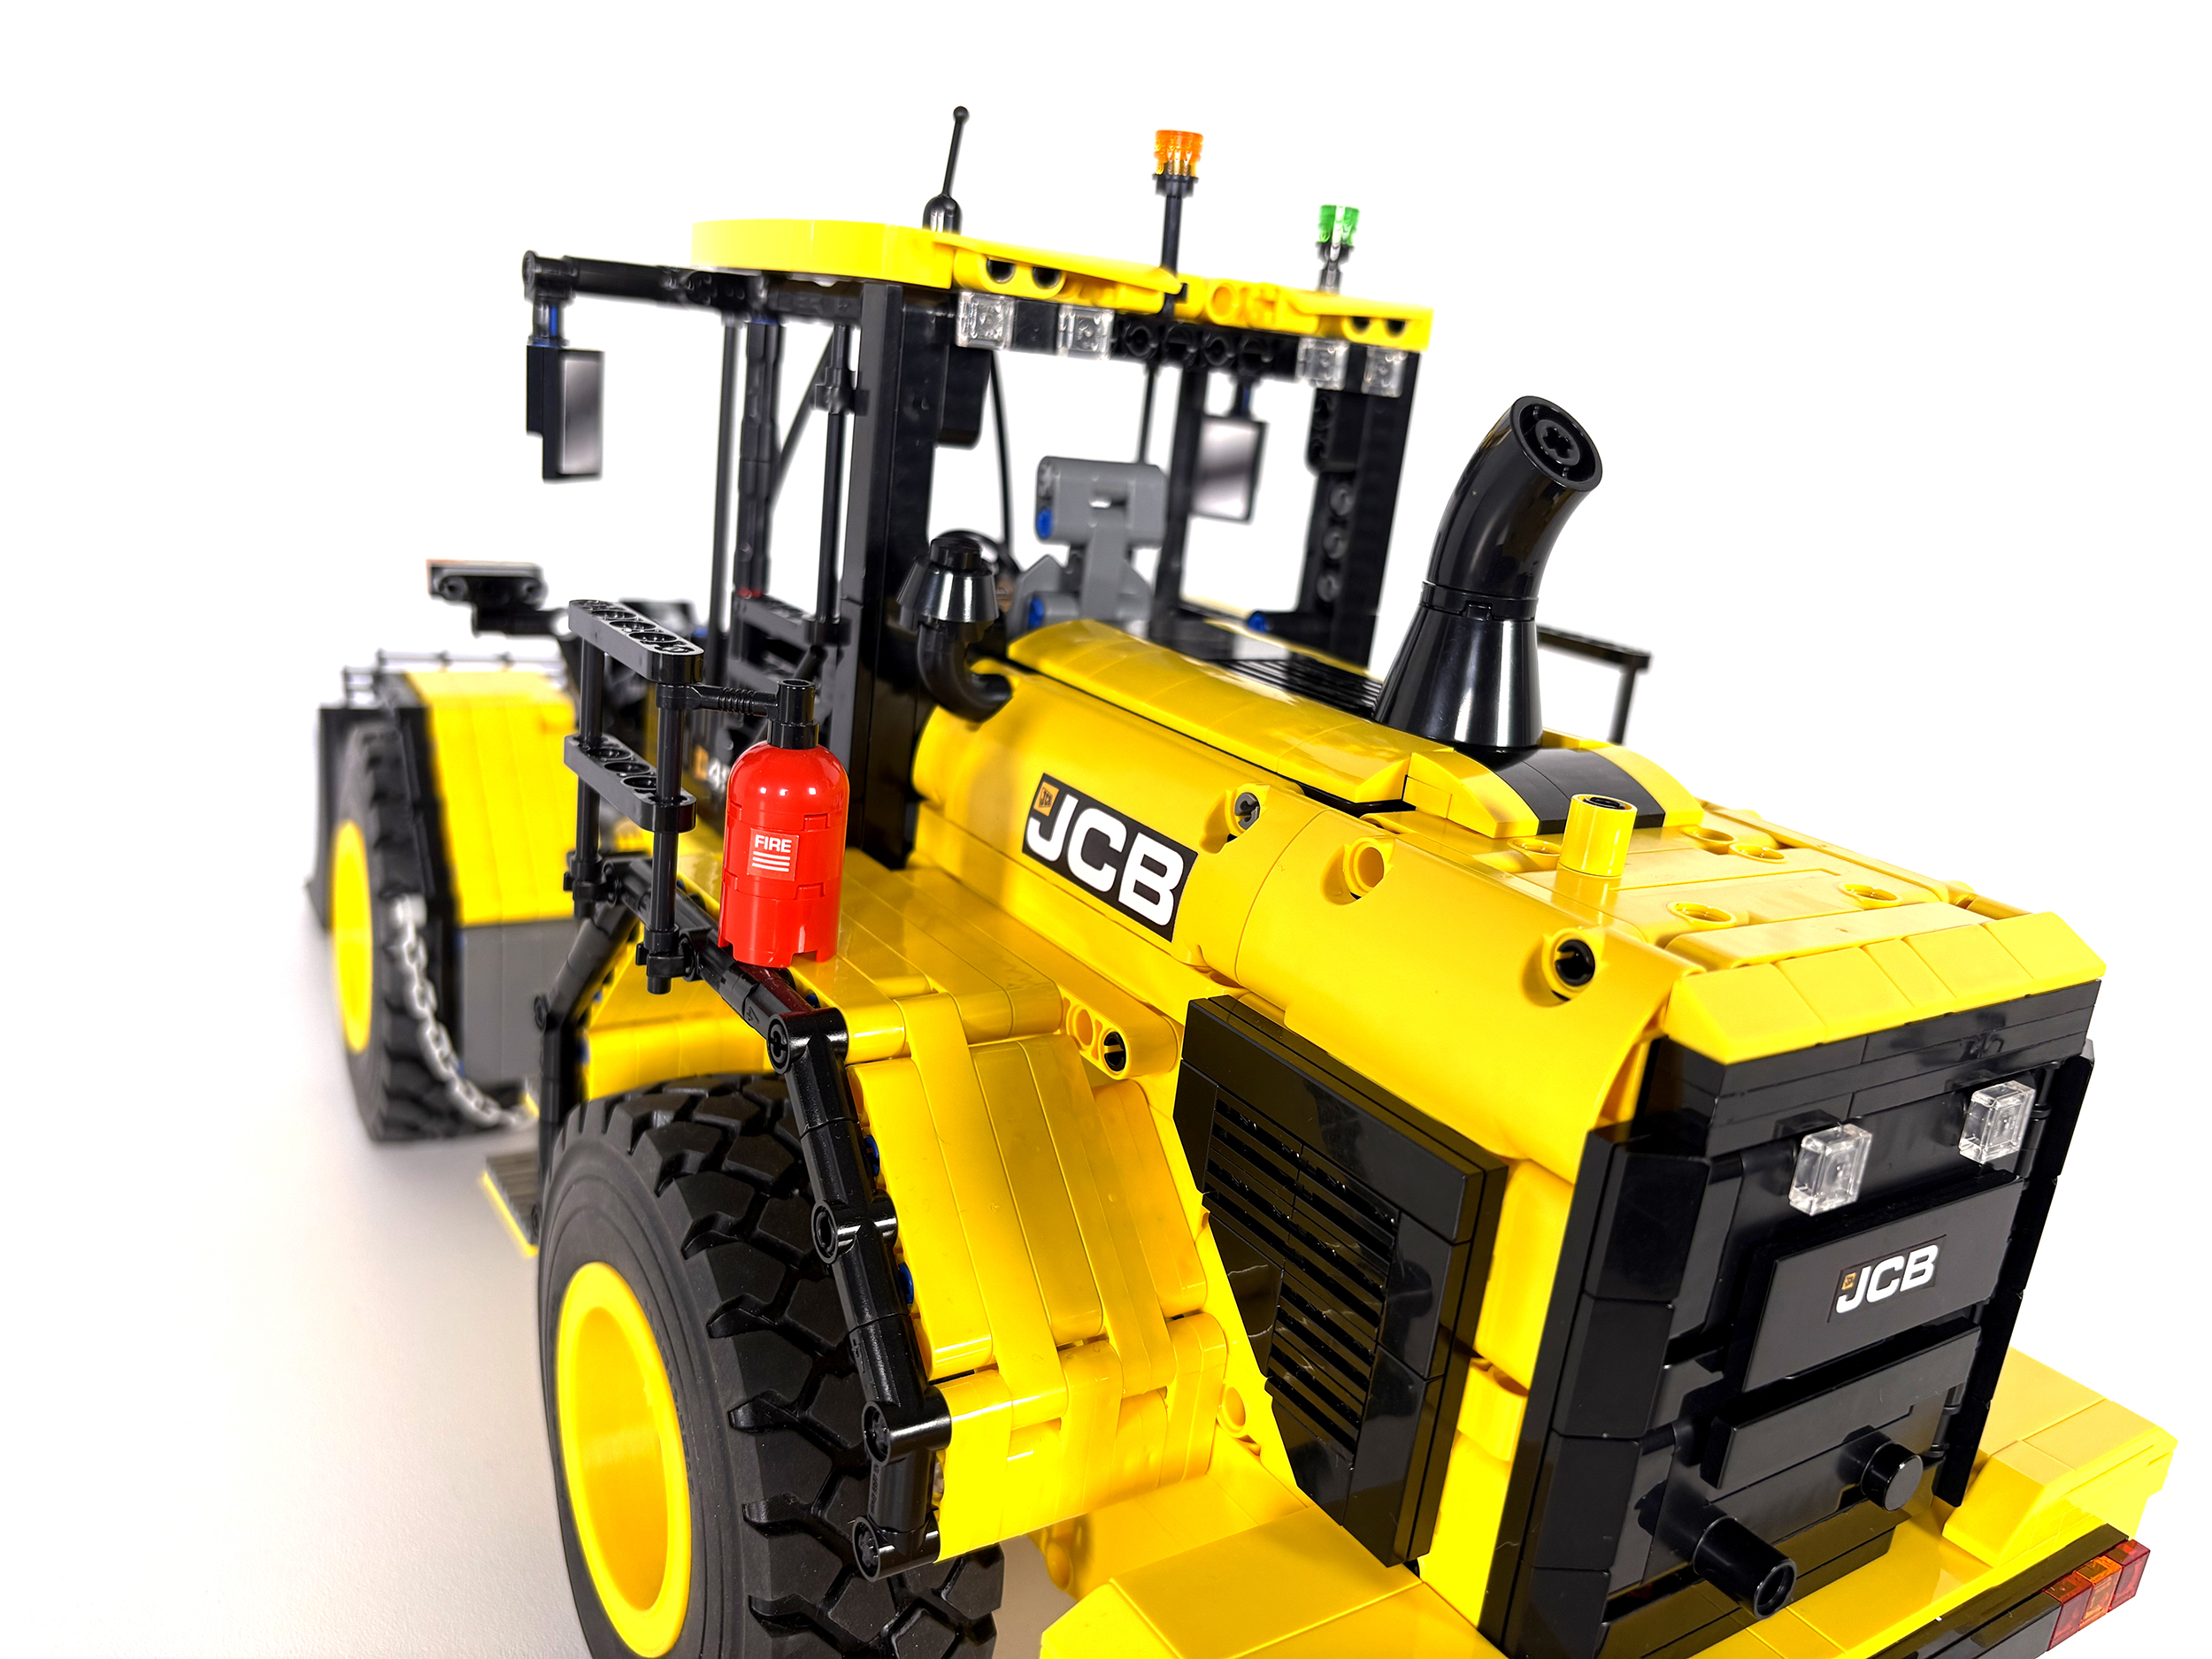
This MOC is my version of the JCB 457 Wheel Loader. It has four motorised functions, all of which are controlled by the BuWizz 2.0 and accompanying app. The model has 2309 pieces and is a complex, but enjoyable build. PDF instructions are available to purchase here on the site, and via ReBrickable. A sticker sheet for this set is also available from the shop.
Background
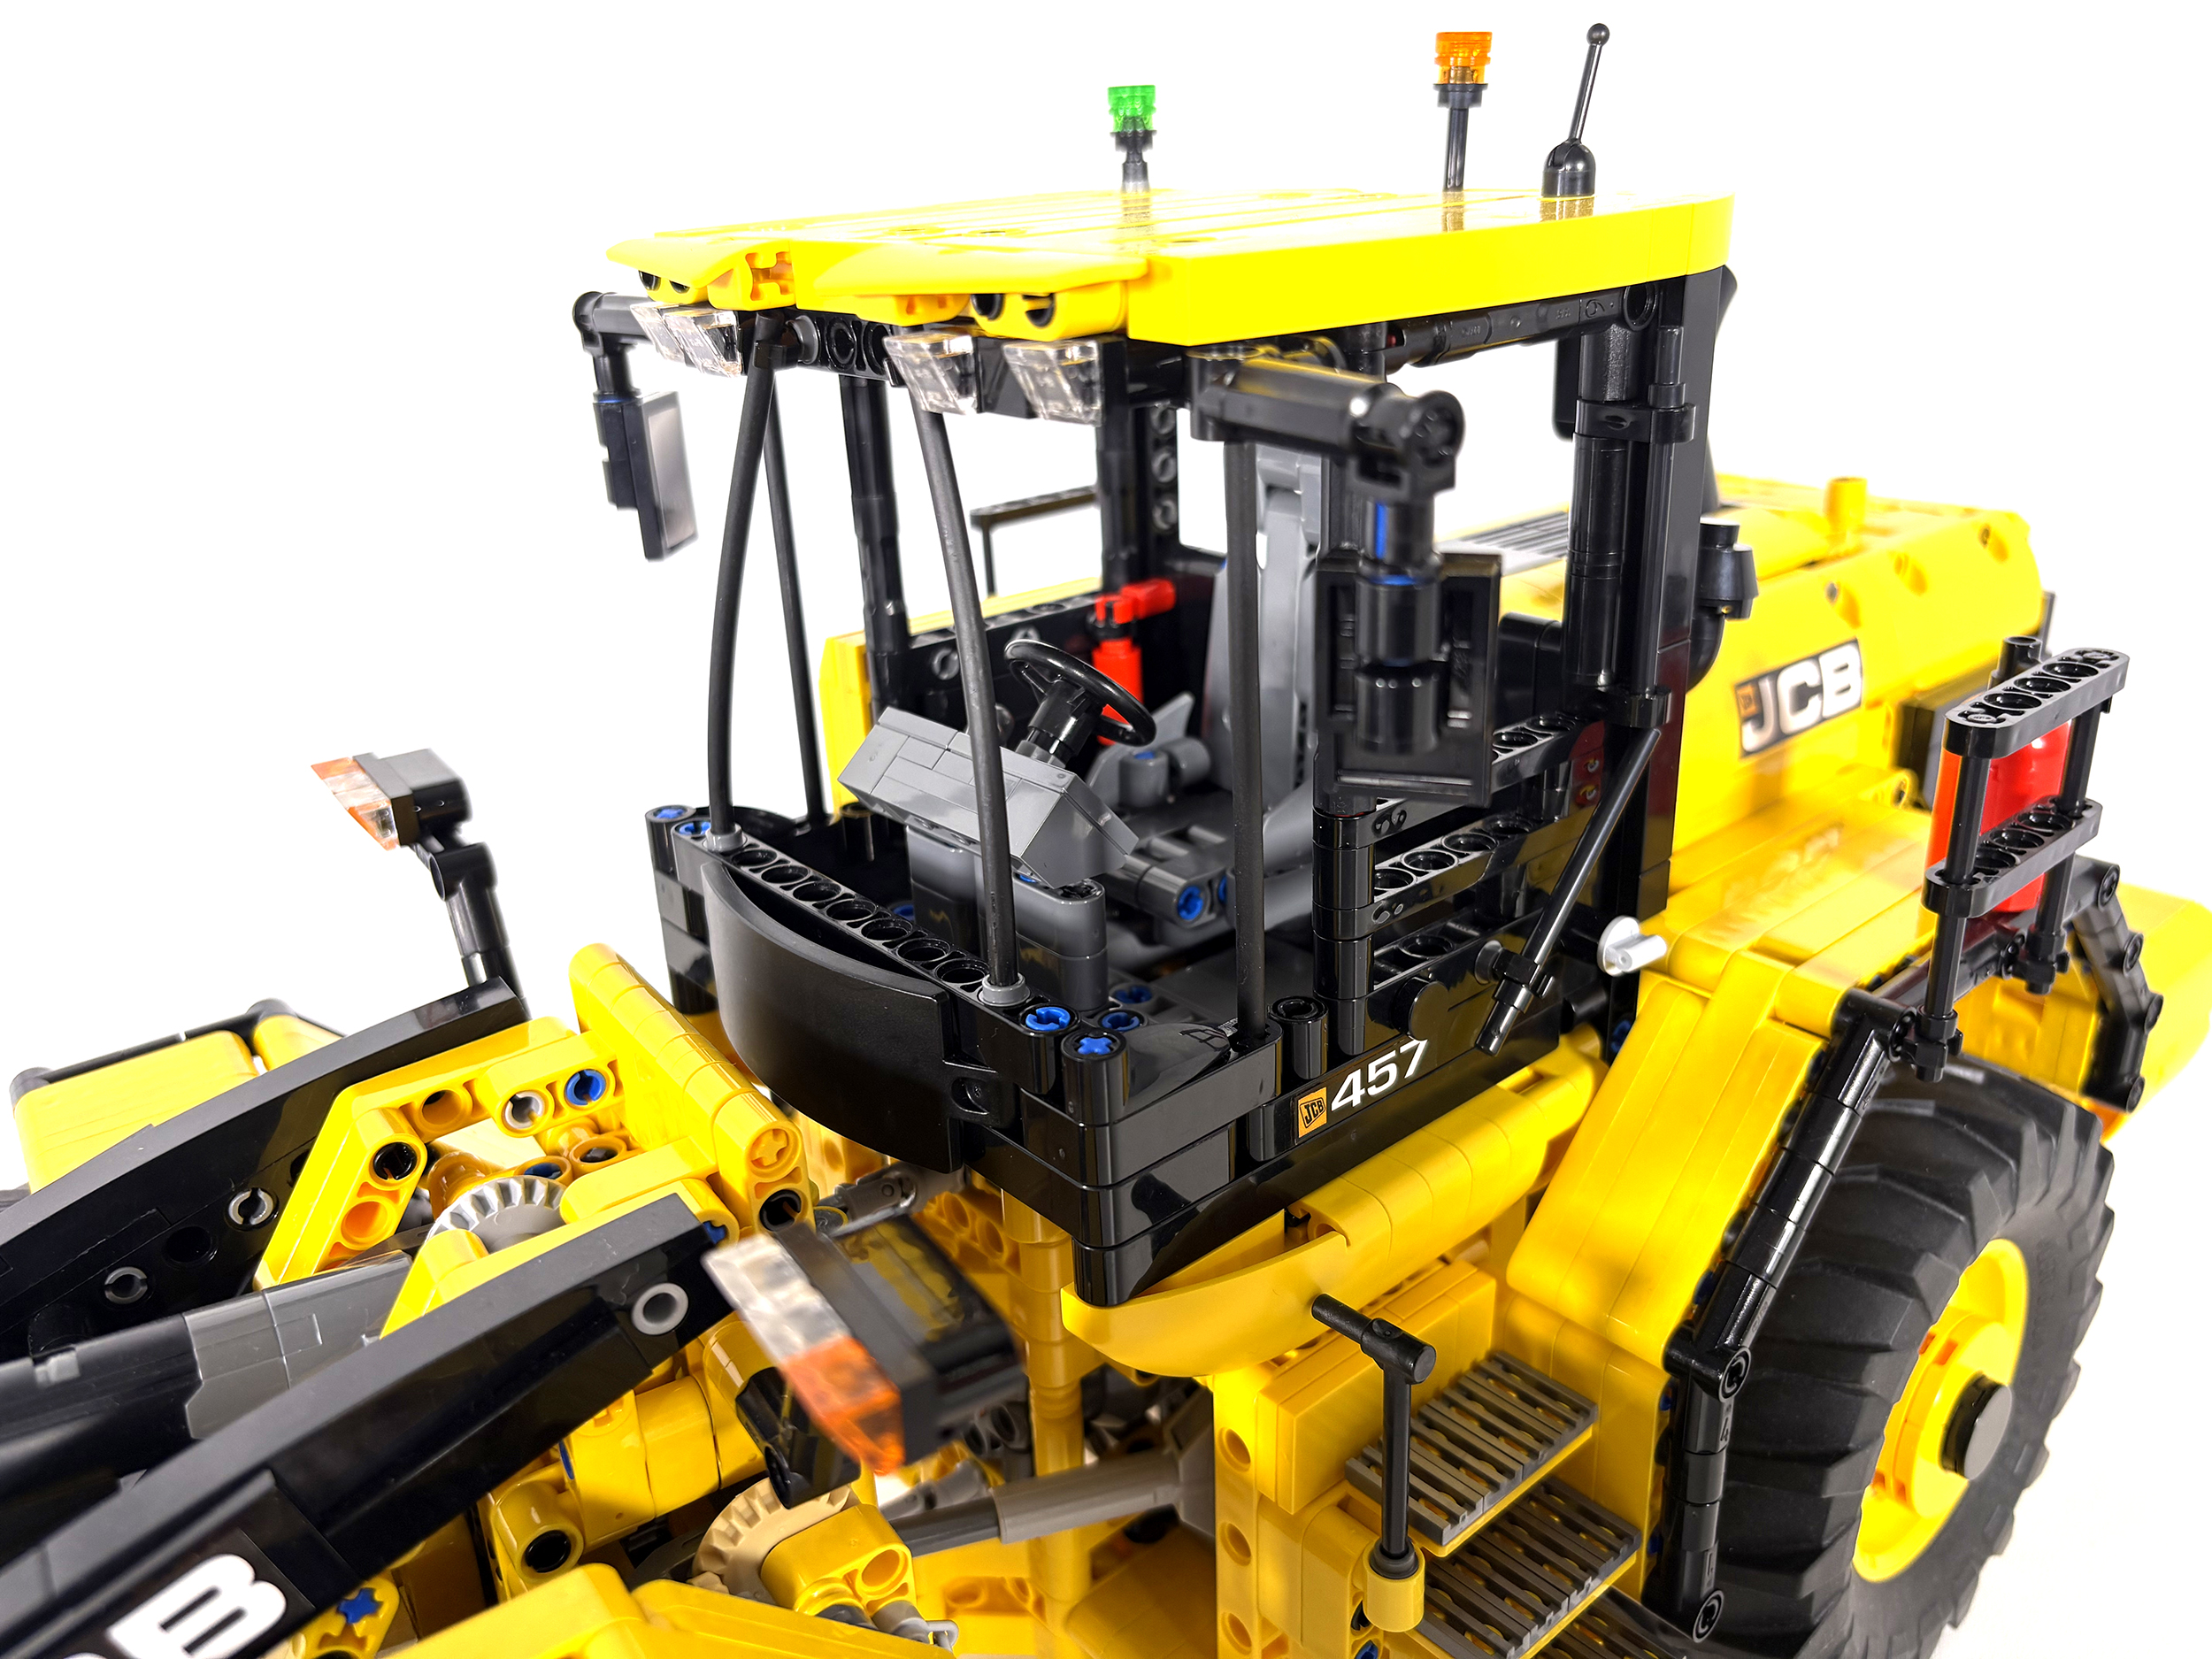
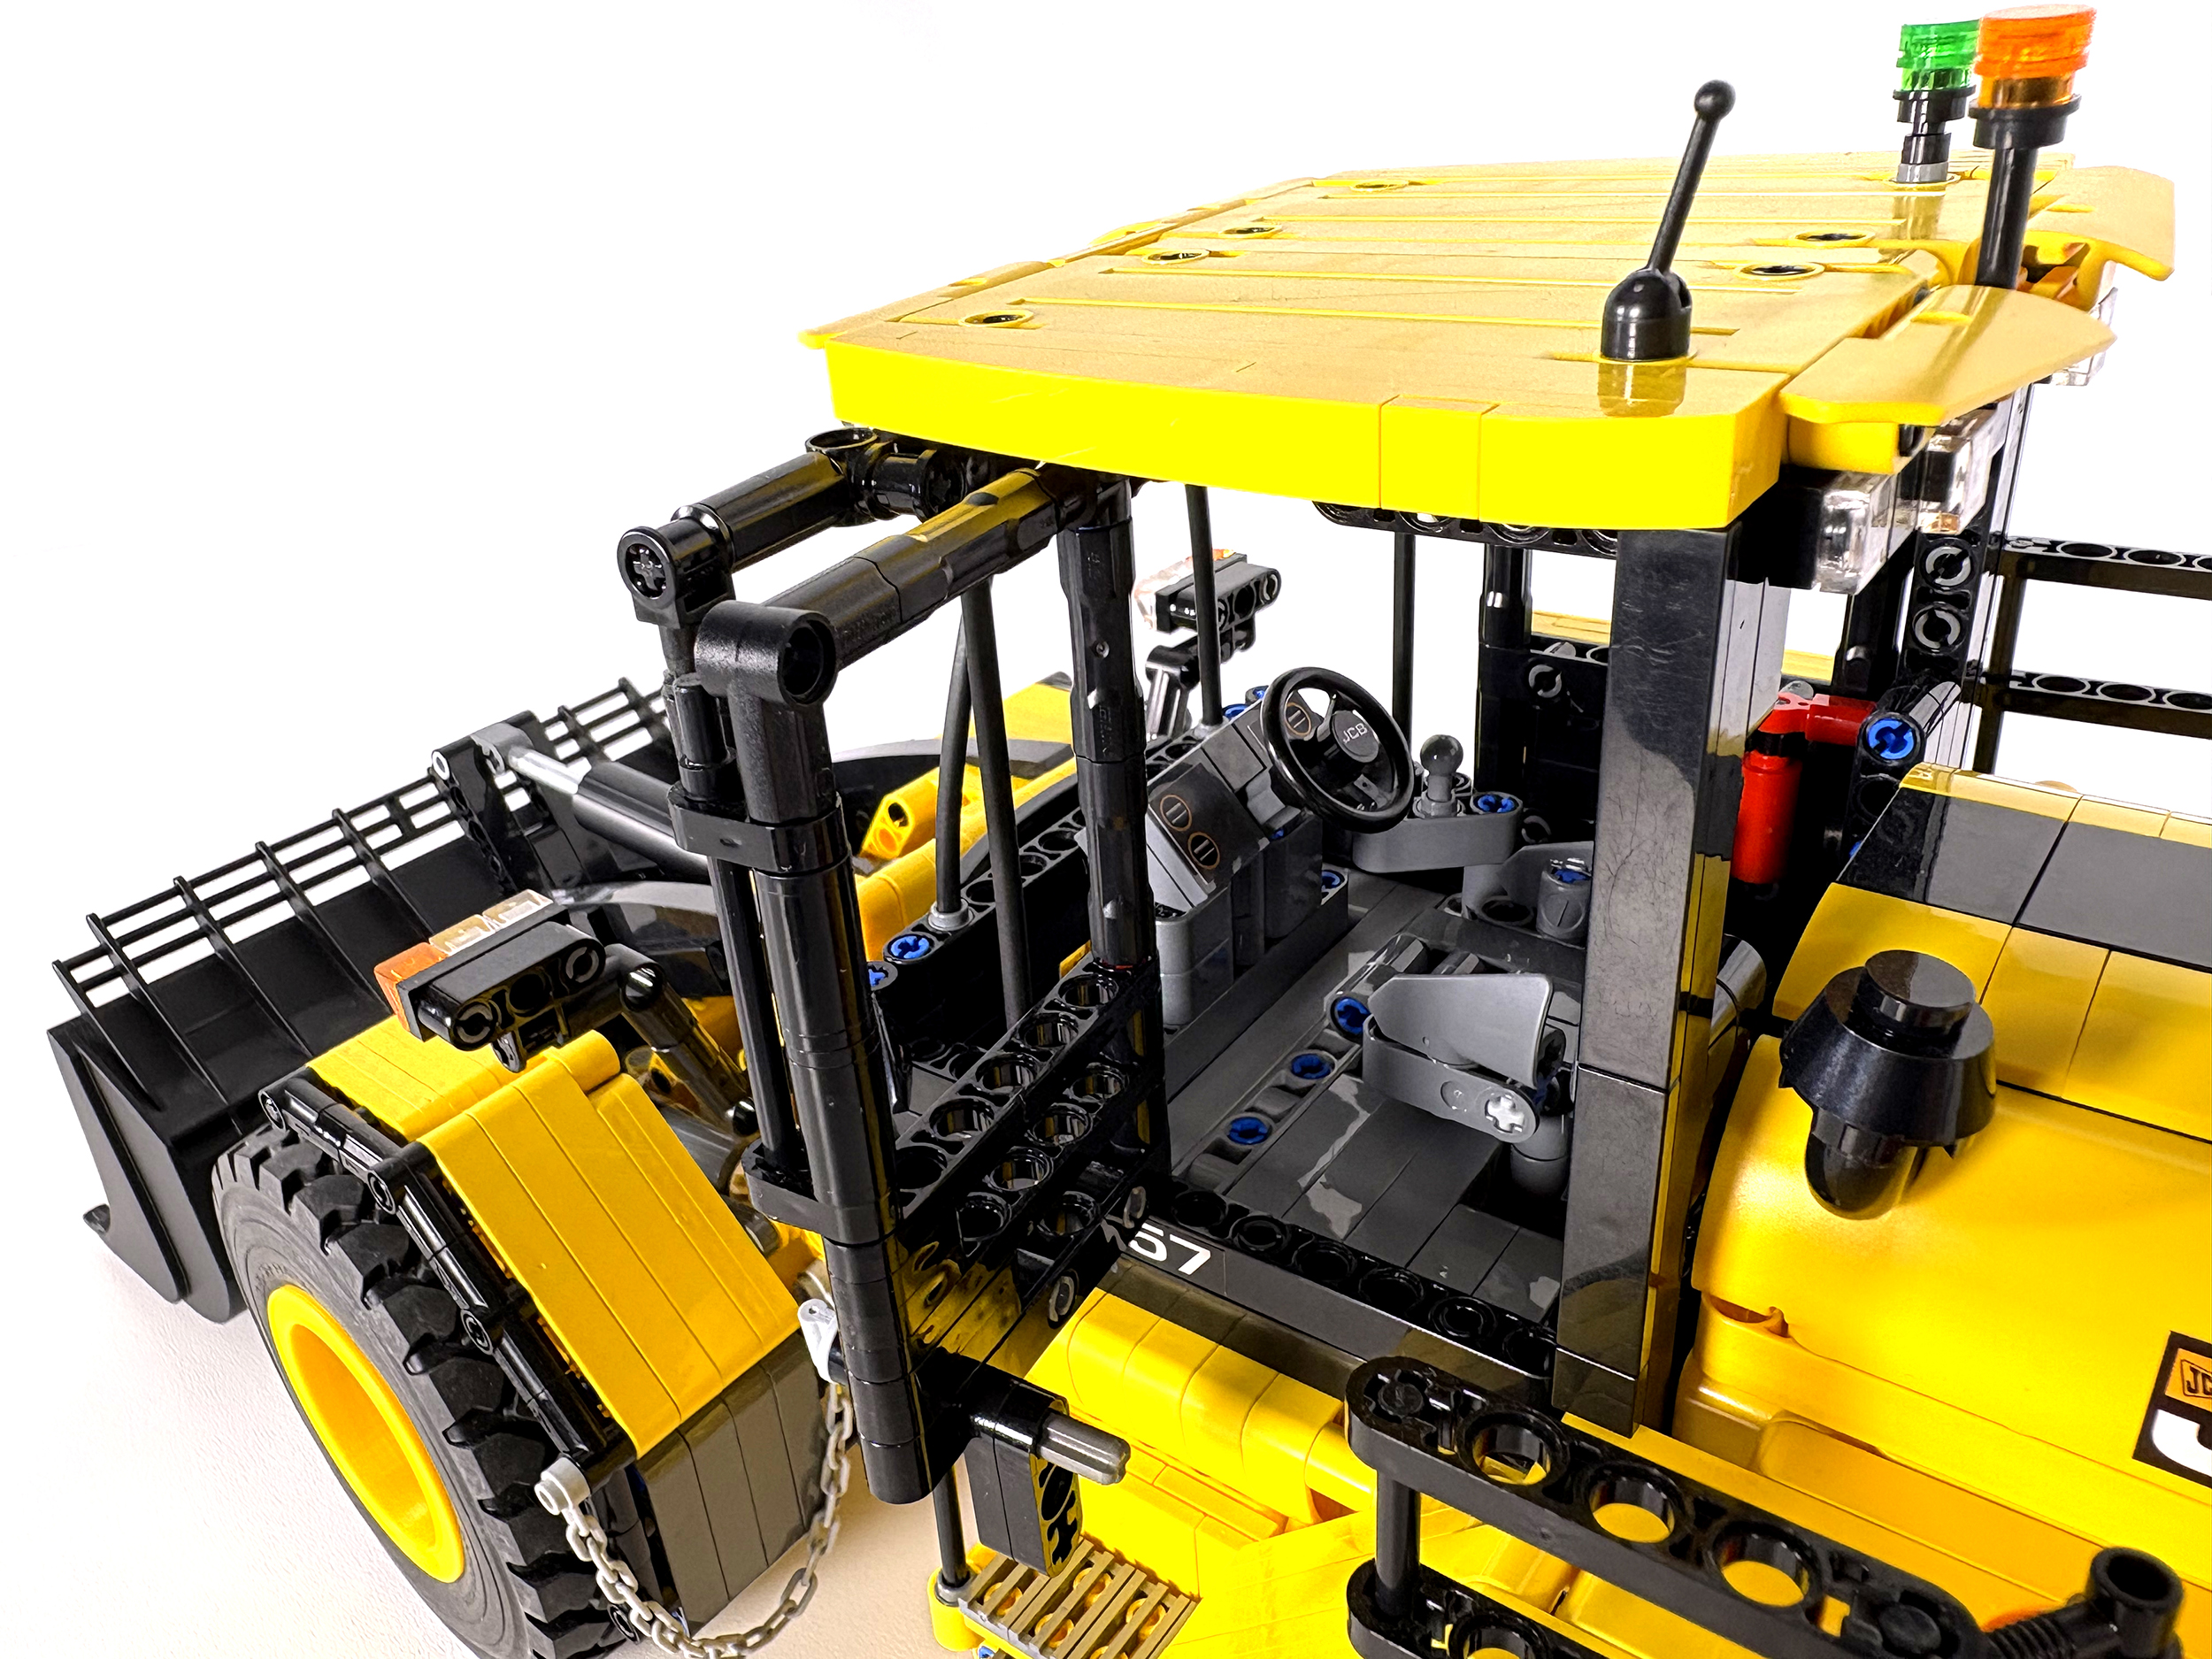
This model is my third MOC and was started on 9th March 2022. Having already built a backhoe and a telehandler, I decided that the next machine to tackle would be a wheel loader. This would present some new challenges that I hadn’t encountered in my previous models: pendular suspension, functional Z-linkage, and steering via linear actuators. I wanted to pack this model with other features too, and was determined to include a functioning engine, as well as opening doors and engine compartments.
NOTE: As I designed and built this model I took many photographs. These can be seen on my Facebook page.
Designing & Building
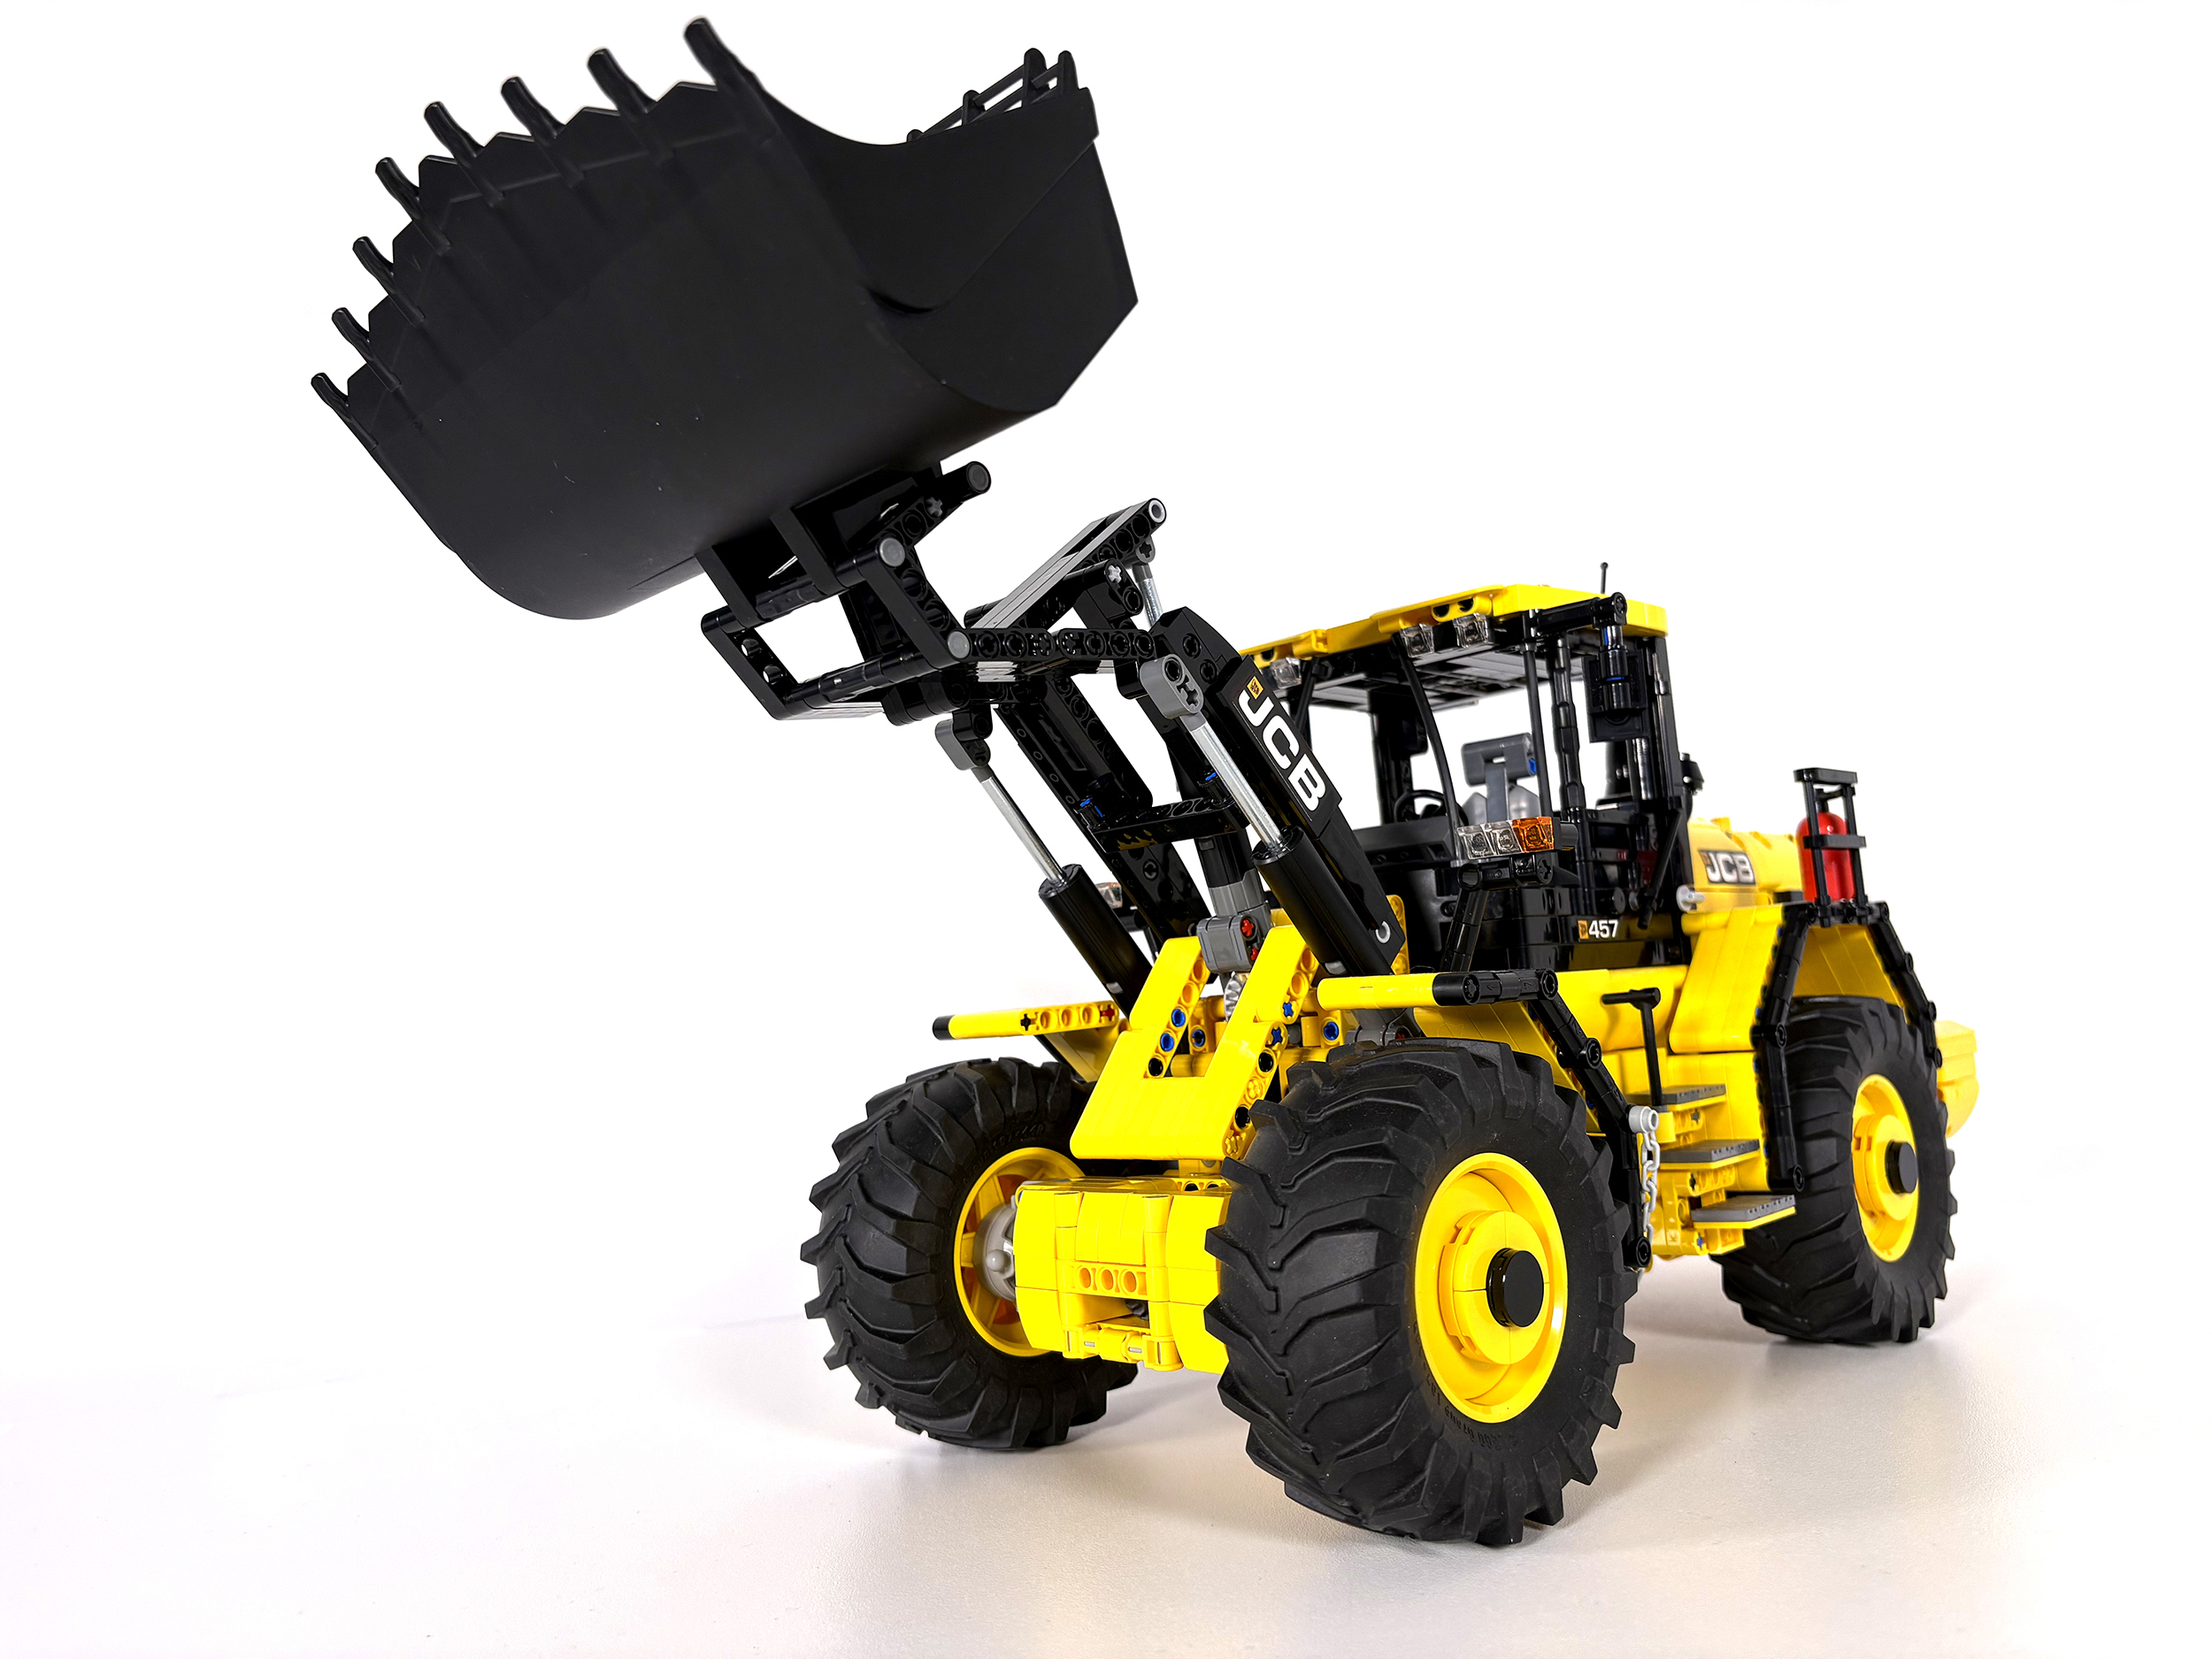
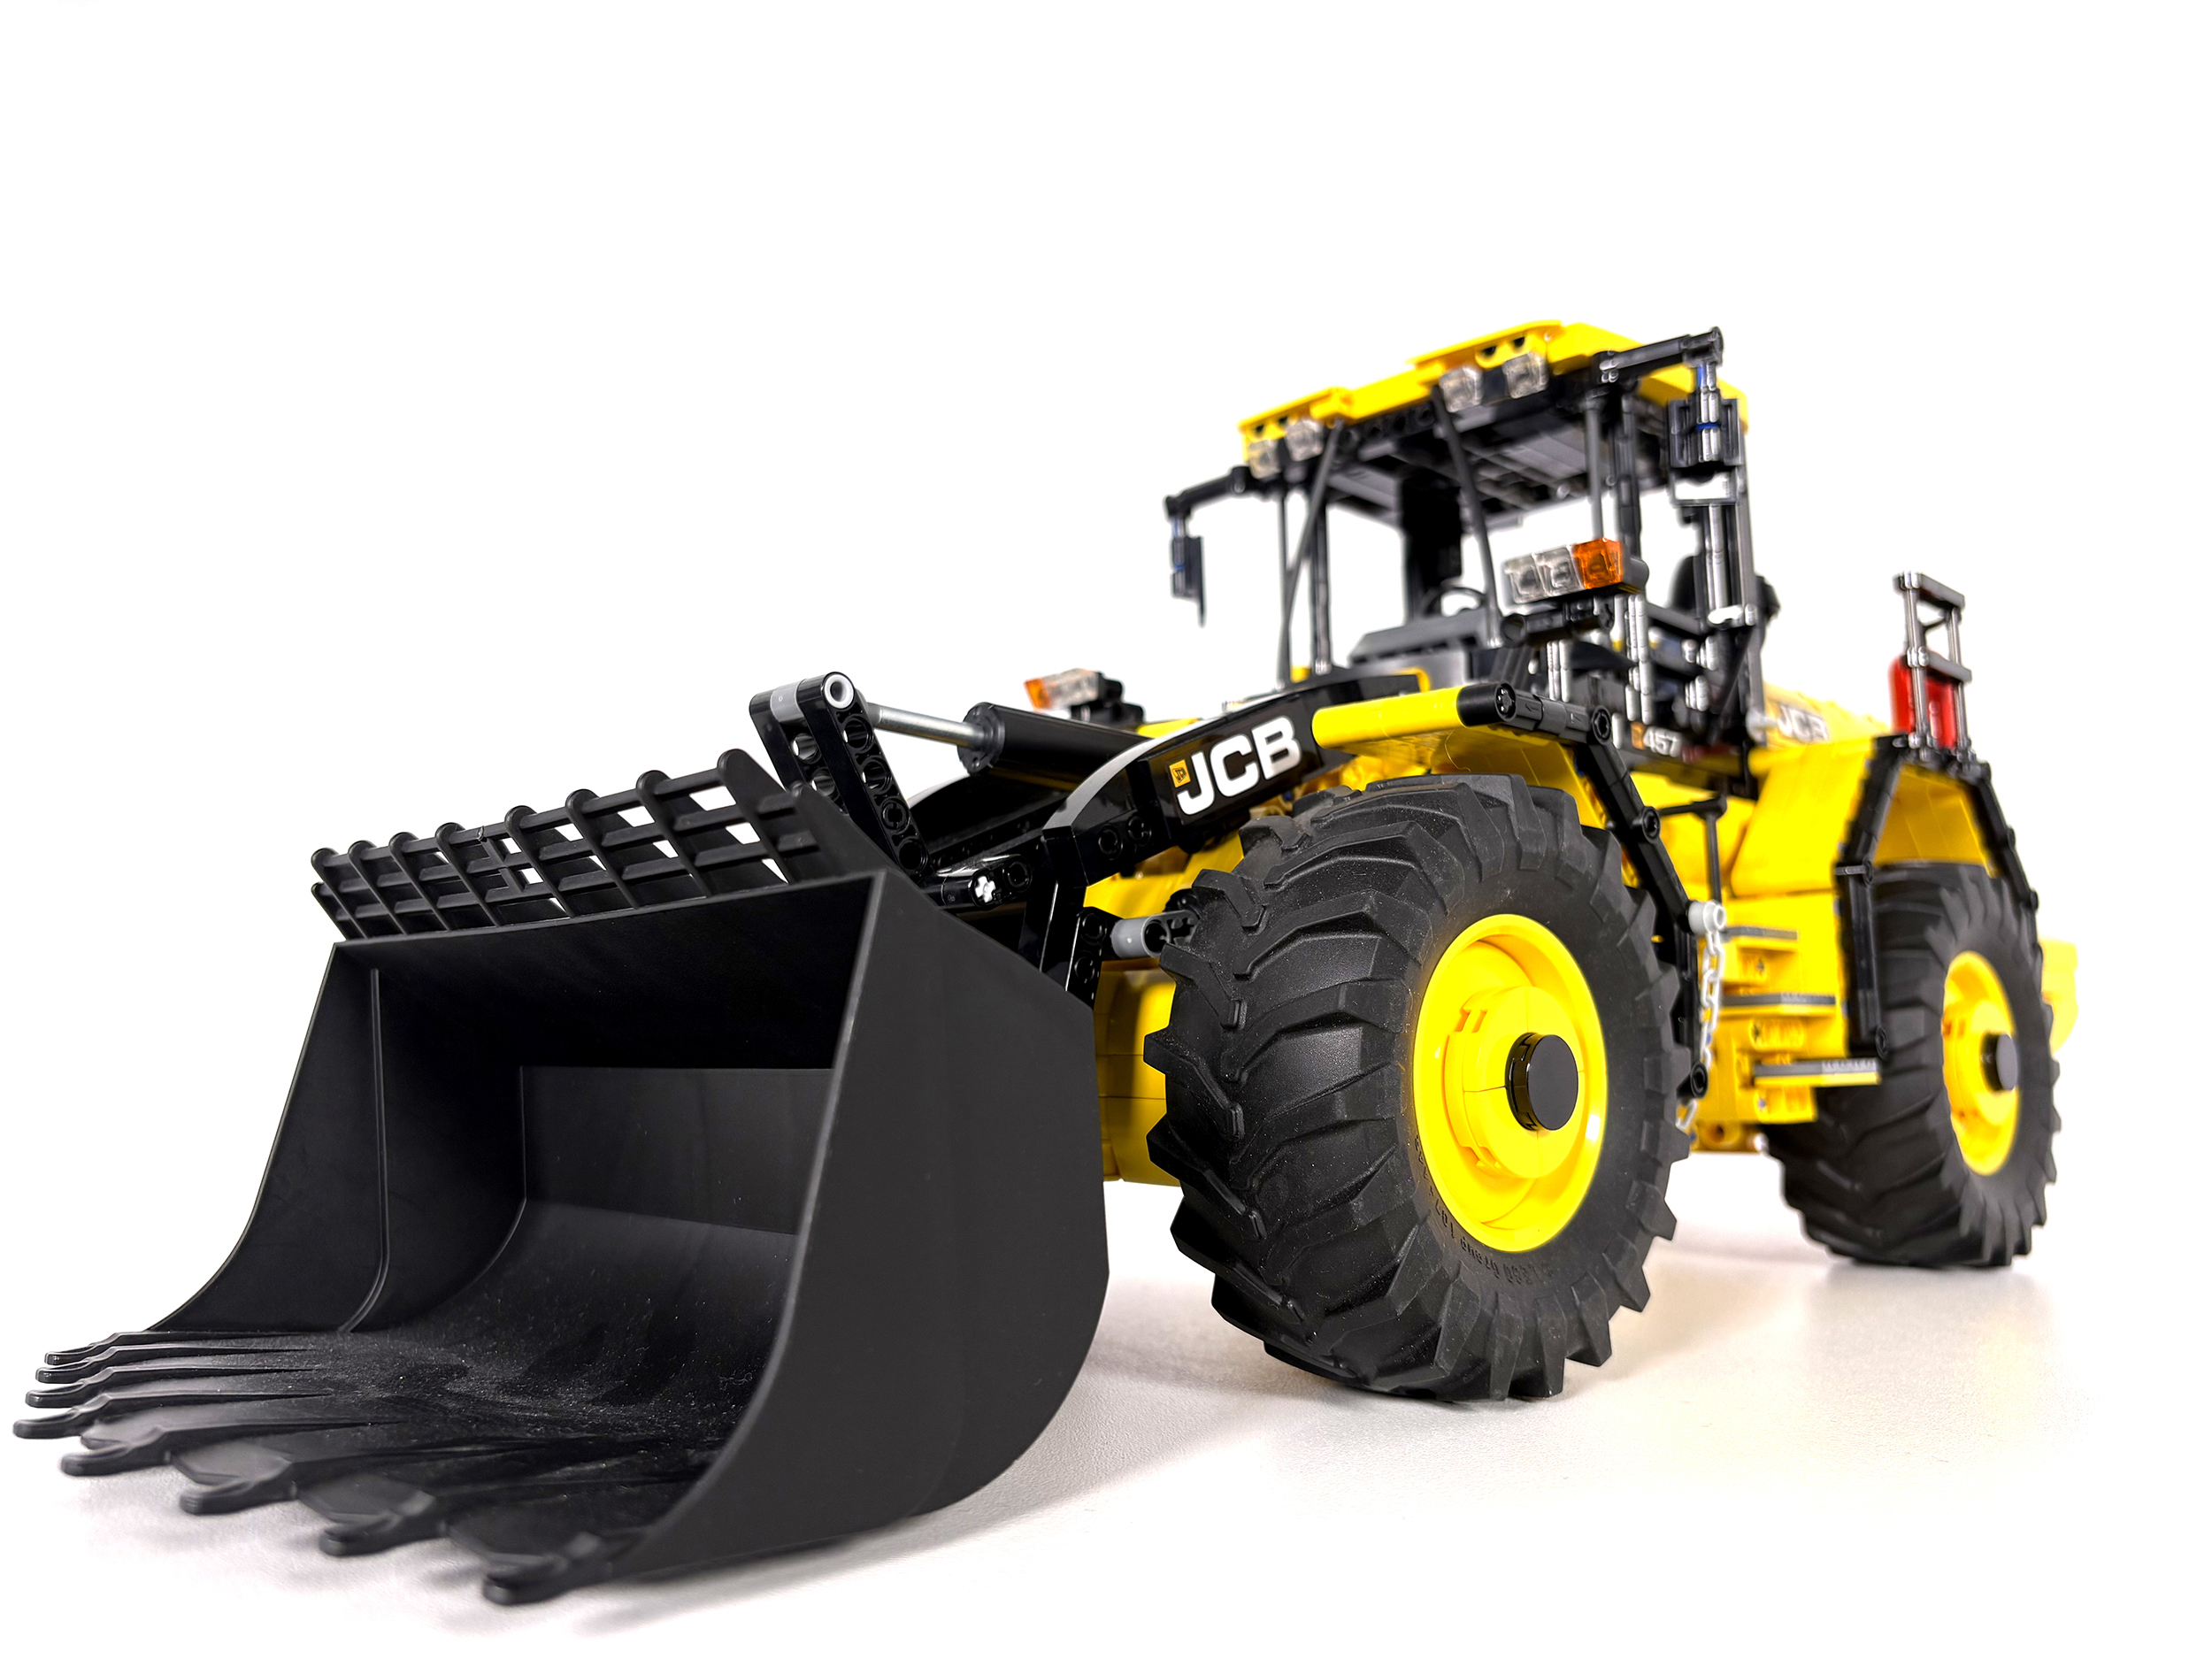
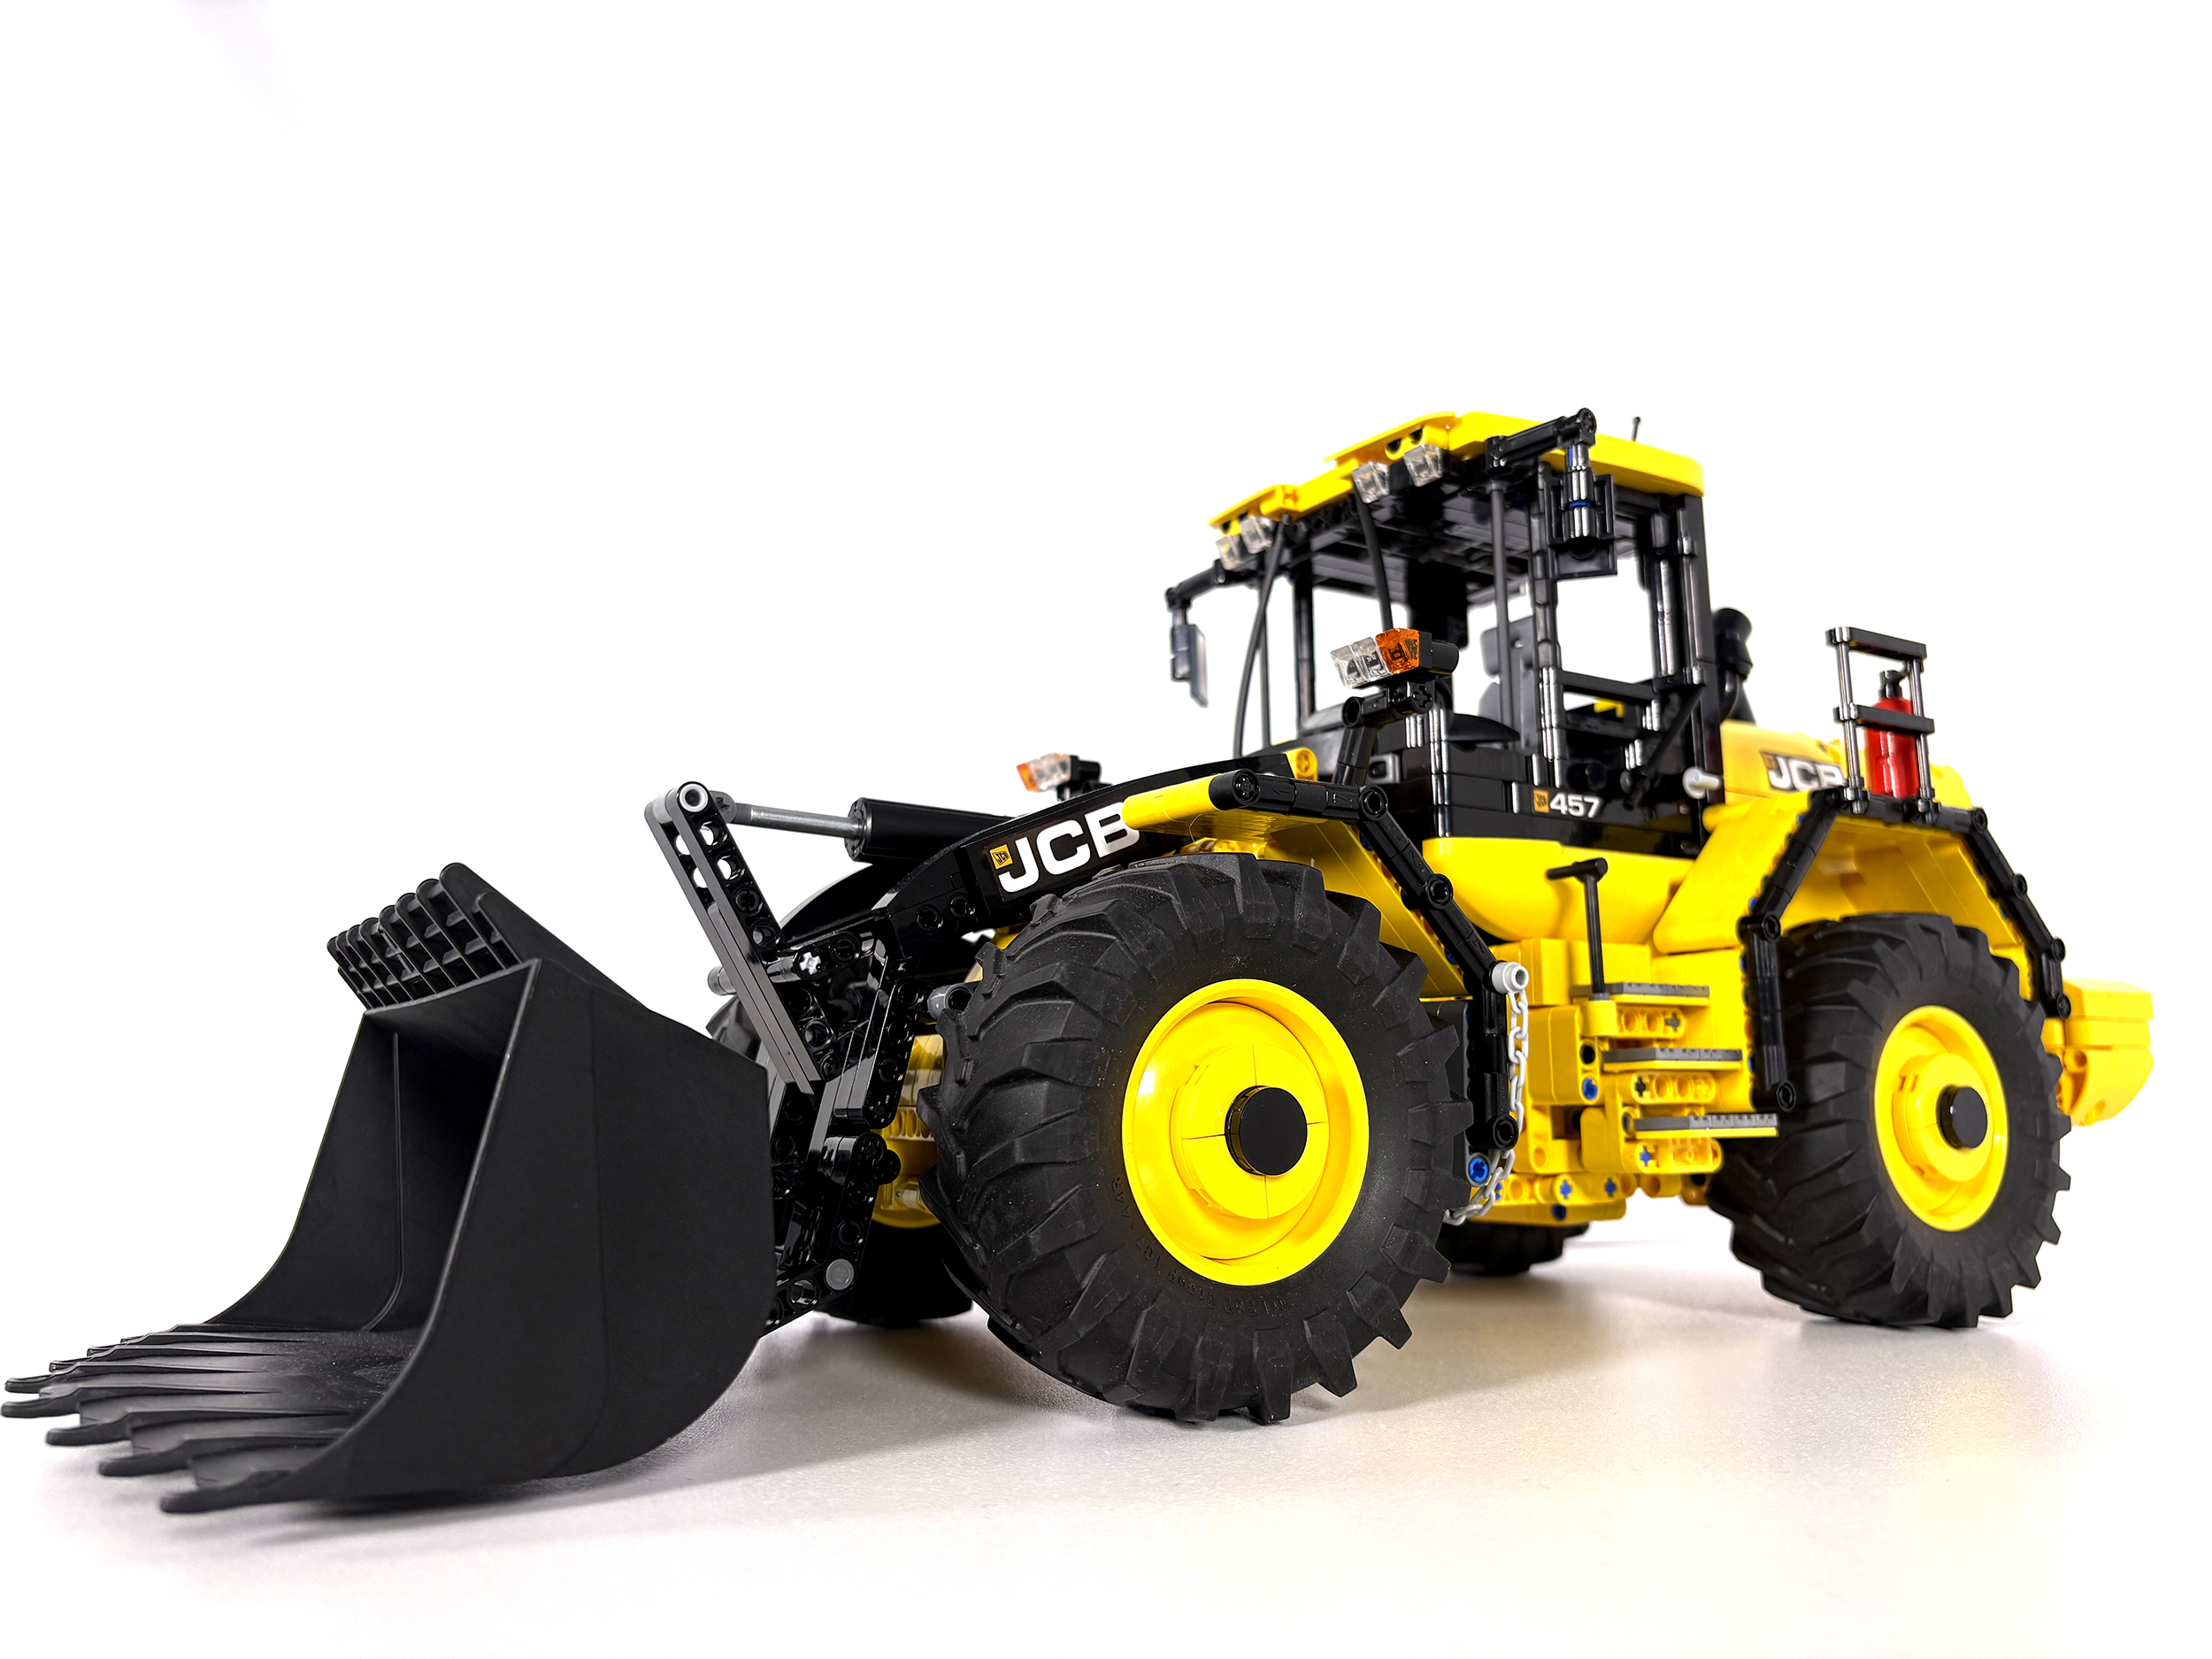
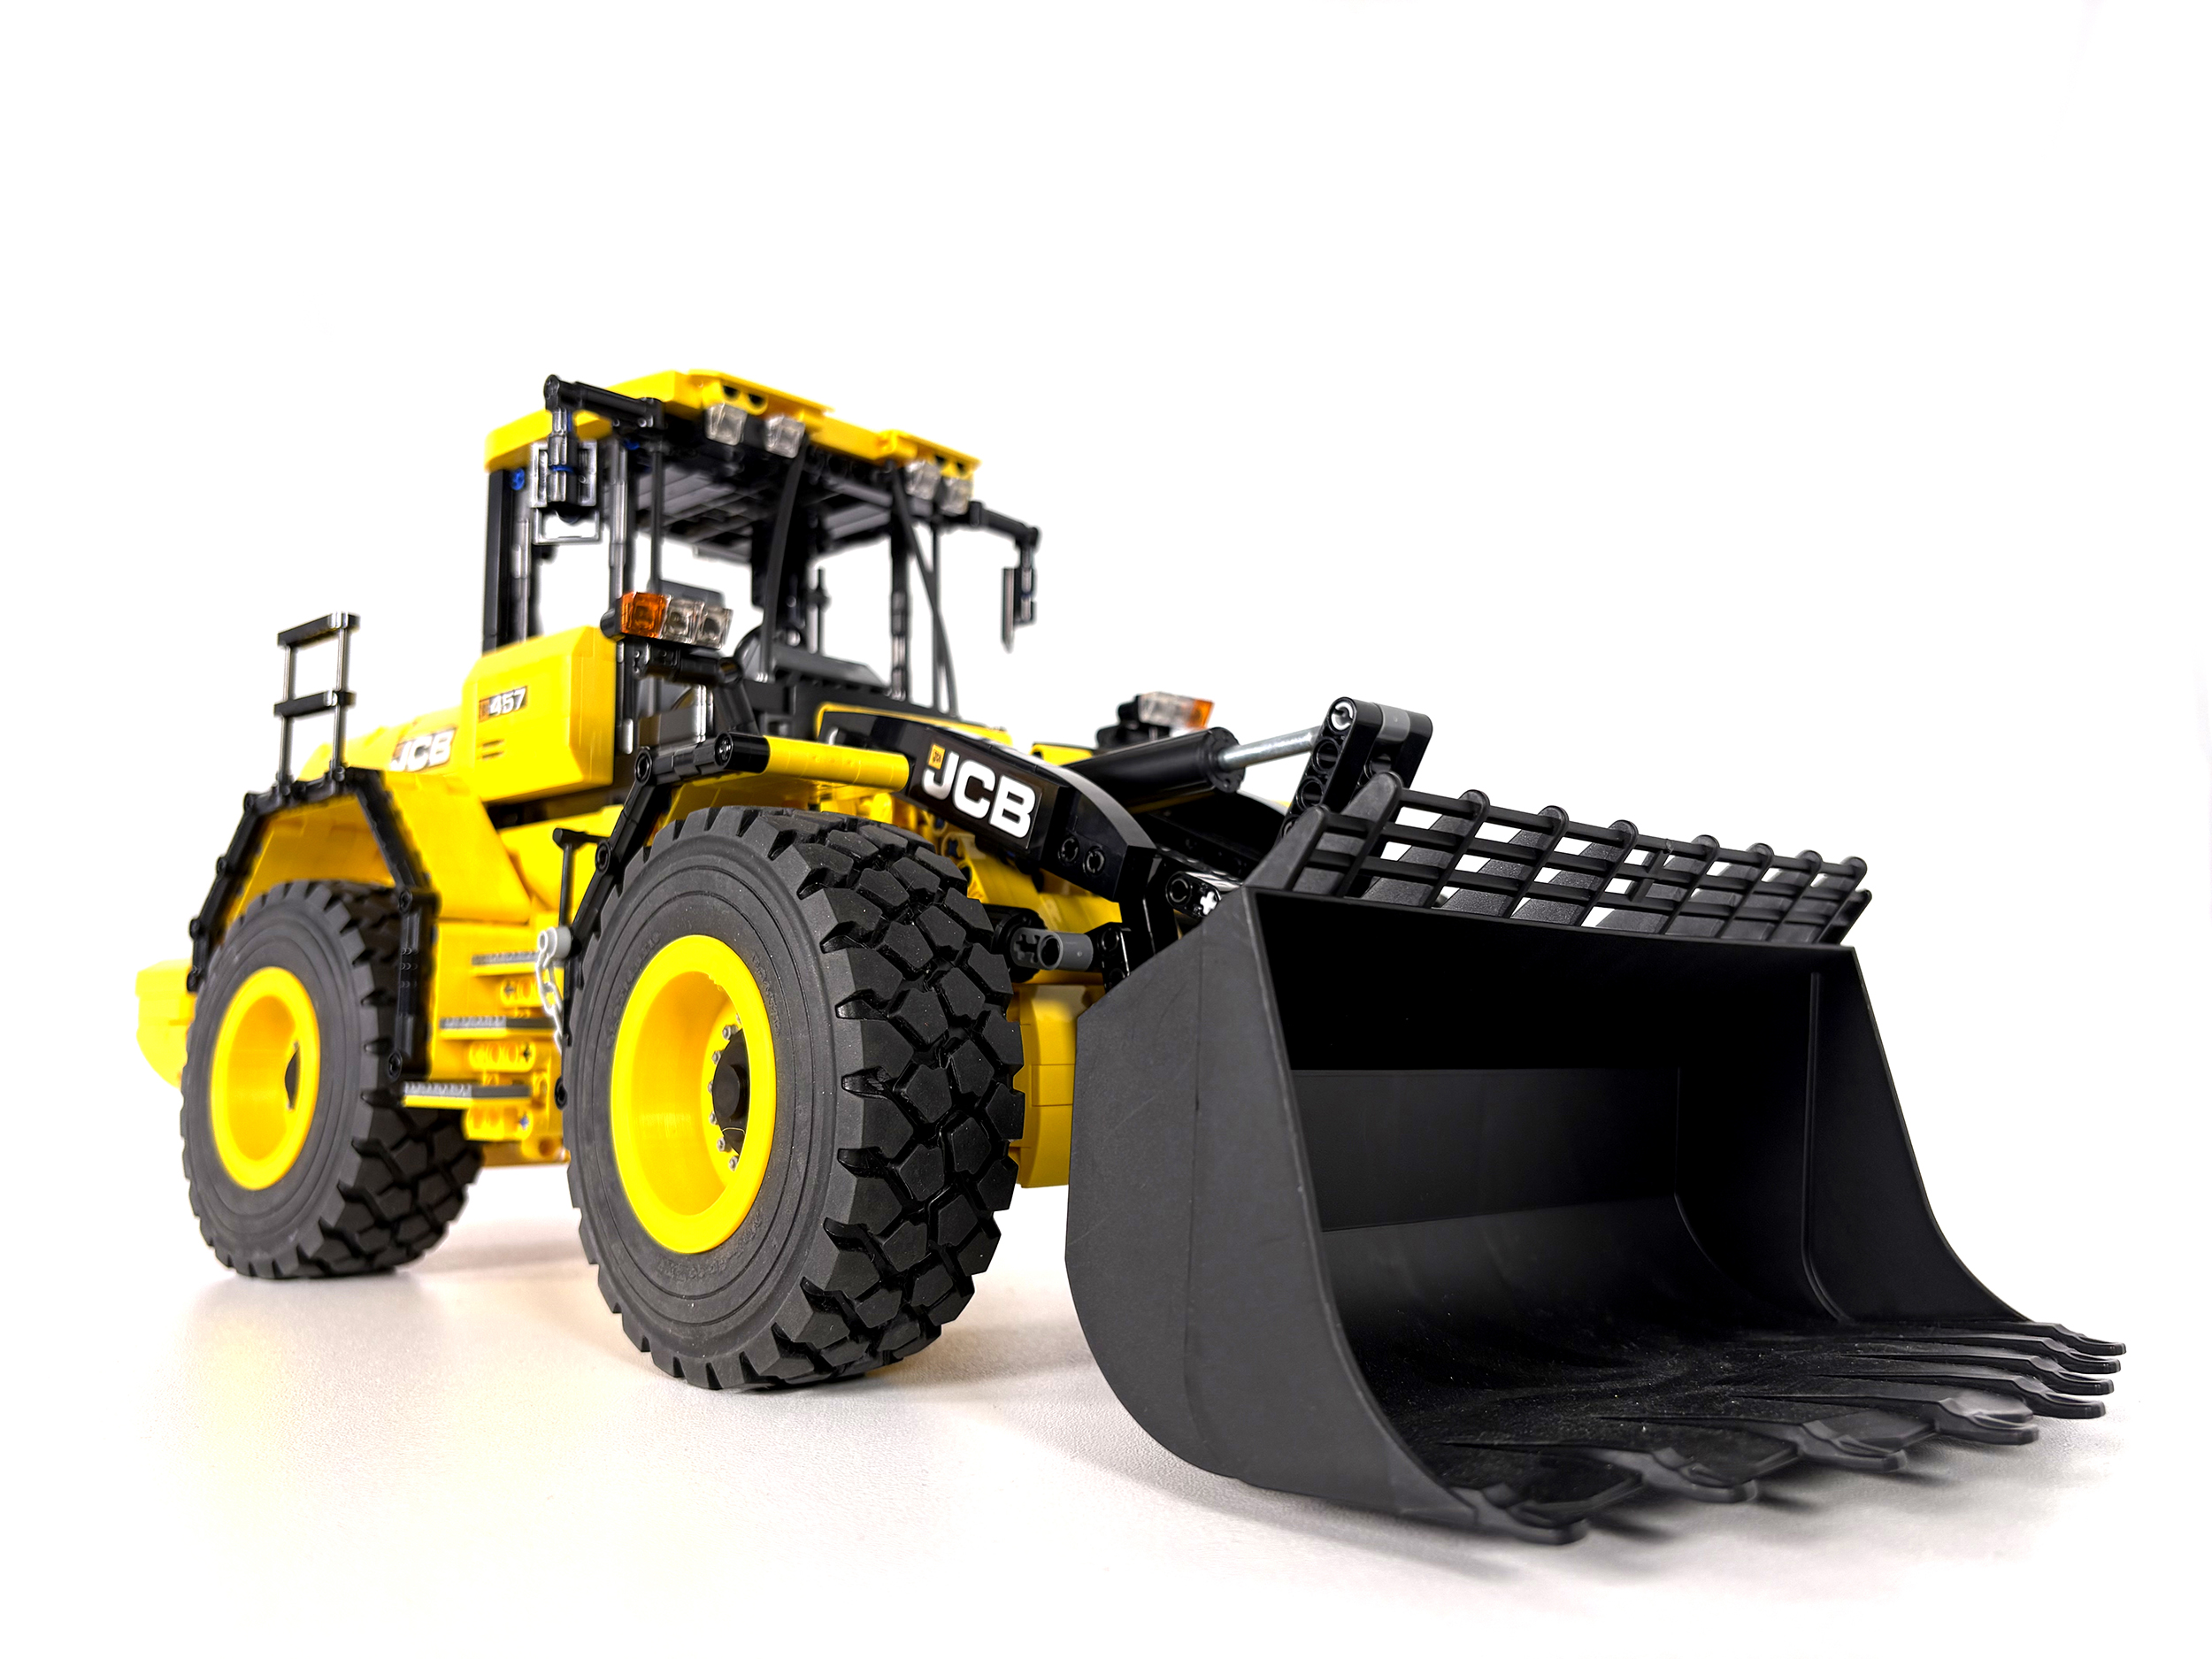
Once I’d decided which wheel loader to build (JCB offers many different shapes and sizes) I started – as I always do – with a printed schematic, scaled to the wheels that I had decided to use. At this size, the options are limited, and I opted for 23798 tractor tyres as I felt they looked better than the 92912 tyres that Lego used on their own Volvo wheel loader.
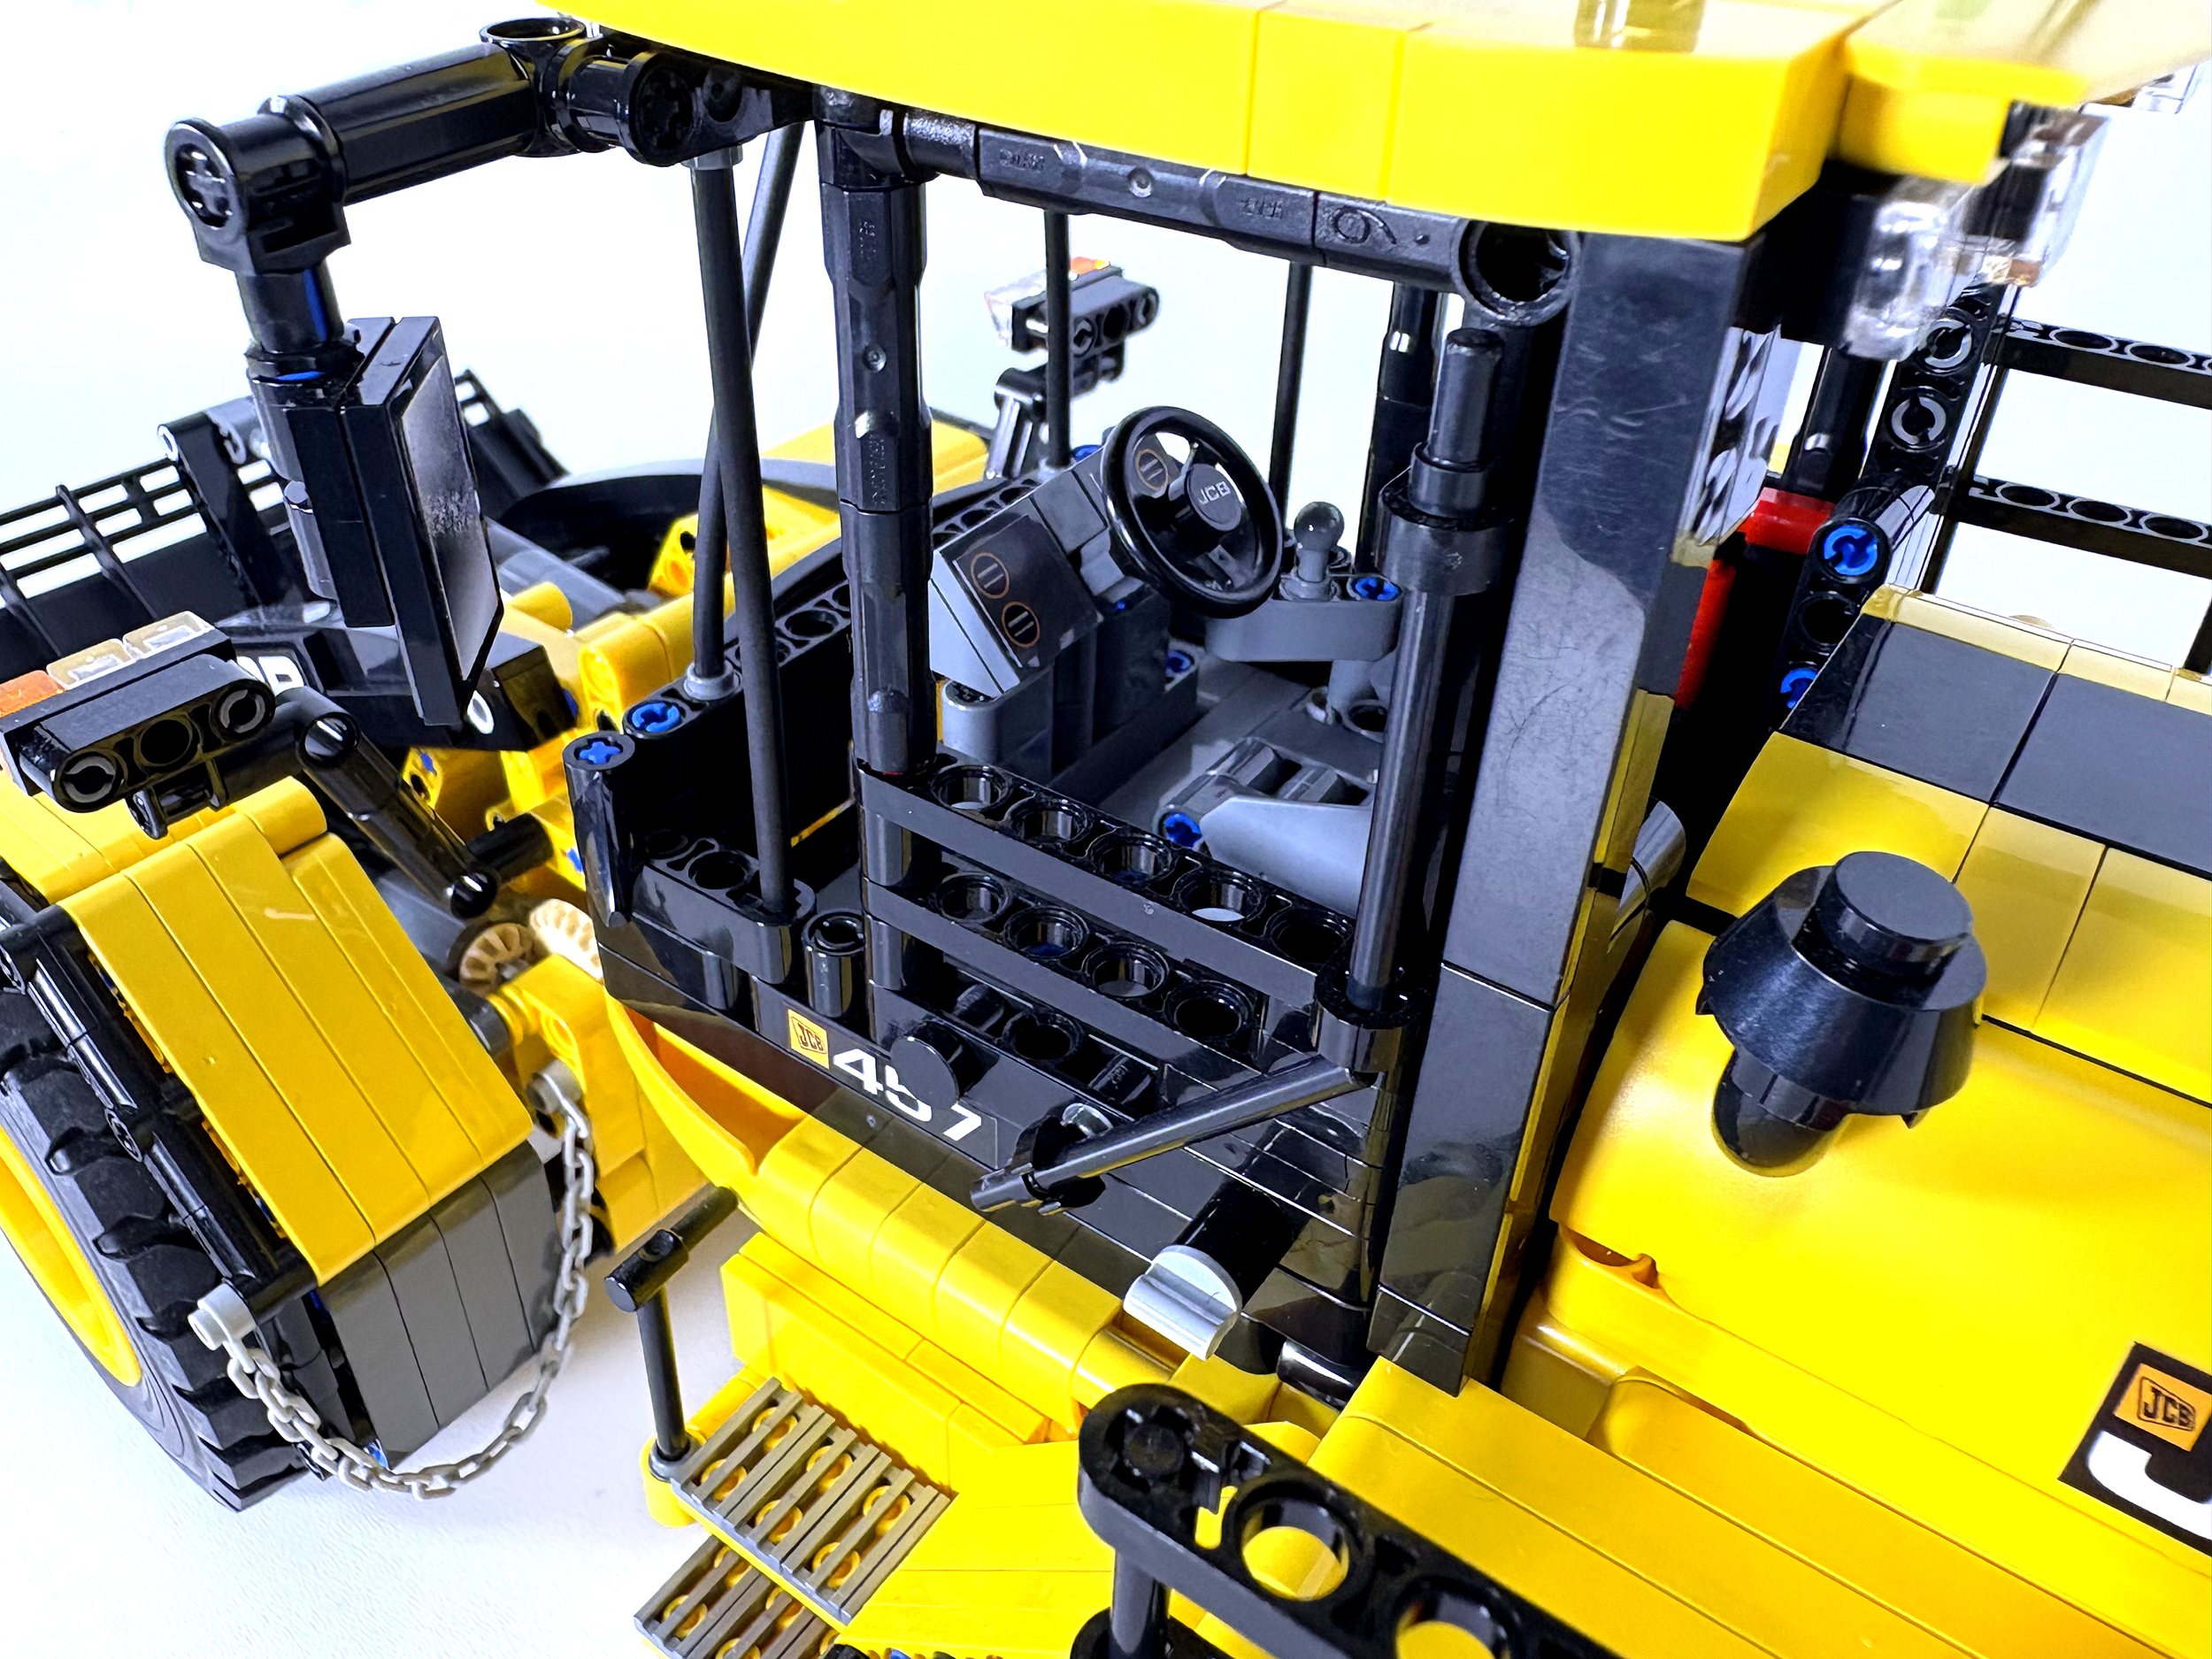
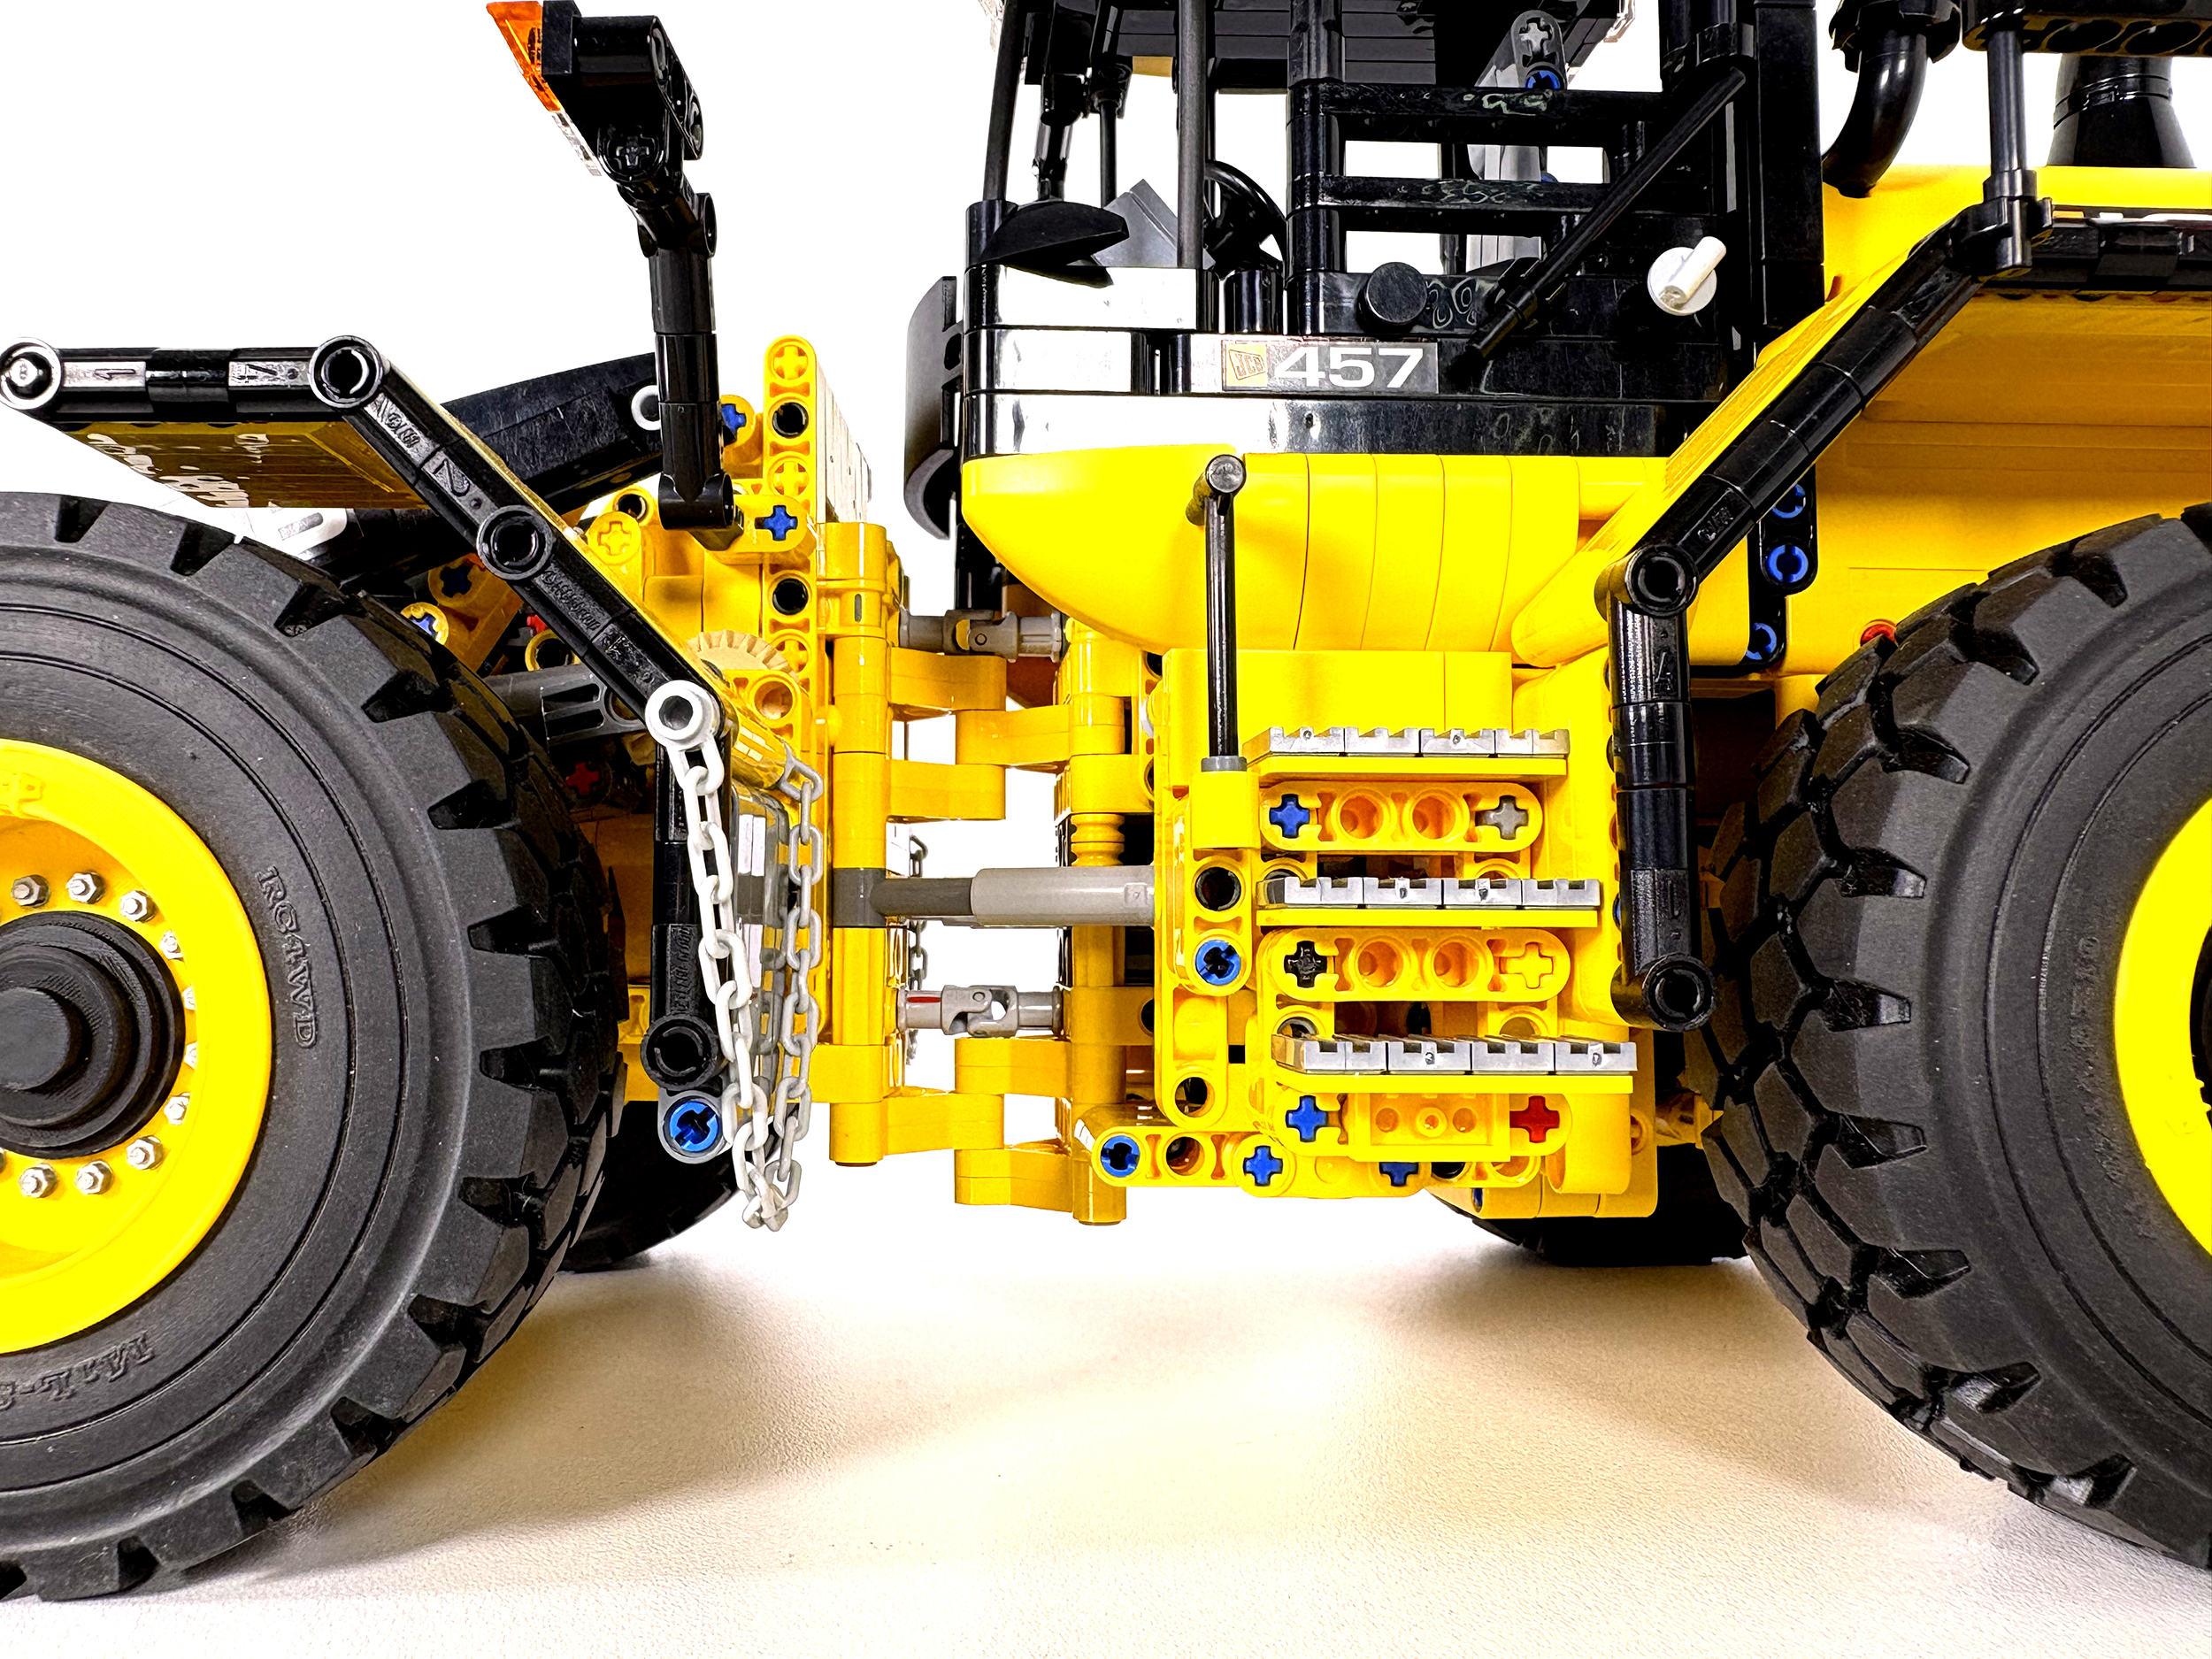
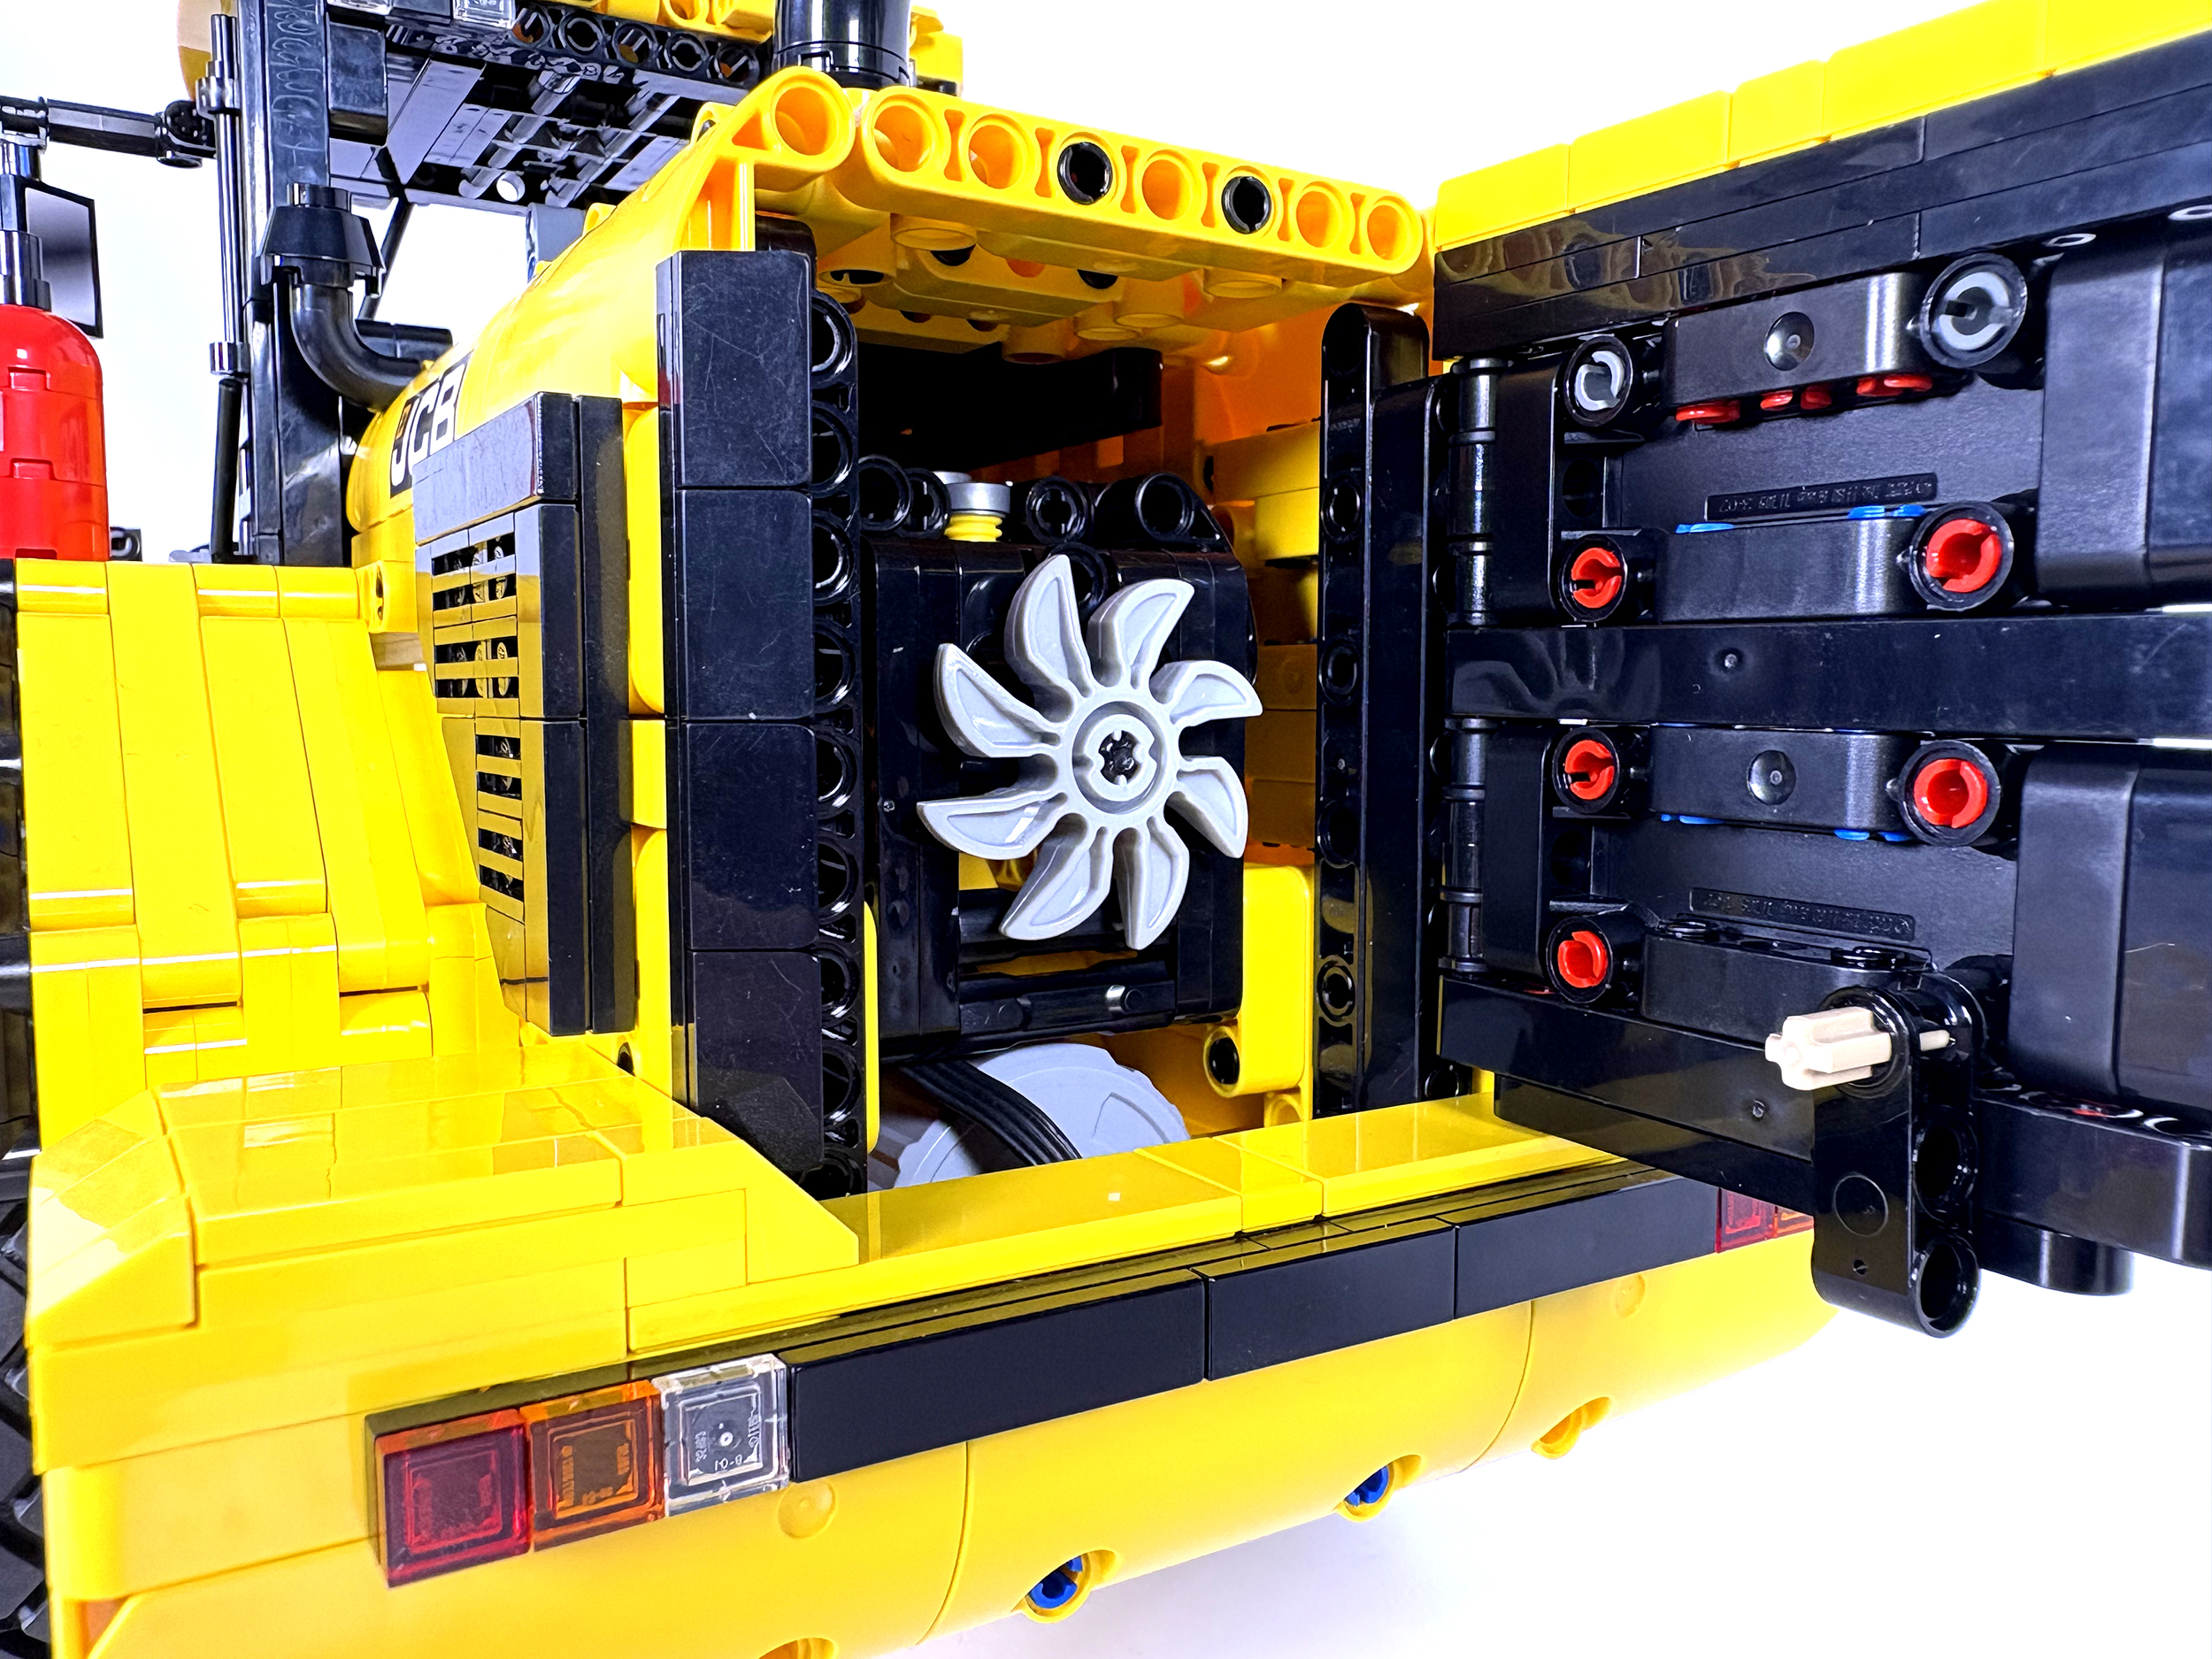
It was clear from the start that I had plenty of room within the main body for the four motors that were needed. My first task was to tackle the steering, which would be operated via mini linear actuators. I’d never built with these before and it took a few days to figure out how to get a basic steering system working. I initially tried to use the motor in a vertical configuration, but this was quickly abandoned as it took up too much space. I soon had a version of the steering mechanism that worked well, and during the first few weeks of work on the model, this was refined extensively. I decided to site the drive motor at the rear of the vehicle in order to provide a simple connection point for the 6-cylinder engine. This was simple enough to do, and before long I had a basic chassis that could drive, steer, and which had an engine with working pistons. The Lego Volvo hauler had recently been released, and I initially duplicated the crankshaft design from this model. My initial plan had been to use the Lego IR receivers and the physical remote (I’m not a huge fan of controlling vehicles via an app). However, adding the receivers AND a battery into the build proved difficult and I soon abandoned this idea in favour of using the BuWizz receiver. As this was also a battery box, I was able to save a considerable amount of space.

Figuring out the basic dimensions of the chassis.

An early version, able to drive and steer and with a working engine.

Another early attempt at the loader arm. It took a long time to get this to work correctly.
I returned to the project a few months later. My first step was to rebuild the Lego 42030 Volvo wheel loader and have a look at the z-linkage. To my surprise, it was good, but not perfect, and certainly didn’t seem to work in the same way as the real thing. Armed with new ideas of how to approach the loader, I spent a few evenings experimenting with a very simple design. At this stage there was a lot of experimentation with beams of different lengths, but eventually I had a design that seemed to work well. The arms were a little longer than I’d like, but the functionality seemed right. Even so, I was feeling disheartened by the project, so once again I decided to put it aside for a while.
In the end I wasn’t able to get back to this model for almost ten months, but in the meantime, I’d been inspired by some other builds. Notable amongst these was Eric Trax’s excellent CADA dump truck. This model provided significant inspiration for a better way to implement the steering mechanism and also had a great design for steps up to the cab. With my existing model replicated in Stud.io, I decided to dismantle what I had and start again. This time everything went much better: within days I had a vastly improved chassis in place and the front loader was significantly better. For a while I experimented with including a motor in the front section (for bucket tipping), but when scaling against the schematic, there really wasn’t room for this – the JCB 457 has a significantly smaller front section when compared to other wheel loaders. Within a couple of weeks I’d refined the front part of the loader to the point where it was almost perfect: it functioned as it needed to and just needed some refinement in terms of how it looked.

A vastly improved version of the loader arm and Z-linkage. This version worked quite well, but is not the final design.
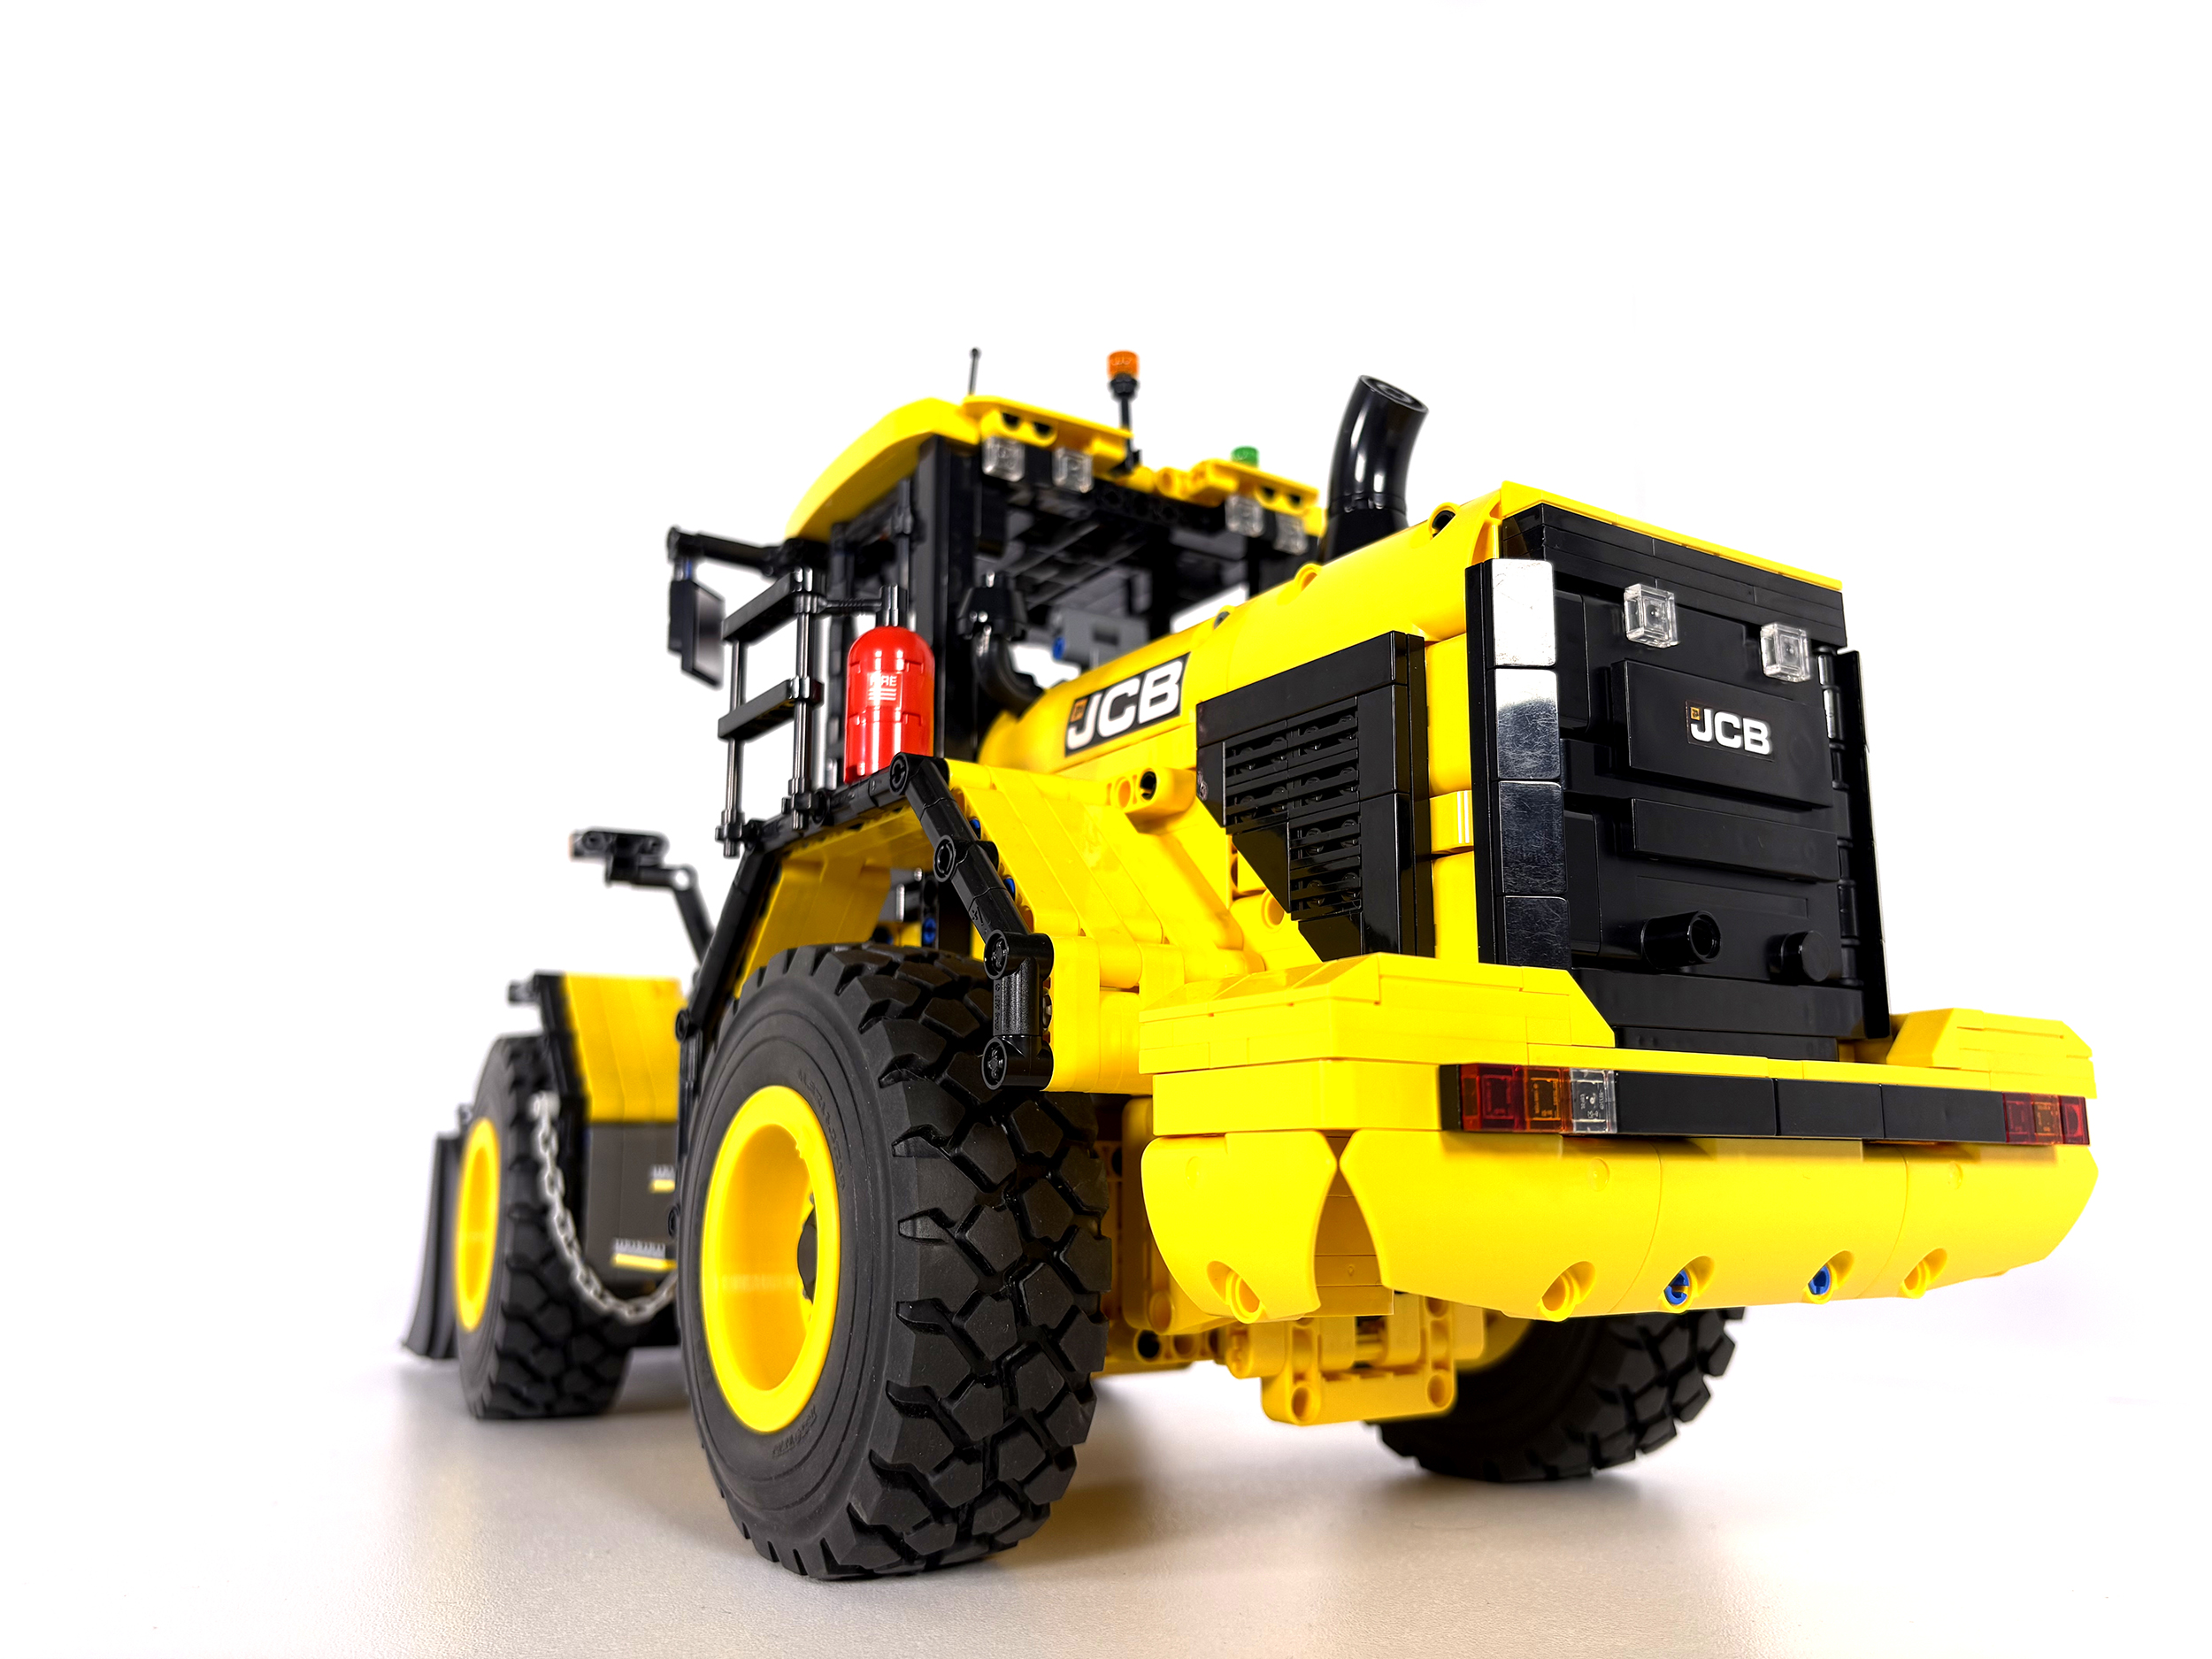
At this stage I turned my attention to the rear of the vehicle and the pendular suspension. I employed the same mini turntables that Lego used in their Volvo wheel loader, and this enabled me to build a rear axle section that was strong and worked correctly. Much of this section was quite similar to the front of the vehicle. Modifications made along the way had made it more difficult to connect the engine, but I was on a roll by this point, and this difficulty was swiftly overcome. I’d recently built the new Lego Mercedes-Benz G500 truck, which had a new crankshaft and piston design, so I decided to incorporate those parts. This enabled me to make the engine slightly smaller and also looked a lot better. At this point all of the functionality of the model was in place – with some of my previous models I’d been accused of focusing too heavily on how they looked rather than how they worked, but this time around I’d been at pains to ensure that the model worked well before I started making it look nice (my favourite bit).

The pendular rear axle section. The design is simple, so this part came together quickly.
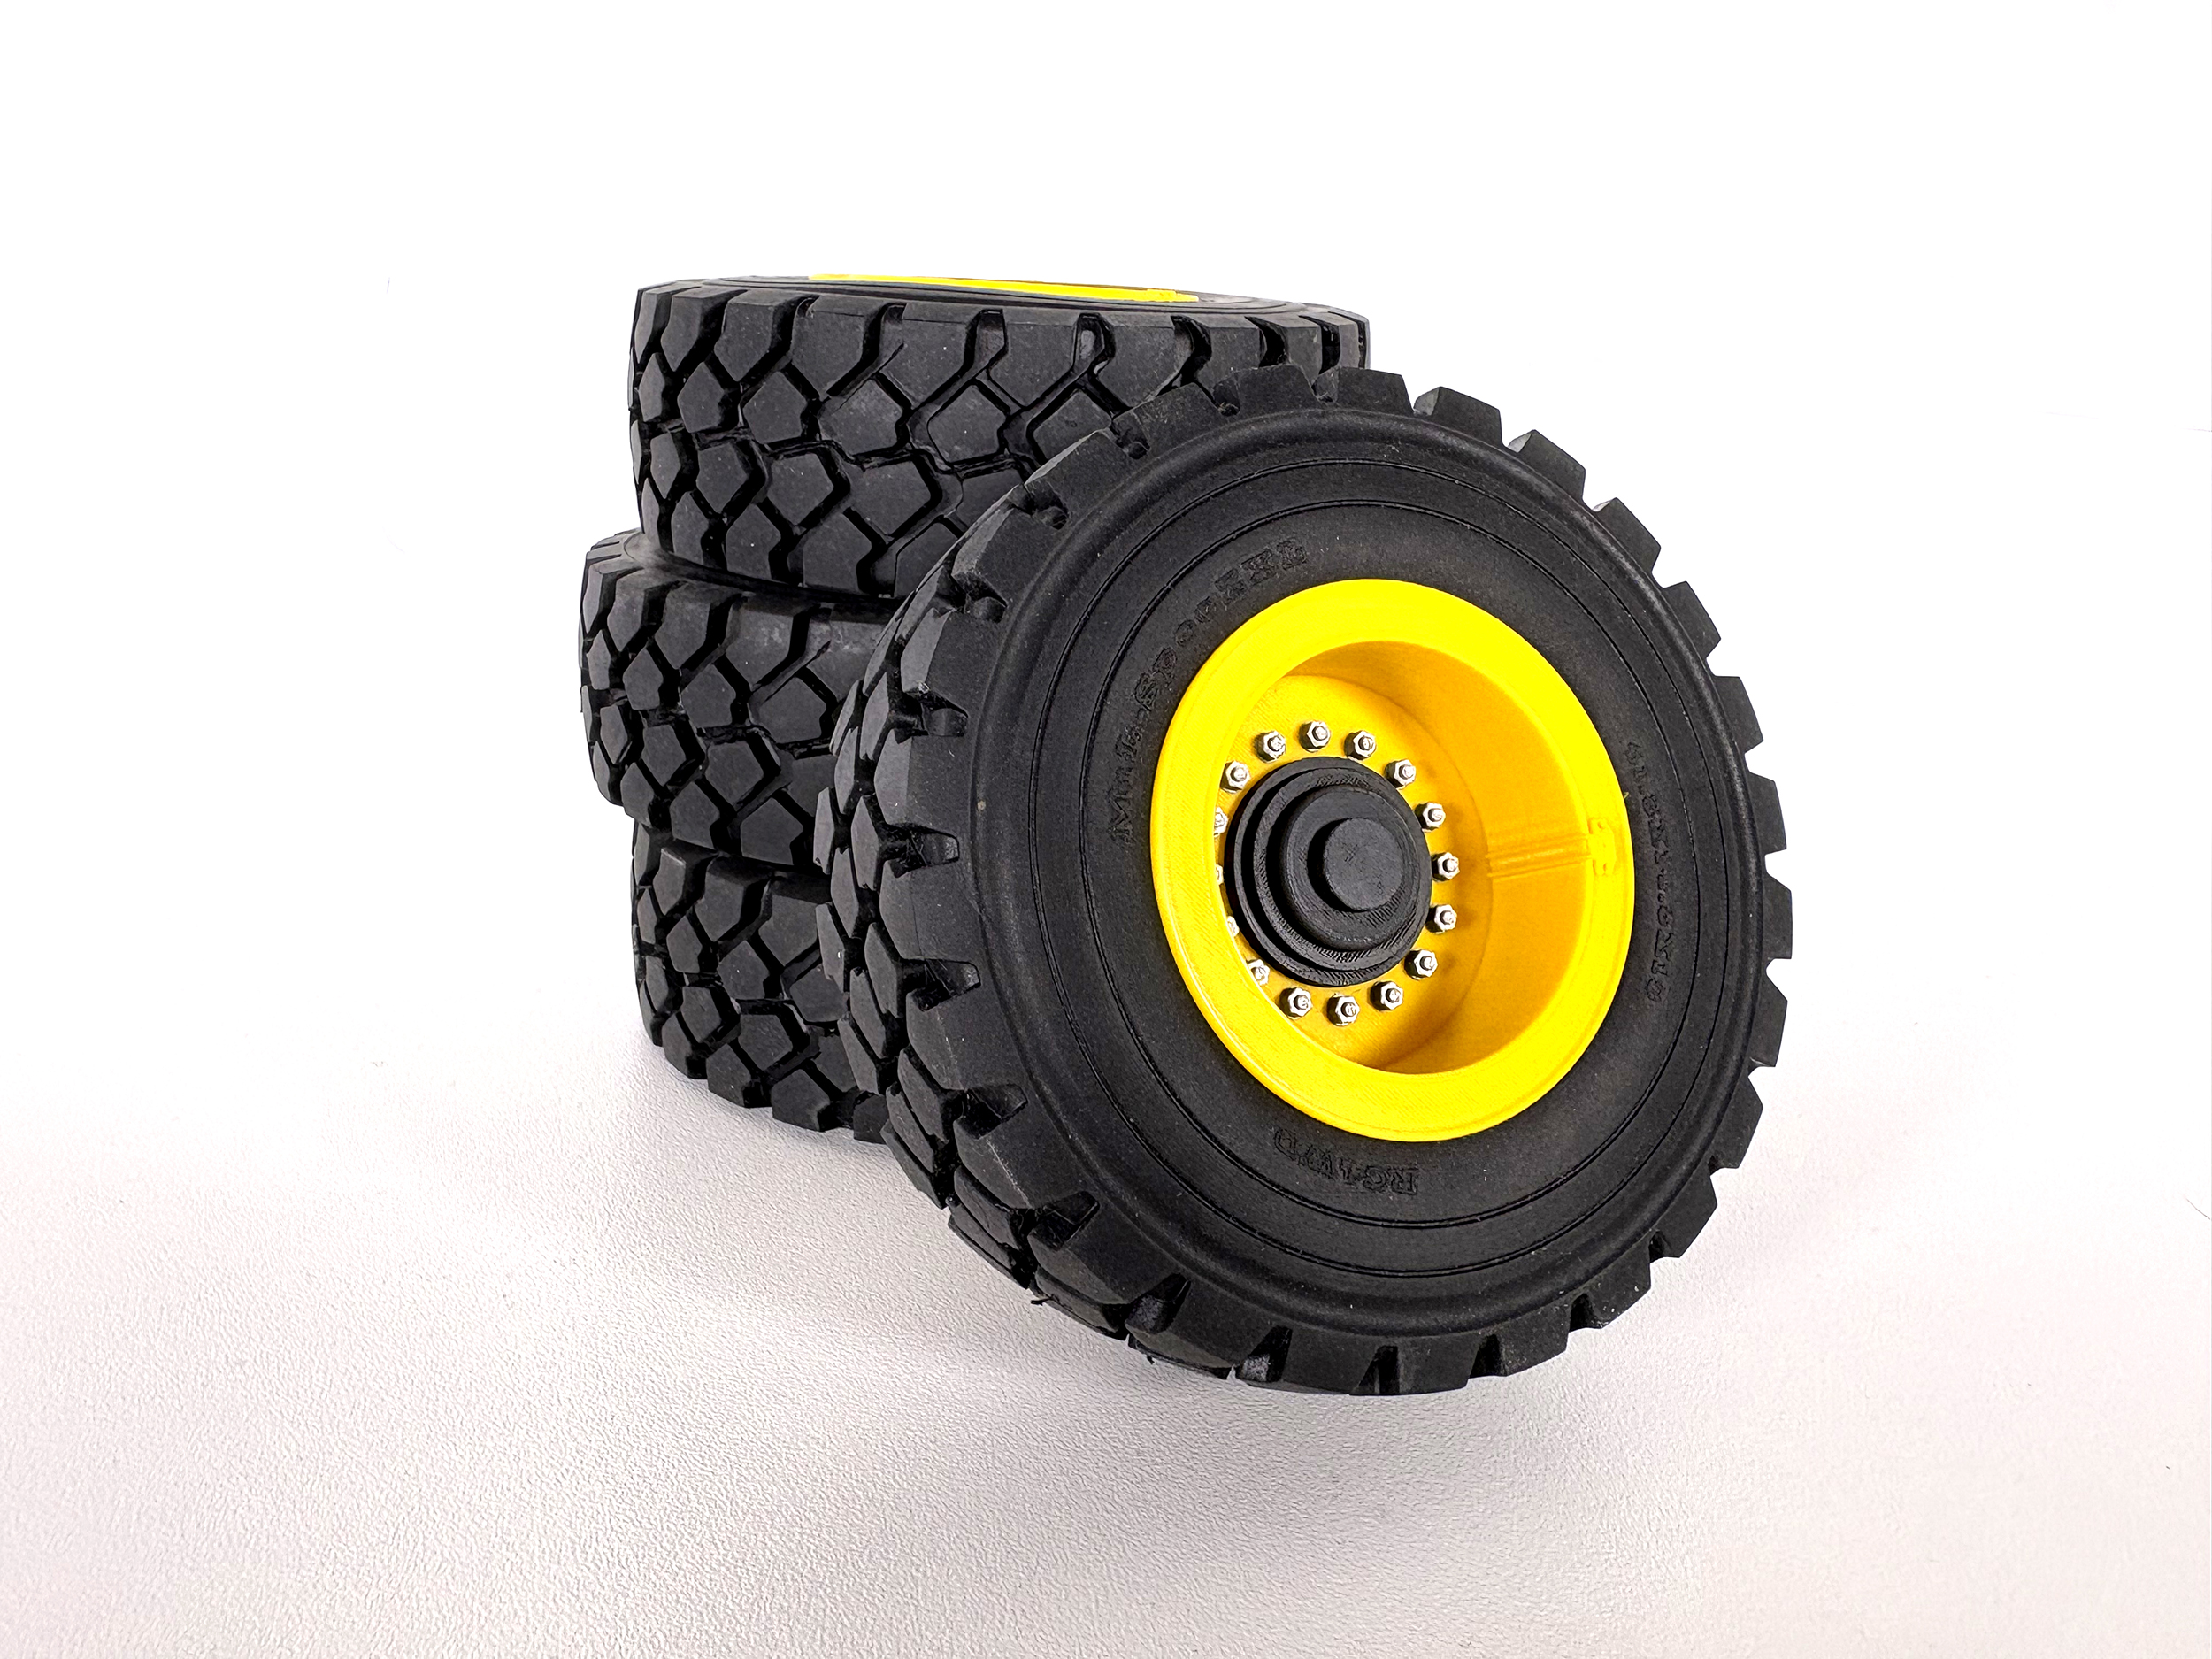
At this point, Eric Trax, a designer whose work I like very much, released his own wheel loader, based on a Doosan DL420-7. His model made use of non-Lego wheels and tyres, and this looked so good, I decided to do the same. The tyres were made for RC vehicles (can be found here) but fit well with certain Lego wheels. However, I contacted the builder of the custom wheels that Eric had used in his model and had him make the same for me, but in yellow. When these arrived, the model really began to take shape and started looking seriously good.
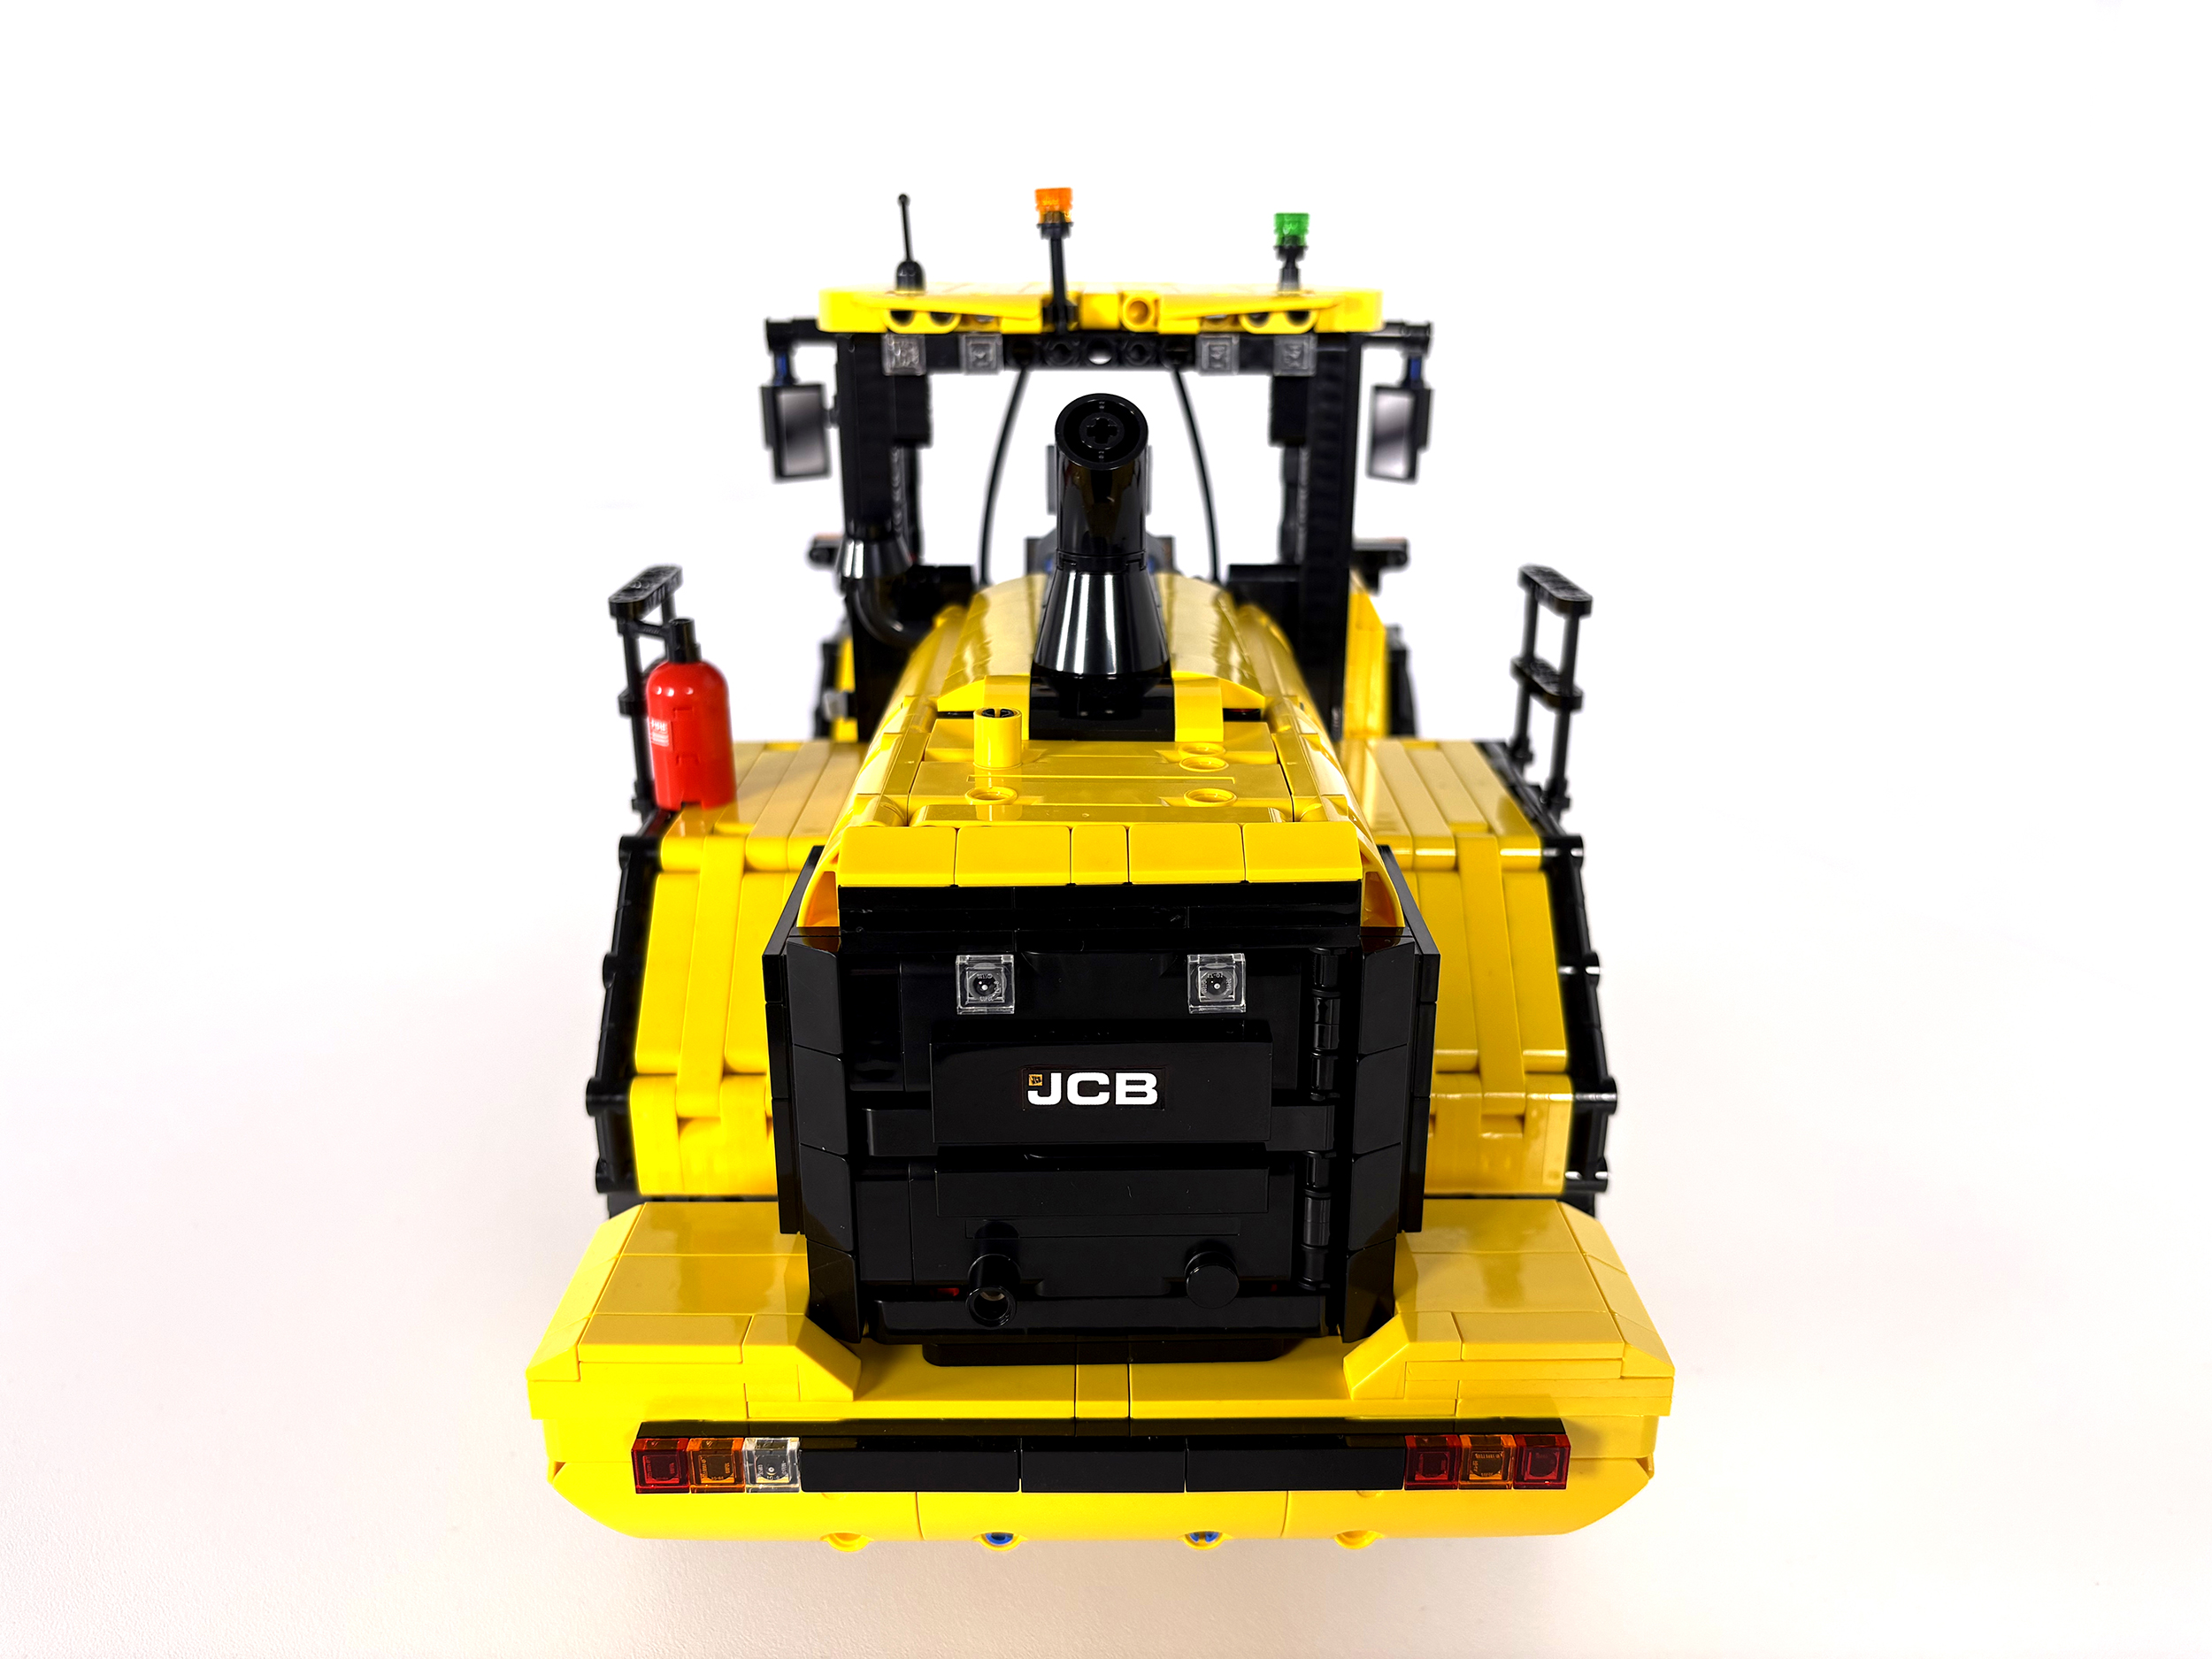
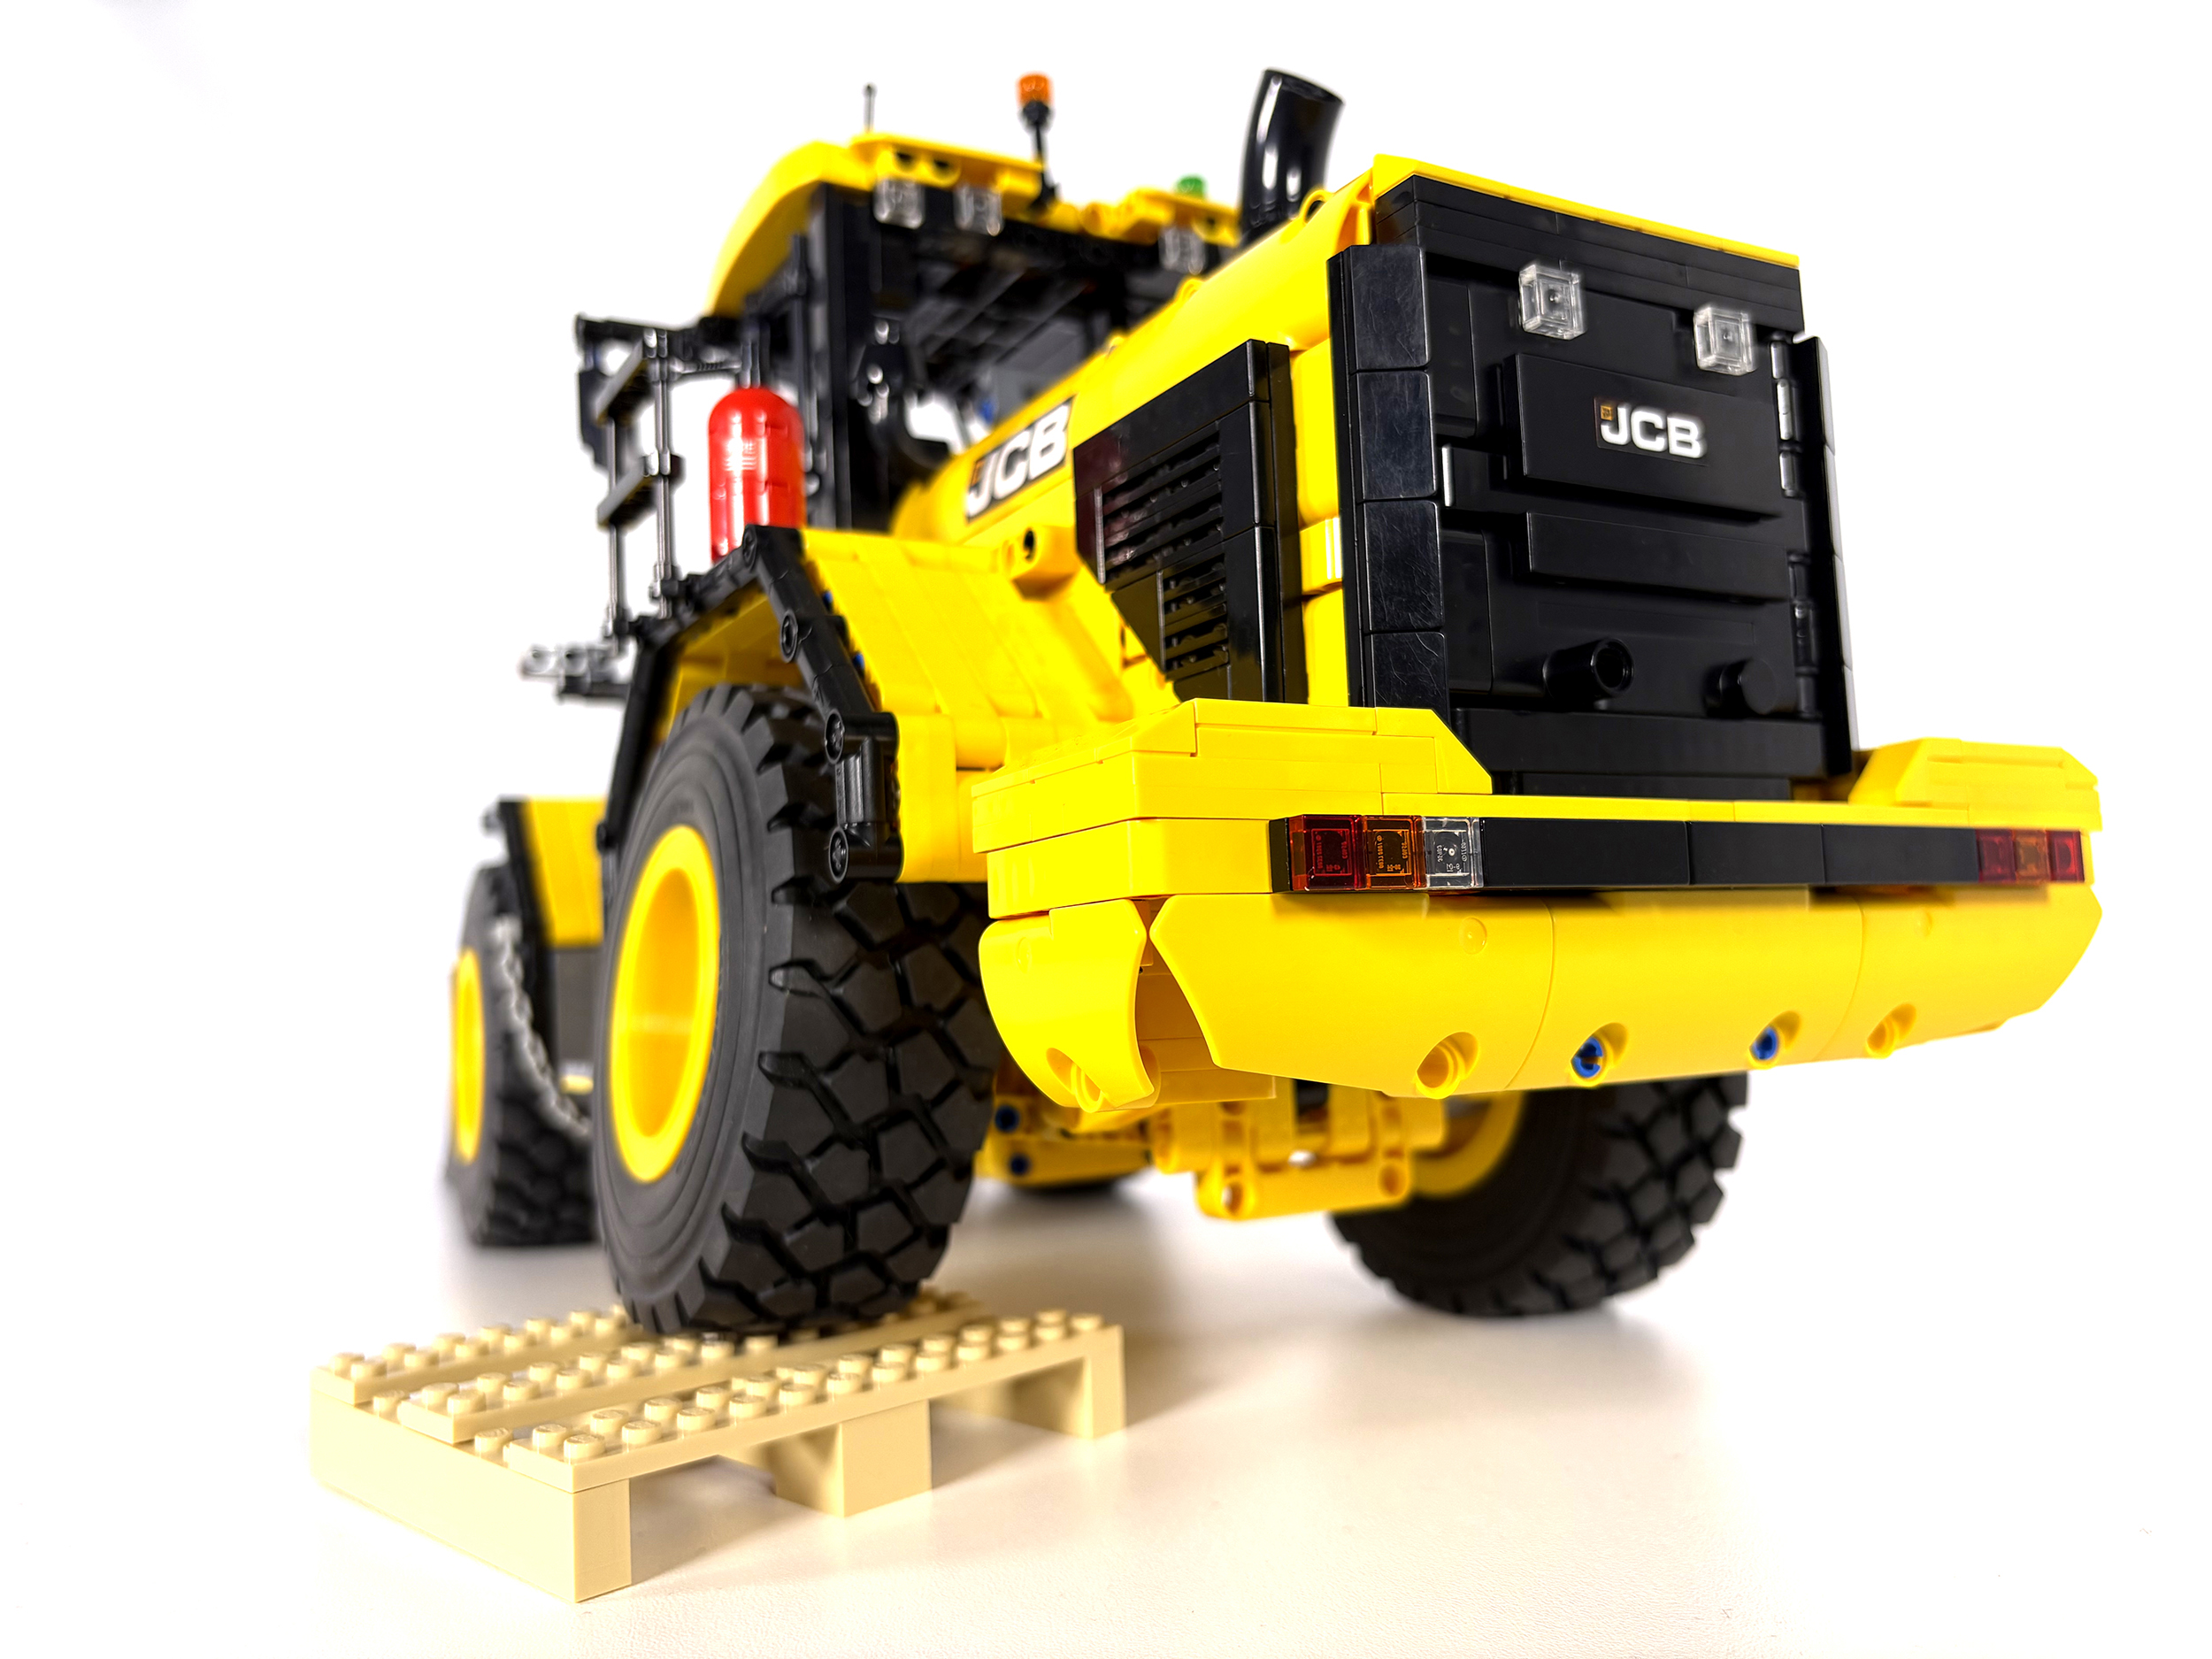
Over the next few months I designed the cab and the rear shell of the vehicle. After the painful process of getting the z-linkage working, this was a relatively simple task, and it all came together quickly. I had initially planned to have the entire rear section hinged at the rear bumper so that it could be easily lifted to access the BuWizz box and view the engine. This turned out to be impractical with the mudguard design that I’d settled on at this point, so I settled for an opening rear door and top compartment. The simple mechanism for locking the rear door (and the cab door) was the same as the one used on the Lego Mercedes truck.

Although the model can be built using wheels and tyres readily available from LEGO, I used these non-LEGO wheels (custom 3D printed) and tyres.
Conclusion
The model was eventually completed on 22nd May 2025. This turned out to be a far longer build than either of my previous models, but it seems that I had underestimated the complexity of the loader design. The finished model is one that I am extremely pleased with: the functionality is excellent, and I’m pleased to have been able to incorporate extra features such as the working engine, opening cab door, rear compartments etc. In terms of scale, this model doesn’t quite match my two previous mocs (it would need to be quite a bit bigger, something that isn’t possible with the bucket sizes available), but it certainly looks great alongside them.
JCB 457 wheel loader Gallery